

The Inventory Status page is your command center for tracking inventory data across all fulfillment centers. View real-time information about units on hand, committed inventory, incoming shipments, lot numbers, expiration dates, and more—all organized by location or status to give you the visibility you need to manage your stock efficiently.
Accessing the Inventory Status Page
The page opens with two main views—Location View and Status View—each offering different ways to organize and analyze your inventory data.1
Navigate to Inventory
From your Jetpack dashboard, click Inventory on the left-hand navigation bar. Additional menu options will appear.
2
Select Inventory Status
Click Inventory Status from the drop-down menu.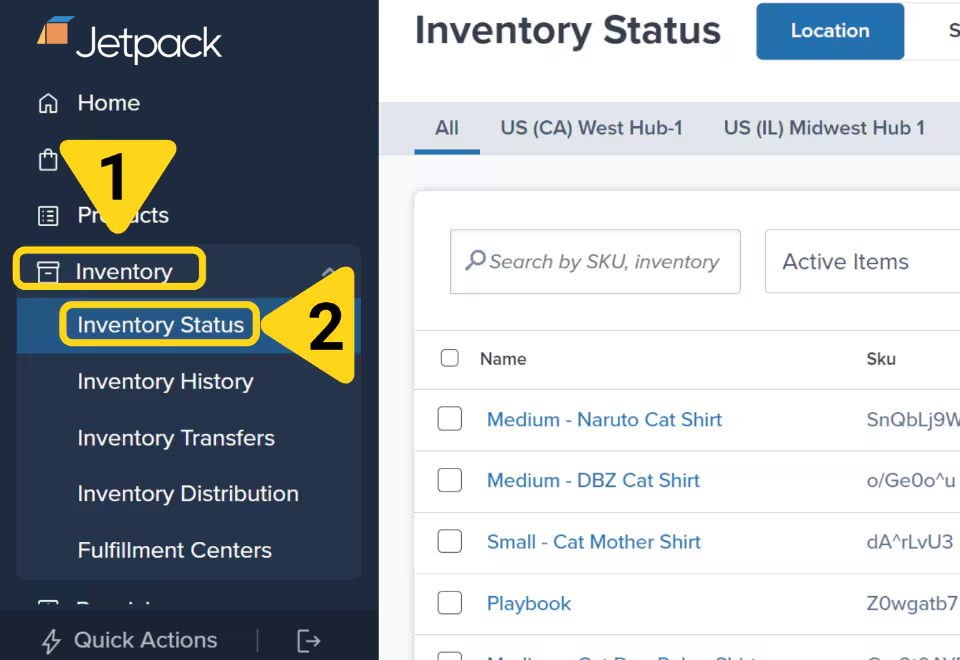
Location View
The Location View organizes your inventory by fulfillment center, making it easy to see what’s available at each location. Use the tabs at the top of the page to view data for each fulfillment center individually, or select the All tab to see aggregated data across all centers. The available fulfillment centers are determined by the locations you have access to.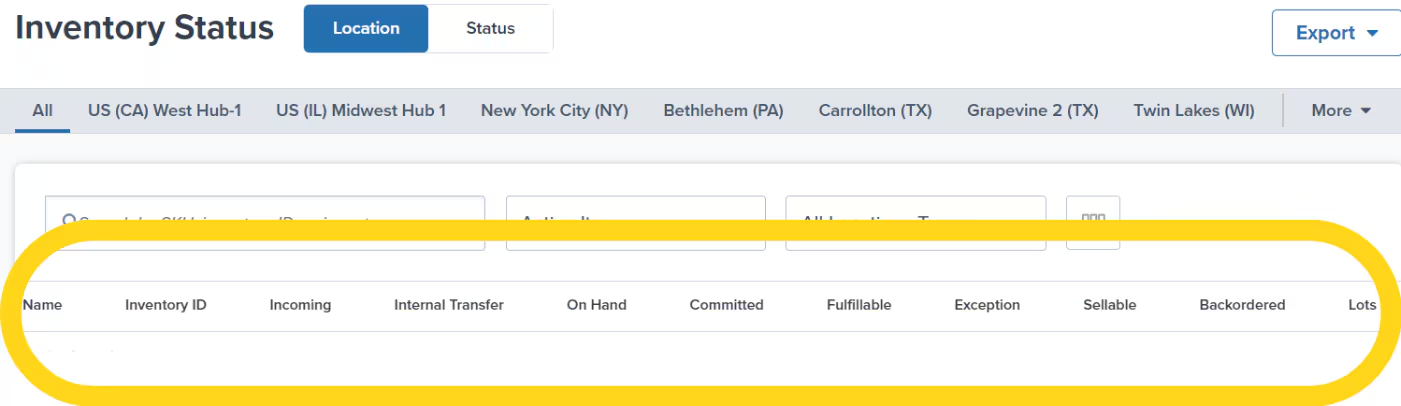
Columns in Location View
Status View
The Status View displays your inventory based on the current status of the units, making it easy to see how much inventory is in each stage across all locations.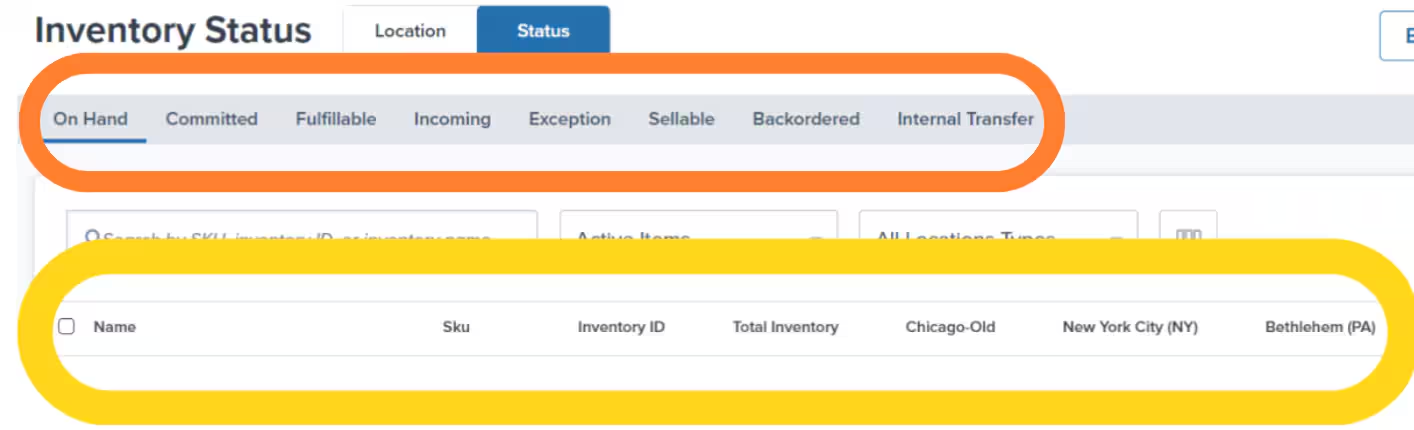
Columns in Status View
Customizing Columns on the Inventory Status Page
You can customize which columns appear in the Location View to focus on the data points most relevant to your needs.In the Status View, all columns are selected by default and cannot be removed.
1
Open column customization
Click the column icon in the Location View. A pop-up will appear on the right side of the screen.
2
Select columns to display
Check or uncheck boxes to show or hide data points such as Name, SKU, Inventory ID, On Hand, Committed, and other inventory metrics.
3
Rearrange column order
Use the drag-and-drop icon next to each column name to rearrange the order of the columns as needed.
4
Save your customization
Click Apply to save your settings. The Location View will update to reflect your column preferences.
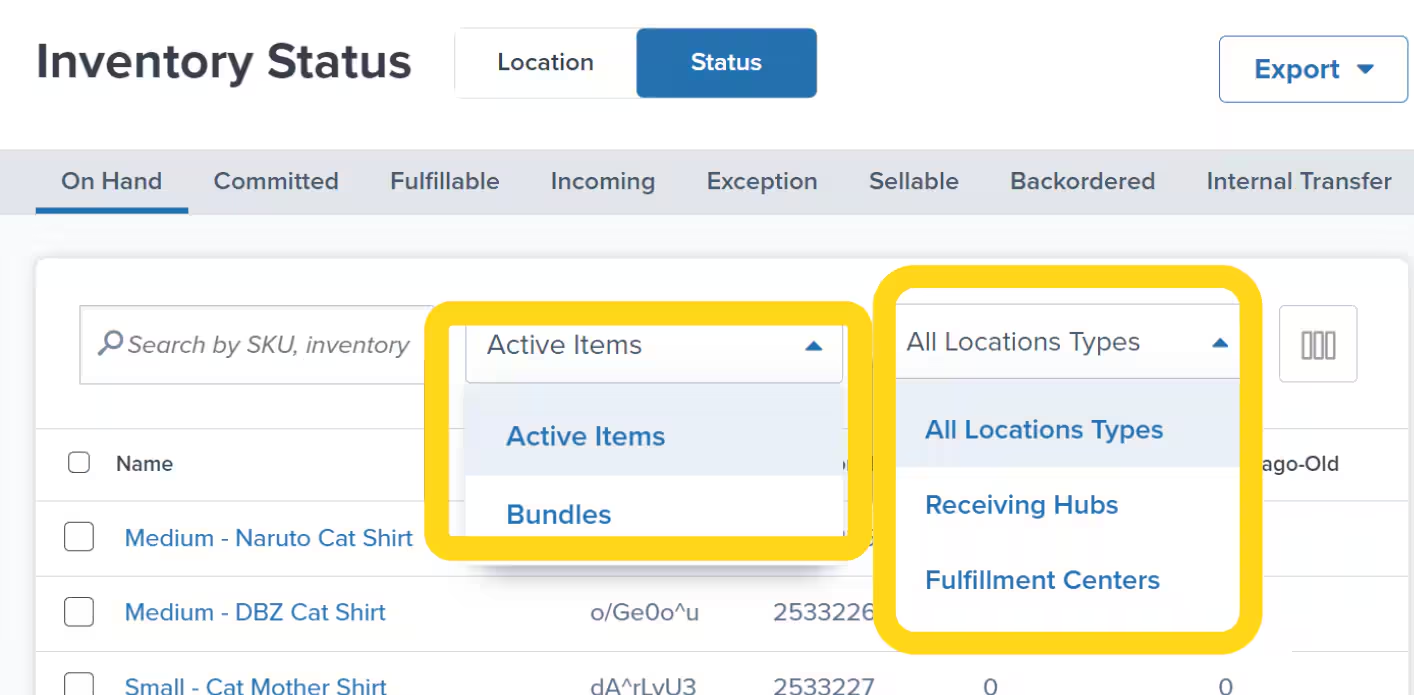
Additional Filters
Use filters to narrow down the inventory data based on where your inventory is stored or its status. You can filter each view under the Inventory Status page by:- Whether the product is Active or a Bundle, and/or
- The location type in which the inventory is currently stored (this includes all location types, hubs, or fulfillment centers)
Downloading the Inventory Status Page Data
Export your inventory data for analysis, record-keeping, or sharing with your team.1
Open export menu
Click the green Actions button on the Inventory Status page. Additional menu options will appear.
2
Choose export type
Select your export option:
- Export All Data - Exports quantities across all statuses
- Export On Hand Summary - Exports only On Hand units by fulfillment center
3
Select data range
In the pop-up window, choose which data to export:
- Current Selection - Only selected rows
- Current Page - All items on the current page
- All Pages - All inventory items across all pages
4
Confirm export
Click Export to submit your request. A success message will appear confirming that the report will be emailed to your account.
5
Download from email
Check your email for the inventory report. The email will contain a download link valid for 24 hours.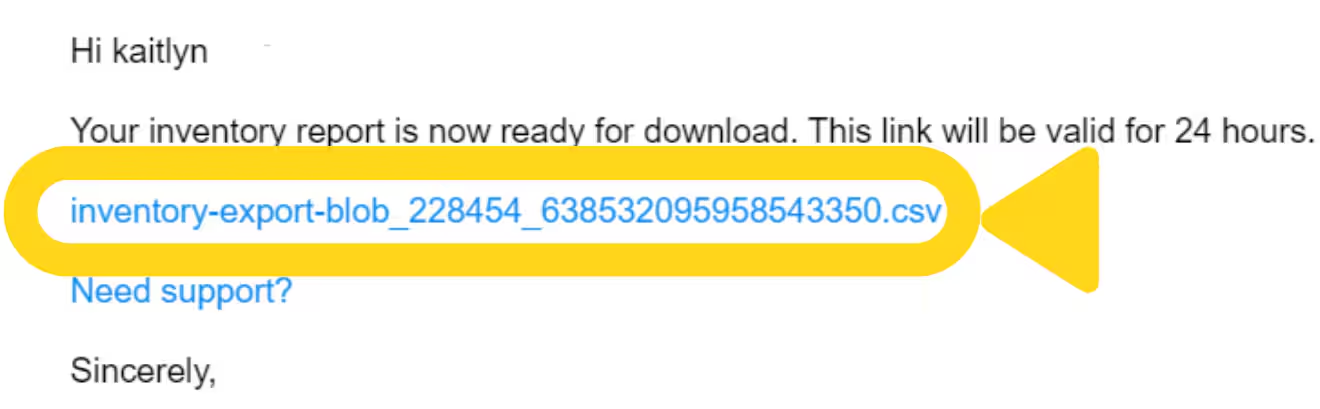
The report delivery time may vary depending on the amount of data. Check your spam folder if you don’t receive the email within an hour. For additional questions or assistance, please use Slack or email.
Let’s Dive Deeper
Inventory Overview
Back to the main inventory management guide with all tools and features
Inventory History Page
Track and audit all inventory adjustments with detailed records
Inventory Transfers
Move inventory between fulfillment centers or to external facilities
Inventory Distribution
Analyze customer locations and optimize inventory placement
MultiHub IQ
Learn about intelligent inventory distribution across locations
Creating a WRO
Send inventory to Jetpack fulfillment centers

Questions? Contact Jetpack Care.
If you have any questions or run into issues, you can always contact Jetpack Care for help. Our team is always here to assist via Slack, phone, or email!