

Order Import Methods Overview
Jetpack supports four primary methods for importing orders, each designed for different use cases:Automatic Order Syncing from Ecommerce Integrations
Automatic syncing is the primary way B2C merchants fulfill orders through Jetpack. When enabled, new orders from your integrated store flow automatically into the Jetpack system for fulfillment.How Automatic Syncing Works
When a customer places an order on your integrated ecommerce platform:- Order syncs to Jetpack - Within minutes, the order appears in your Jetpack dashboard
- Order processing begins - Based on your automation rules, Jetpack selects carrier, shipping speed, and packaging
- Order fulfills from nearest FC - Inventory allocates from the optimal Fulfillment Center
- Tracking updates automatically - Tracking numbers push back to your store and notify customers
- Inventory decrements in real-time - Your store’s inventory count updates as orders ship
Supported Platforms for Automatic Syncing
Automatic order syncing is available for all major ecommerce integrations:- Shopify - Full automation with real-time syncing
- Amazon - Seller Central orders (FBA and FBM)
- BigCommerce - Complete order automation
- WooCommerce - WordPress store integration
- Adobe Commerce (Magento) - Enterprise platform support
- eBay, Walmart, TikTok, Temu - Marketplace order syncing
Enabling Automatic Syncing
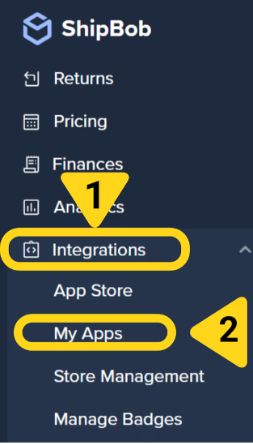
Automatic syncing is configured during your initial store integration setup. To verify or enable automatic syncing:Navigate to Settings in your Jetpack dashboard
Select Integrations, then My Apps
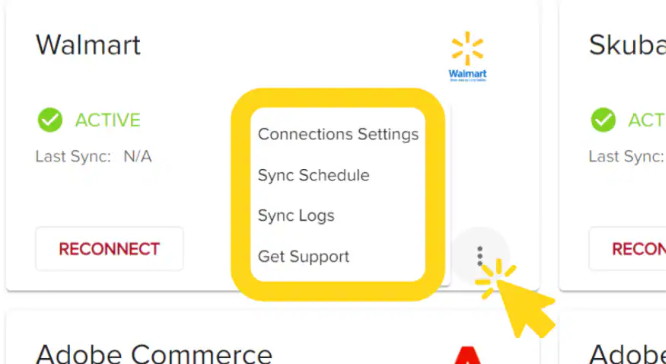
Locate your integration and click the 3 vertical dots icon
Check the box next to Sync new Orders
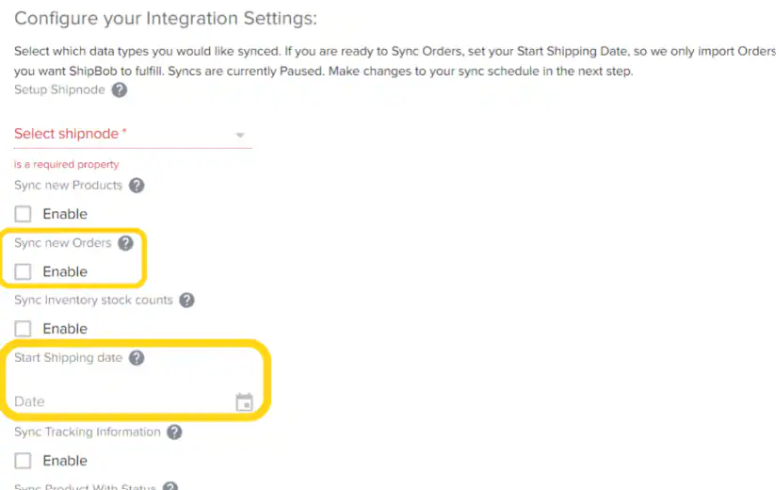
Click SAVE
Manual Order Syncing from Ecommerce Integrations
Manual syncing gives you control over which orders import from your integrated stores. This is useful when:- Testing your integration setup
- Selectively fulfilling orders (e.g., only certain SKUs or order types)
- Troubleshooting order sync issues
- Holding orders temporarily before fulfillment
How to Manually Sync Orders
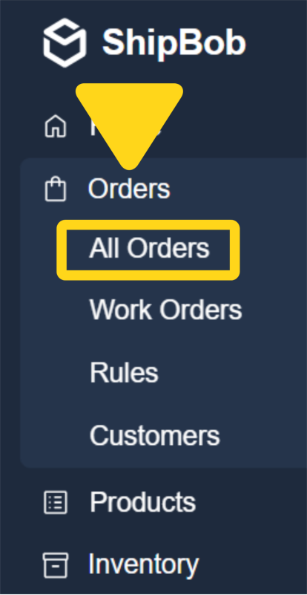
From the Jetpack dashboard:Click Orders on the left-hand navigation bar
Select All Orders
Click the Sync Orders button

Select the ecommerce platform and store
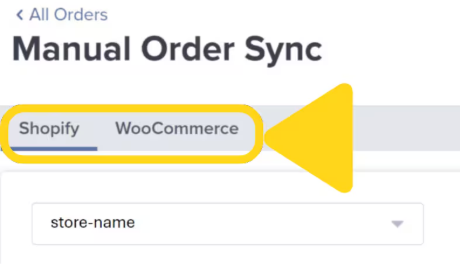
Click the Sync button
When Manual Syncing Makes Sense
Bulk Order Import via Excel Template
Bulk importing allows you to upload multiple orders at once using an Excel template. This method is essential for B2B wholesale orders, orders from non-integrated platforms, or large order batches that don’t come through a connected integration.When to Use Bulk Import
Bulk Import Limits and Guidelines
Jetpack’s bulk import feature has specific limits and formatting requirements:How to Bulk Import Orders
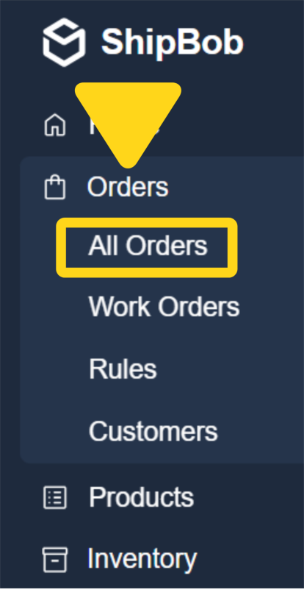
From the Jetpack dashboard:Navigate to Orders > All Orders, then click Add Order
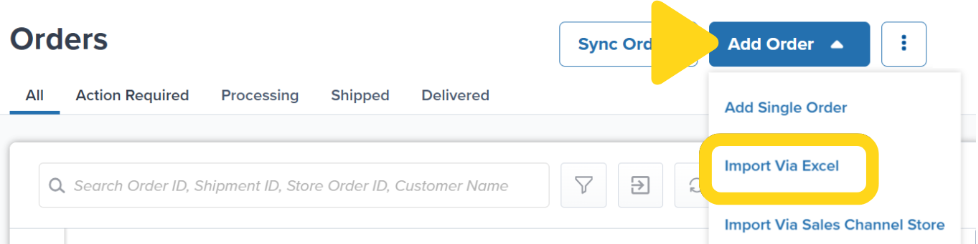
Select Import Via Excel
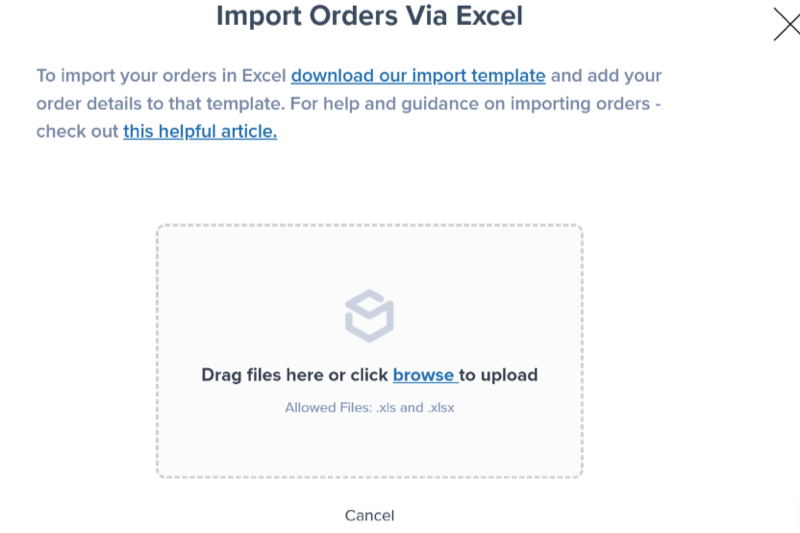
Download the Excel Template (if you haven't already)
- One row per order line item
- Include all required fields
- Use exact SKU names as they appear in your Product Catalog
- Format addresses correctly with all required fields
Drag and drop or browse for your completed Excel file
Click Yes to confirm the order count
Bulk Import Best Practices
- Test with small batches first - Upload 5-10 orders to verify template formatting before large uploads
- Use consistent formatting - Match address formats, date formats, and field naming conventions
- Validate SKUs beforehand - Export your Product Catalog and cross-check SKU names
- Include all required fields - Missing fields cause validation errors and delay processing
- Check for duplicate order numbers - Duplicate order numbers will be rejected or overwrite existing orders
Individually Creating Manual Orders
For one-off orders, test orders, or custom B2B shipments, you can create orders individually directly in the Jetpack dashboard. This gives you complete control over every order detail.Types of Manual Orders
Jetpack supports creating three types of manual orders:How to Create a Manual Order
From the Jetpack dashboard:Navigate to Orders in the main menu
Click Add Order

Select Add Single Order
Select the order type
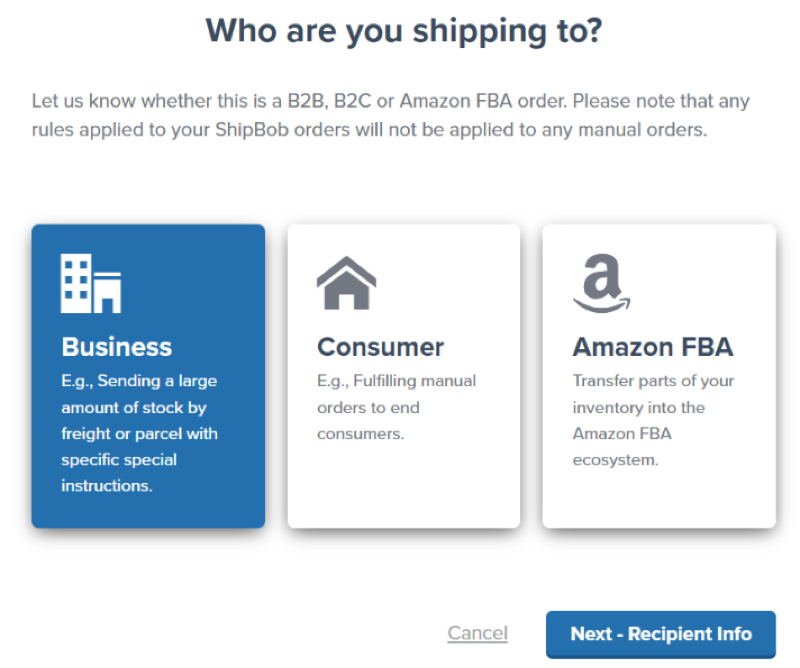
Click Next - Recipient Info
Search for an existing contact or create a new one
Add products to the order
Click Save Items to create the order
Manual Order Best Practices
- Use for testing - Create manual test orders to verify product configuration, packaging, and shipping settings
- Custom B2B orders - Manually create orders for wholesale customers with specific requirements
- One-off shipments - Sample orders, replacements, promotional shipments
- FBA prep - Create FBA orders when you need Jetpack to prep inventory for Amazon
Order Status and Monitoring
After orders are imported (regardless of method), you can monitor their progress through the order lifecycle:Choosing the Right Import Method
Not sure which import method is best for your business? Use this decision guide:I run a D2C ecommerce store (Shopify, BigCommerce, WooCommerce, etc.)
I run a D2C ecommerce store (Shopify, BigCommerce, WooCommerce, etc.)
I fulfill wholesale/B2B orders for retail partners
I fulfill wholesale/B2B orders for retail partners
- Use Bulk Import for recurring wholesale orders or large order batches
- Use Manual B2B Order Creation for one-off wholesale shipments
I sell on Amazon and need FBA prep services
I sell on Amazon and need FBA prep services
- Use Manual FBA Order Creation for occasional FBA prep needs
- Set up Automated FBA Shipments for regular FBA replenishment
I sell on multiple platforms without direct Jetpack integrations
I sell on multiple platforms without direct Jetpack integrations
- Use Bulk Import to upload orders from multiple sources in batches
- Consider integrating a middleware platform like Order Desk or ShipStation that connects to Jetpack
I want to test the system before going live
I want to test the system before going live
- Product configuration is correct
- Shipping settings work as expected
- Automation rules apply properly
- Order flow end-to-end functions correctly
Troubleshooting Order Import Issues
If orders aren’t importing as expected, check these common issues:Let’s Dive Deeper
The Onboarding Process
Syncing, Importing, and Creating Orders
Creating Manual B2B/Wholesale Orders
The Orders Page
Order Status Overview
Store Integration Overview

Questions? Contact Jetpack Care.
If you have any questions or run into issues, you can always contact Jetpack Care for help. Our team is always here to assist via Slack, phone, or email!