> ## Documentation Index
> Fetch the complete documentation index at: https://help.jetpack3pl.com/llms.txt
> Use this file to discover all available pages before exploring further.
# Custom Branded Packing Slips for WMS Merchants
> Enhance your customer's unboxing experience with custom branded packing slips featuring your logo, personalized messaging, and gift notes for WMS operations.
Jetpack WMS merchants can elevate their end customer's unboxing experience by customizing packing slips with personalized branding. Once enabled, you can add your company logo, a custom message, and personalized gift notes to every packing slip—transforming a standard fulfillment document into a branded touchpoint.
## Requirements for Custom Branded Packing Slips
Before enabling custom branded packing slips, ensure your equipment and setup meet the following criteria:
| Requirement | Details |
| ---------------------- | ------------------------------------------------------------------------------------------------------------------------------------------------------------------------------------------------------------------------------------------------------------------------------------------------------------------------------------------------- |
| **Laser Printer** | - A laser printer is required for printing custom branded packing slips
- Ensure the printer is properly connected to your PC by following the printer's installation instructions
- **Recommended model:** HP LaserJet Pro 4001n (if unsure about which printer to use, this model is recommended)
|
| **Feature Activation** | - Use Slack or email to Jetpack Care to enable Custom Branded Packing Slips in your dashboard
- **Important:** Schedule the activation during **non-production times** when you are not actively shipping orders
- Provide Jetpack with several timeframes that are considered non-production hours at your warehouse
|
| **Dashboard Settings** | - Once enabled, all packing slips will print according to your settings on the **Customize Your Packing Slip** page
- This applies to all orders processed through your WMS
|
Custom branded packing slip activation should occur during non-production hours to avoid disruption to your fulfillment operations. Coordinate with Jetpack Care to identify the best activation window for your warehouse.
***
## Configuring Custom Branded Packing Slips in the Dashboard
After receiving confirmation that the Custom Packing Slips feature is enabled, follow these steps to customize your packing slips:
From the Jetpack dashboard:
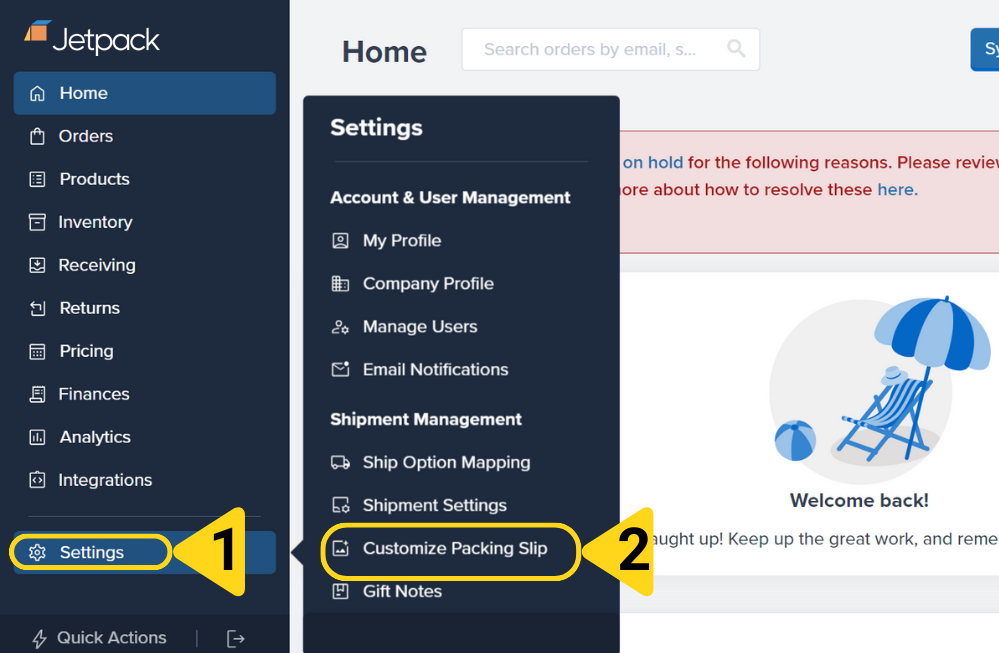
1. Click **Settings** on the left-hand navigation bar
2. Additional menu options will appear
3. Select **Customize Packing Slip** to be redirected to the Custom Packing Slip page
 On the Custom Packing Slip page, click the **Customize your packing slip** button next to **Packing Slip for Your Warehouses**.
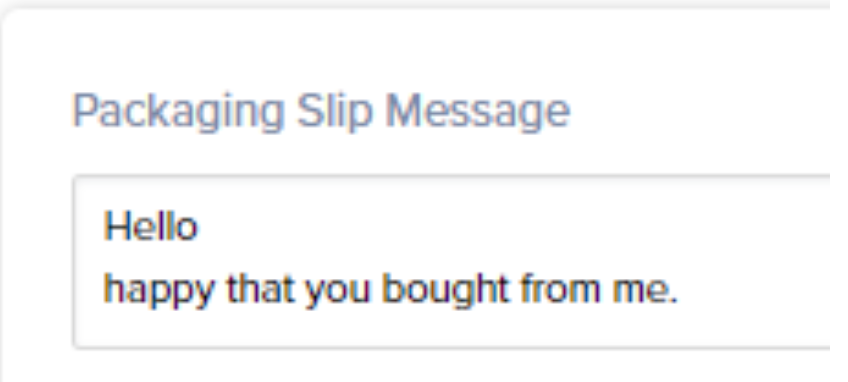
 To add a general message that will appear on all packing slips, type your text into the **Packing Slip Message** textbox.
This message will be printed on every packing slip and can include:
* Thank you messages
* Return instructions
* Customer support contact information
* Social media handles
* Any other standardized messaging
To add a general message that will appear on all packing slips, type your text into the **Packing Slip Message** textbox.
This message will be printed on every packing slip and can include:
* Thank you messages
* Return instructions
* Customer support contact information
* Social media handles
* Any other standardized messaging
 Toggle the **Print Gift Note** option to enable gift notes on your packing slips.
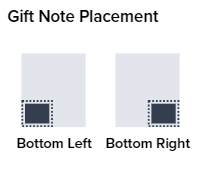
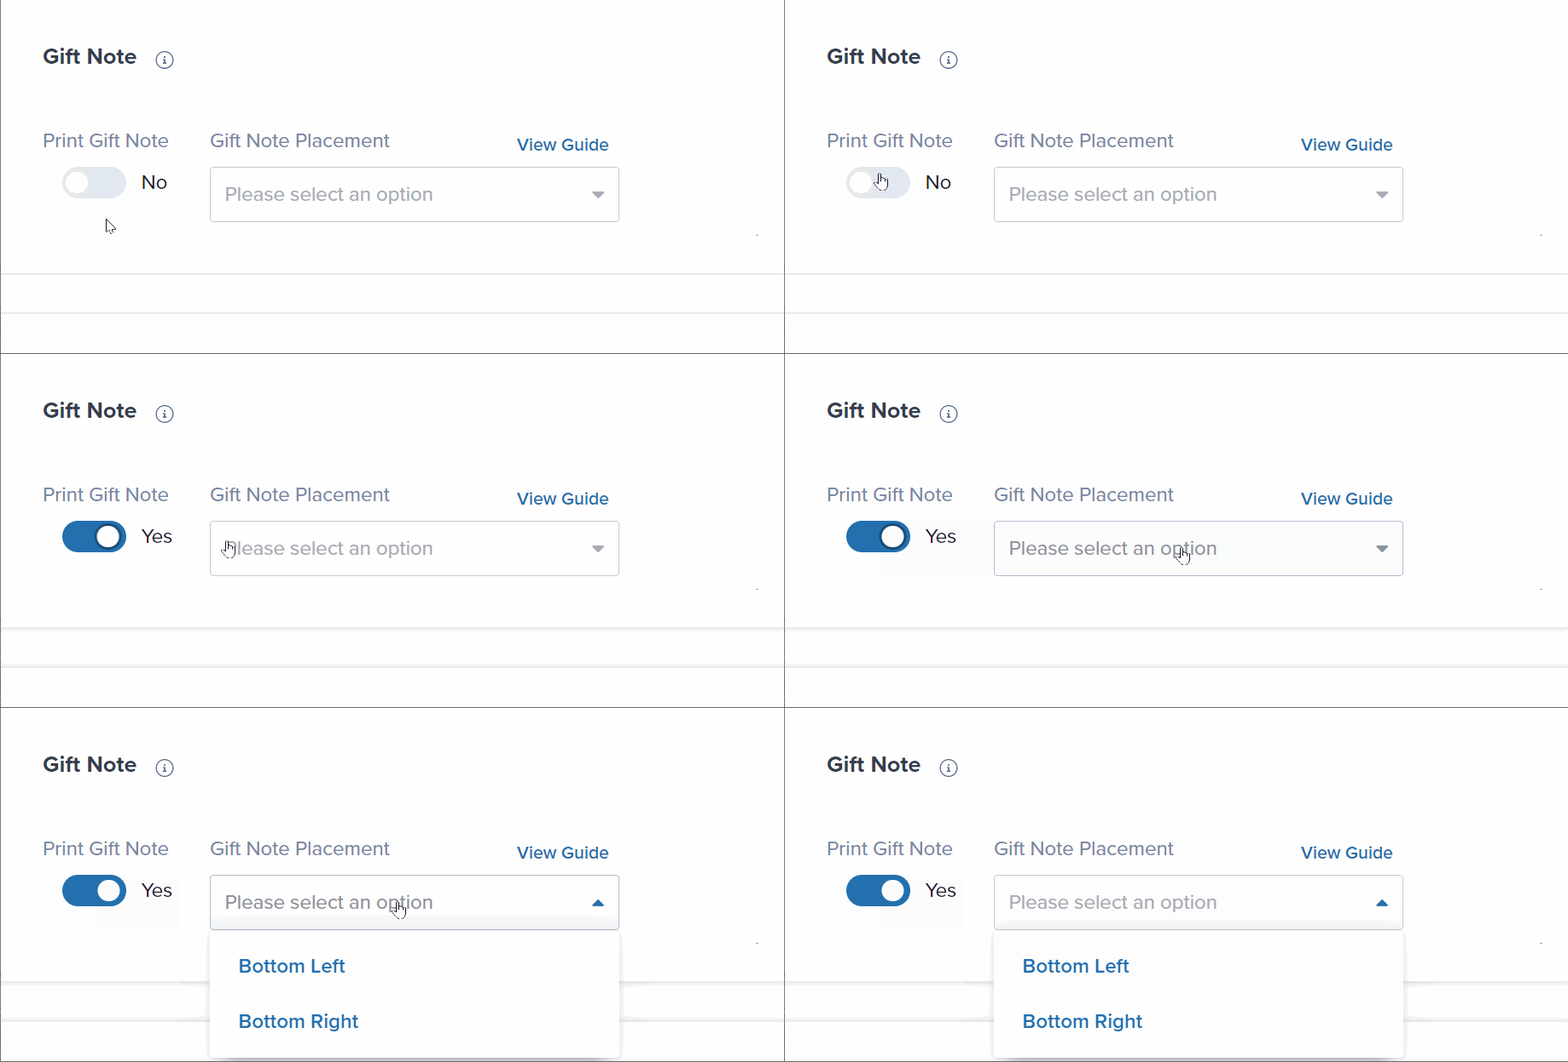 Once enabled, choose the gift note placement using the drop-down menu:
* **Bottom Left**
* **Bottom Right**
Once enabled, choose the gift note placement using the drop-down menu:
* **Bottom Left**
* **Bottom Right**
 Gift notes will only print when an order includes a gift message. The message must be added via your ecommerce integration, manually in the dashboard, or through bulk order import. Learn more about [configuring gift notes](/fulfillment/account-setup/shipping-preferences/gift-notes).
To update your logo:
1. Remove the current file by clicking the **trash can icon**
2. Drag and drop your desired file into the dotted upload box, or click the provided hyperlink to browse and select the file
Gift notes will only print when an order includes a gift message. The message must be added via your ecommerce integration, manually in the dashboard, or through bulk order import. Learn more about [configuring gift notes](/fulfillment/account-setup/shipping-preferences/gift-notes).
To update your logo:
1. Remove the current file by clicking the **trash can icon**
2. Drag and drop your desired file into the dotted upload box, or click the provided hyperlink to browse and select the file
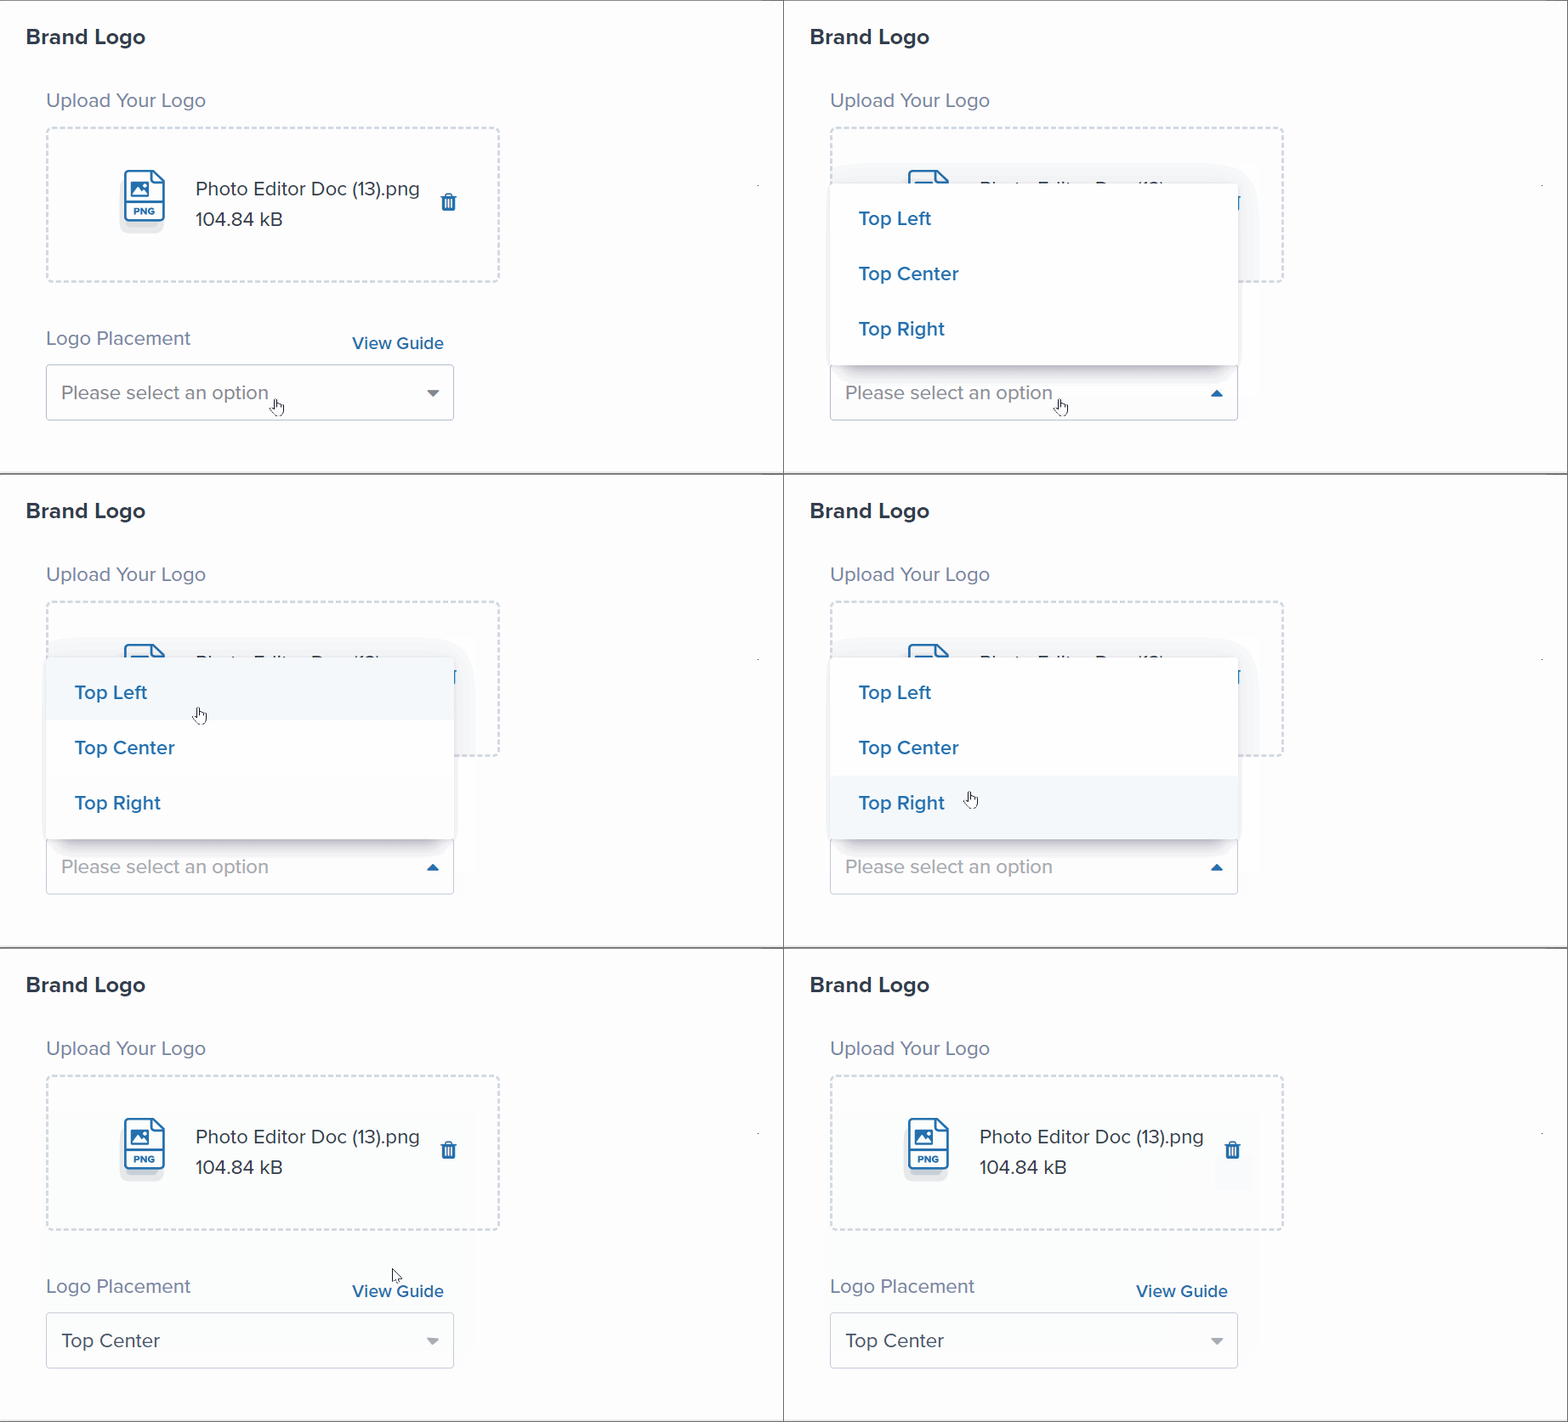 **Logo Requirements:**
* Format: Black-and-white monochrome PNG image
* Dimensions: Square dimensions, ideally 100 x 100 pixels
* File Size: 499 KB or smaller
* The uploaded logo will auto-resize for proper fit on the packing slip
For best results, use a simple, high-contrast black-and-white logo. Complex designs or gradients may not print clearly on standard laser printers.
By default, the uploaded logo appears under the **Brand Logo** section and is positioned at **Top Center**.
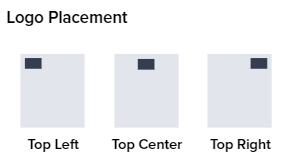
To change the logo position, select your preferred placement from the **Logo Placement** drop-down menu:
* Top Left
* Top Center (default)
* Top Right
**Logo Requirements:**
* Format: Black-and-white monochrome PNG image
* Dimensions: Square dimensions, ideally 100 x 100 pixels
* File Size: 499 KB or smaller
* The uploaded logo will auto-resize for proper fit on the packing slip
For best results, use a simple, high-contrast black-and-white logo. Complex designs or gradients may not print clearly on standard laser printers.
By default, the uploaded logo appears under the **Brand Logo** section and is positioned at **Top Center**.
To change the logo position, select your preferred placement from the **Logo Placement** drop-down menu:
* Top Left
* Top Center (default)
* Top Right
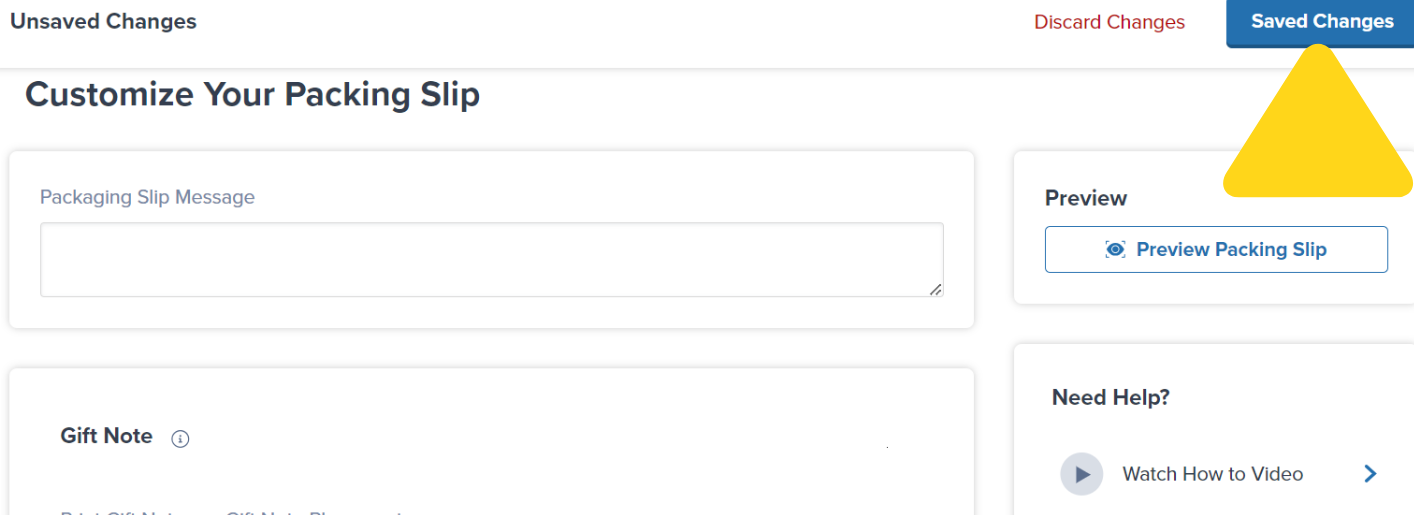
 Once you have configured all your settings, click the **Saved Changes** button at the top right of the page.
 Your custom branded packing slip settings are now active and will be applied to all future orders.
To preview your updated packing slip:
1. Click the **Previous Packing Slip** button under the **Preview** tile
2. Review the preview to ensure your logo, message, and gift note placement appear correctly
3. To print a test packing slip, click the **printer icon**
4. Select the appropriate printer from the **Destination** drop-down menu
Your custom branded packing slip settings are now active and will be applied to all future orders.
To preview your updated packing slip:
1. Click the **Previous Packing Slip** button under the **Preview** tile
2. Review the preview to ensure your logo, message, and gift note placement appear correctly
3. To print a test packing slip, click the **printer icon**
4. Select the appropriate printer from the **Destination** drop-down menu
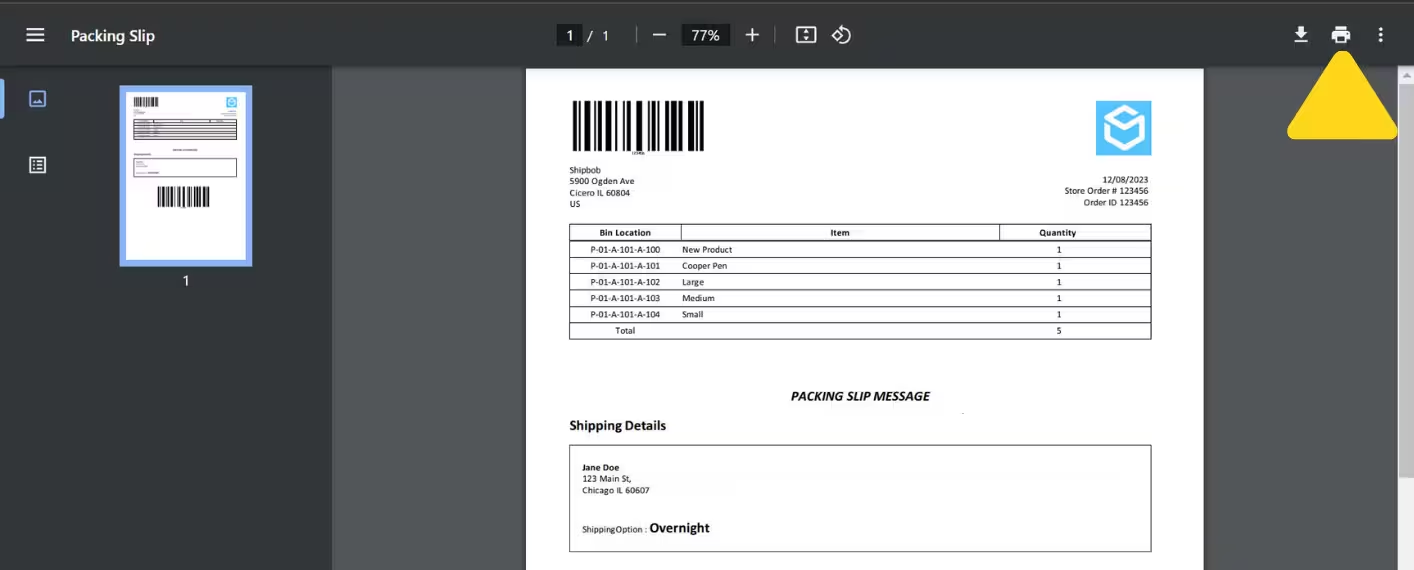 Always print a test packing slip to verify that your logo, message, and gift note placement meet your branding standards before processing live orders.
***
## Setting Up the Default Printer on Packaging PCs
After customizing your packing slip in the dashboard, you must update the default printer on each PC used for packaging orders:
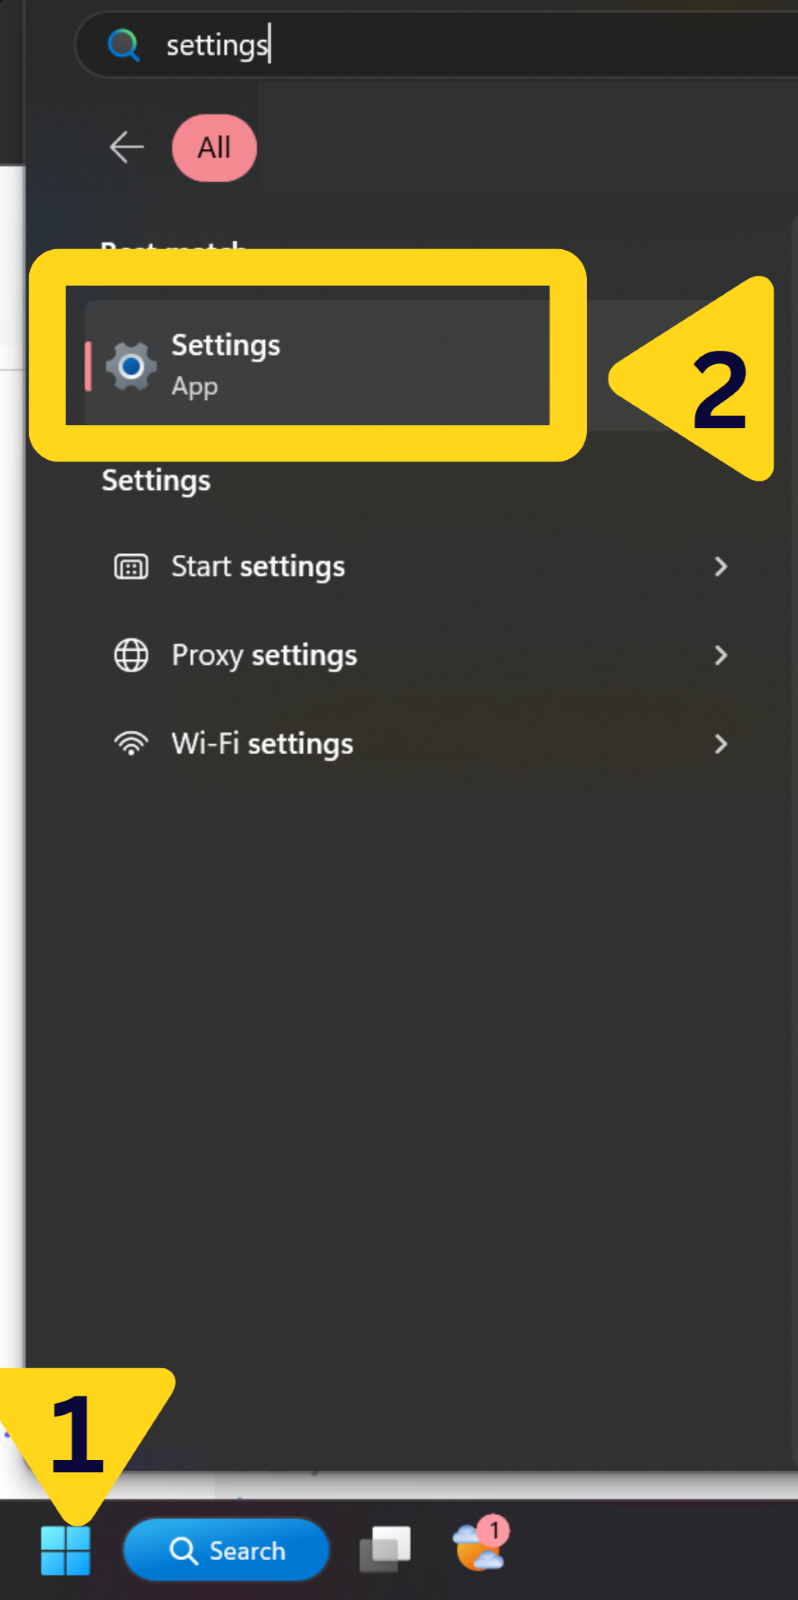
Click the **Windows icon** (or use the keyboard shortcut **Windows + I**) to access the computer's settings.
Locate and select **Settings** from the menu.
Always print a test packing slip to verify that your logo, message, and gift note placement meet your branding standards before processing live orders.
***
## Setting Up the Default Printer on Packaging PCs
After customizing your packing slip in the dashboard, you must update the default printer on each PC used for packaging orders:
Click the **Windows icon** (or use the keyboard shortcut **Windows + I**) to access the computer's settings.
Locate and select **Settings** from the menu.
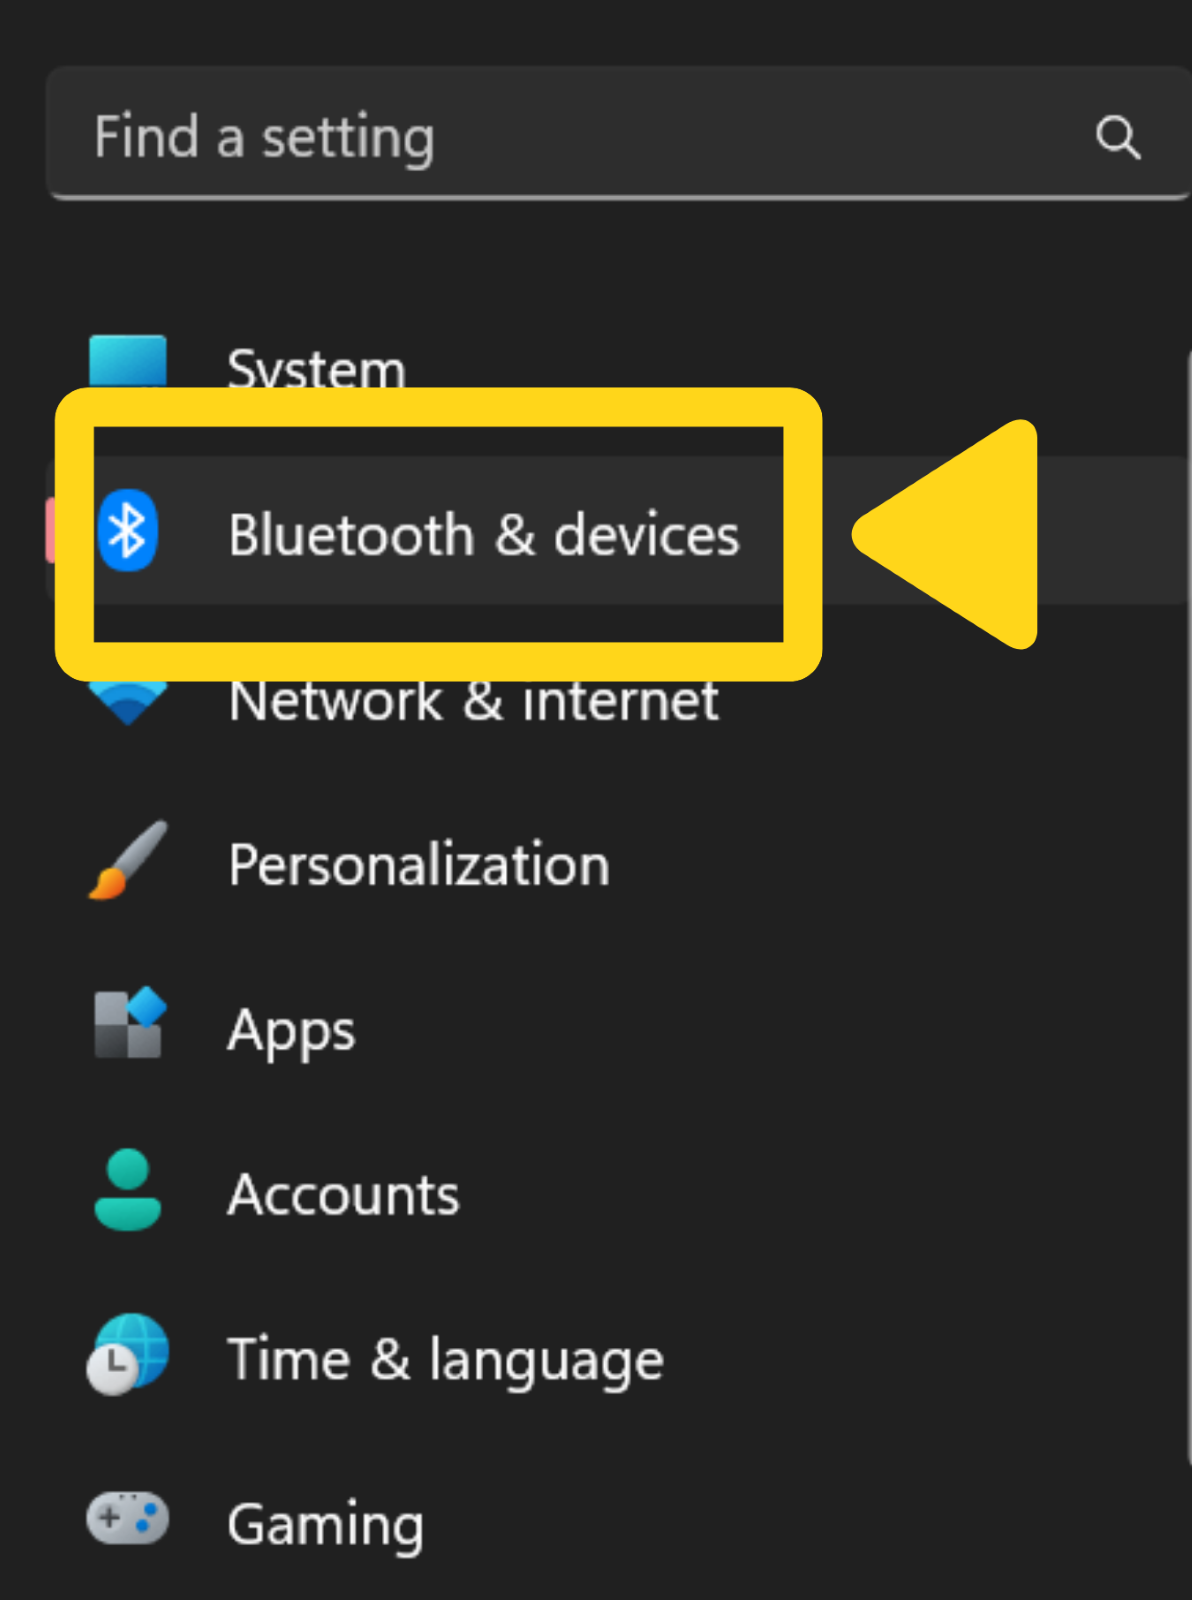
 In the Settings window, click **Bluetooth & devices** from the left-hand menu.
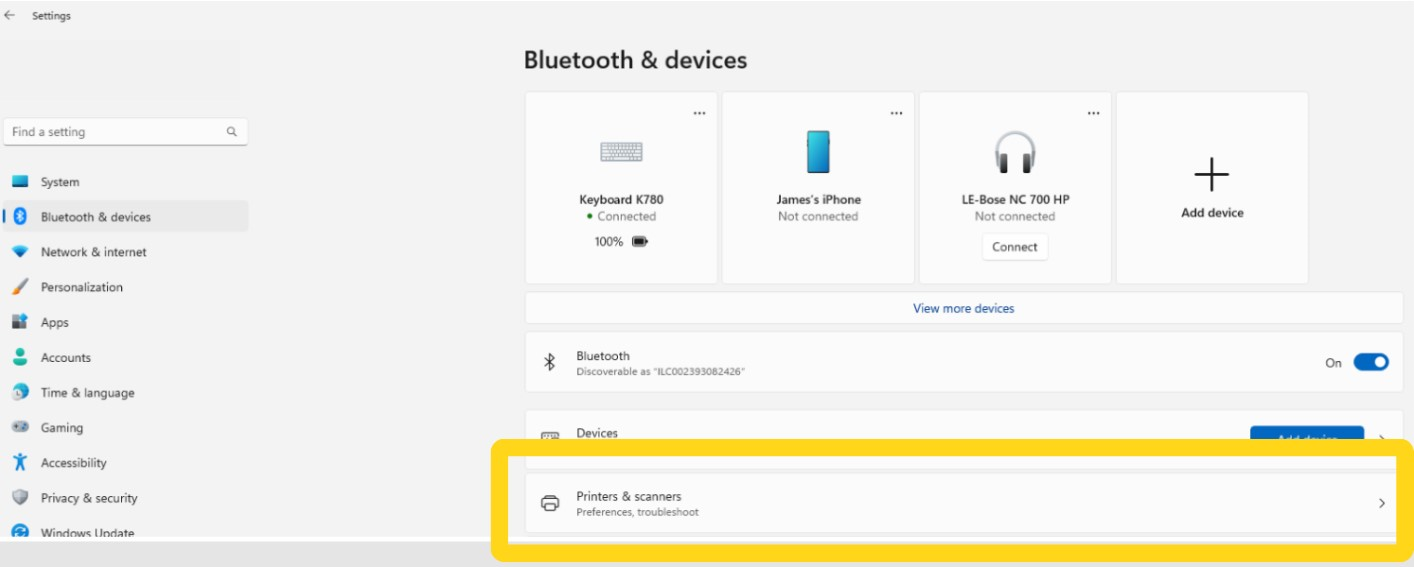
 Select the **Printers & scanners** tile from the Bluetooth & devices page.
 Scroll to the **Printer preferences** section.
Toggle **Let Windows manage my default printer** from **On** to **Off**.
Scroll to the **Printer preferences** section.
Toggle **Let Windows manage my default printer** from **On** to **Off**.
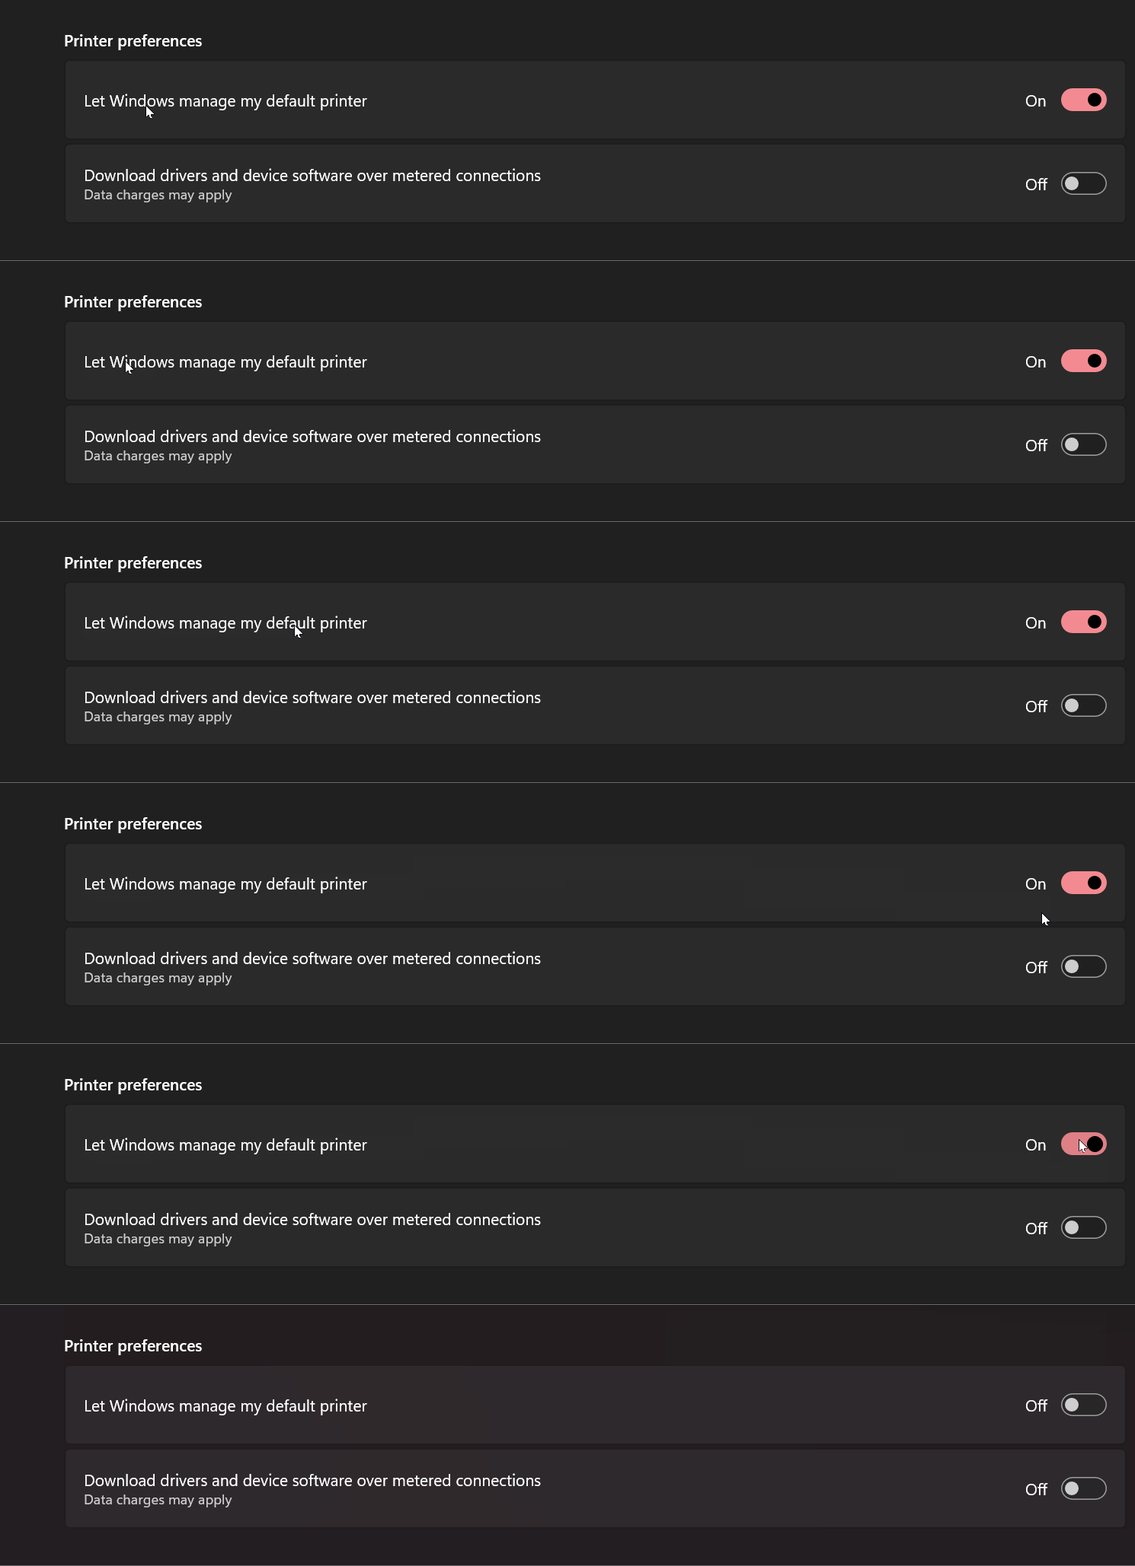 Disabling this option allows you to manually set a specific printer as the default, ensuring custom branded packing slips always print to the correct device.
Scroll back up to the list of available printers.
1. Select your desired printer from the list
2. Click **Set as default** on the printer's settings page
Disabling this option allows you to manually set a specific printer as the default, ensuring custom branded packing slips always print to the correct device.
Scroll back up to the list of available printers.
1. Select your desired printer from the list
2. Click **Set as default** on the printer's settings page
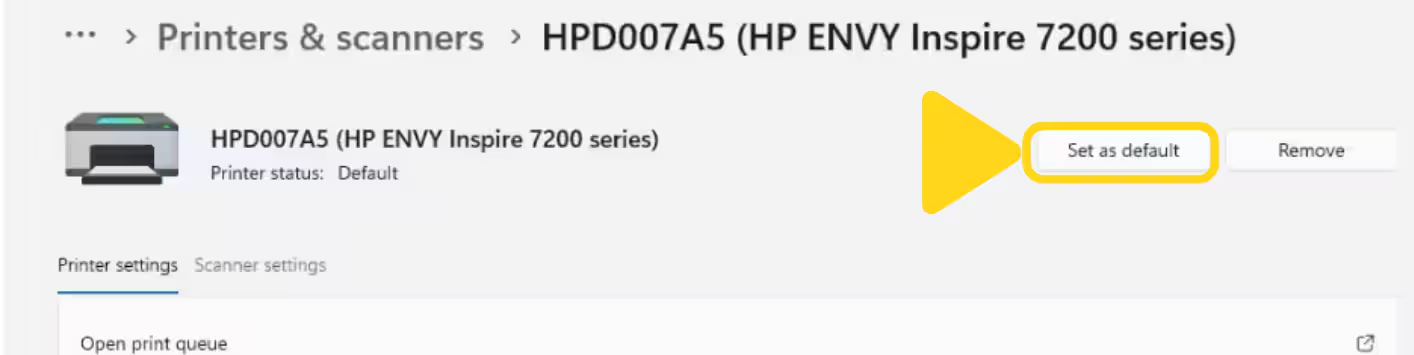 Repeat this process for every PC used for packaging orders in your warehouse.
***
## Configuring Printers in ToolBob for Cluster Packaging
To ensure that packing slips print correctly for cluster packaging operations via ToolBob, follow these steps:
From ToolBob:
1. Go to the **Outbound** section
2. Select **Packing**
3. Click the **gear icon** at the top right of the page
Repeat this process for every PC used for packaging orders in your warehouse.
***
## Configuring Printers in ToolBob for Cluster Packaging
To ensure that packing slips print correctly for cluster packaging operations via ToolBob, follow these steps:
From ToolBob:
1. Go to the **Outbound** section
2. Select **Packing**
3. Click the **gear icon** at the top right of the page
 Under **Select Order Printer**, choose the computer's default printer that you configured in the previous section.
Click **Save** to confirm your printer selection.
Under **Select Order Printer**, choose the computer's default printer that you configured in the previous section.
Click **Save** to confirm your printer selection.
 The printer selected in ToolBob must be the same printer you set as the default in Windows Settings. If these don't match, packing slips may not print correctly.
The selected printer should now appear next to **Order Printer** under the gear icon on the Packing page.
The printer selected in ToolBob must be the same printer you set as the default in Windows Settings. If these don't match, packing slips may not print correctly.
The selected printer should now appear next to **Order Printer** under the gear icon on the Packing page.
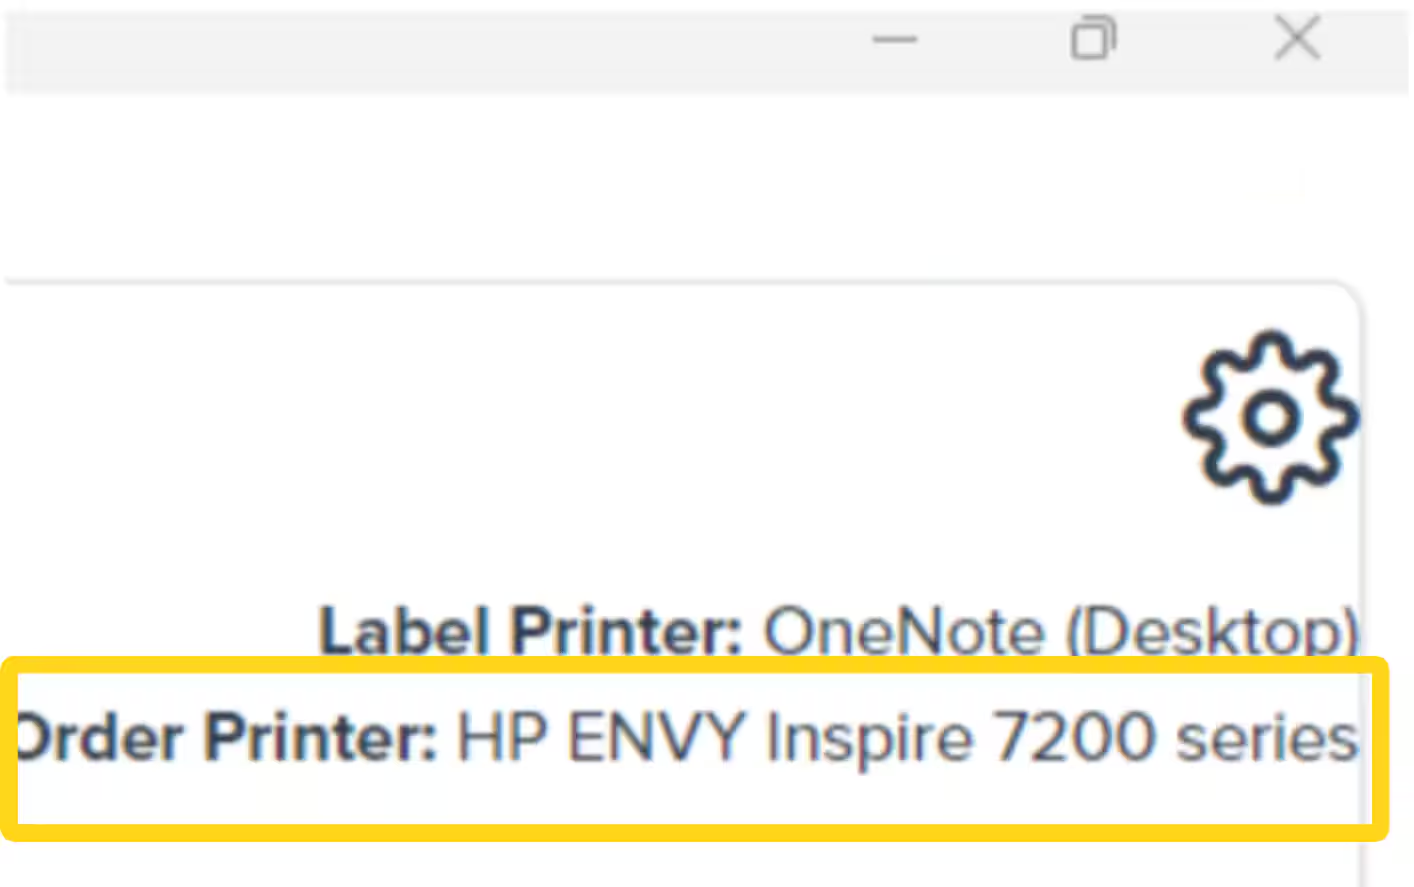 Test the configuration by processing a test order through cluster packaging and verifying that the custom branded packing slip prints correctly.
***
## Let's Dive Deeper
Configure packing slip settings for all Jetpack fulfillment (not WMS-specific)
Enable and manage gift notes for personalized messaging
Set up packaging materials and preferences
Overview of Jetpack's standard D2C fulfillment operations
Learn about Jetpack's standard packaging options
Back to the main tools guide
Test the configuration by processing a test order through cluster packaging and verifying that the custom branded packing slip prints correctly.
***
## Let's Dive Deeper
Configure packing slip settings for all Jetpack fulfillment (not WMS-specific)
Enable and manage gift notes for personalized messaging
Set up packaging materials and preferences
Overview of Jetpack's standard D2C fulfillment operations
Learn about Jetpack's standard packaging options
Back to the main tools guide
Questions? Contact Jetpack Care.
If you have any questions or run into issues, you can always contact Jetpack Care for help. Our team is always here to assist via Slack, phone, or email!