> ## Documentation Index
> Fetch the complete documentation index at: https://help.jetpack3pl.com/llms.txt
> Use this file to discover all available pages before exploring further.
# Branded Tracking Pages
> Replace generic carrier tracking pages with a branded tracking experience that carries your logo, brand name, favicon, and store URL—turning every shipment status check into a brand touchpoint.
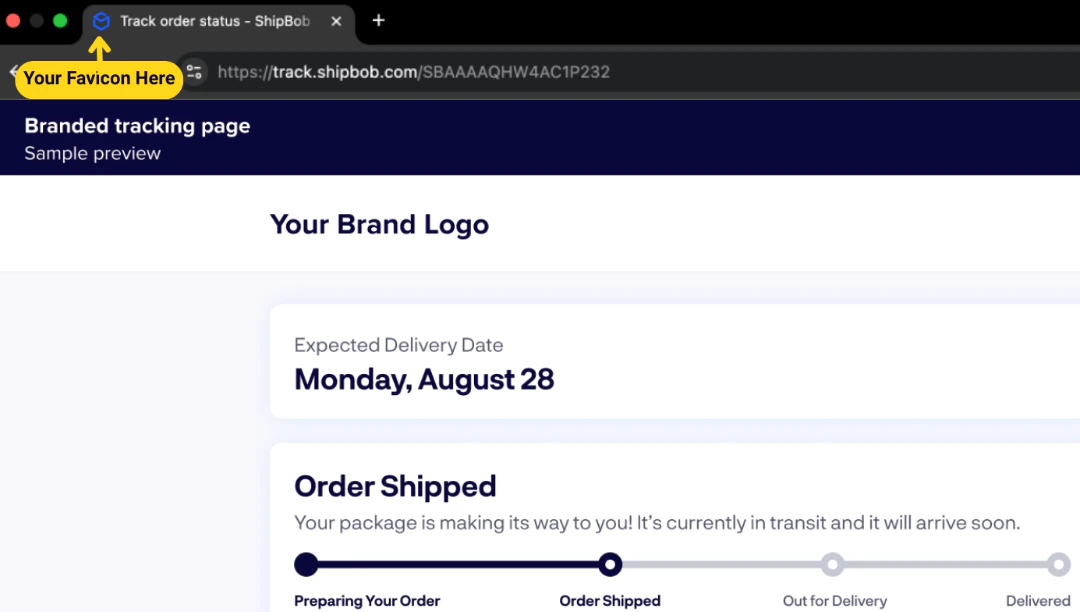
Branded Tracking Pages let you provide a seamless post-purchase experience to your US customers by customizing the carrier tracking page they use to track their shipment. Instead of redirecting customers to a carrier's standard tracking page, you can showcase your company branding (logo, favicon, brand name, and store URL) on a Jetpack-hosted tracking page.
 ***
## Key Terms
| Term | Meaning |
| ------------------------------------------------- | ------------------------------------------------------------------------------------------------------------------------------------------------------------------------ |
| **Branded Tracking Pages** | The feature that lets you customize the carrier tracking page provided to customers, plus the **Brand Tracking** page in your dashboard where you manage those settings. |
| **Brand Tracking page (in your dashboard)** | The dashboard screen where you customize the brand name, brand logo, website URL, and favicon displayed on the tracking page provided to customers. |
| **Branded tracking page (provided to customers)** | The page your customers use to review carrier updates for their shipment. |
***
## Requirements
To use Branded Tracking Pages, your B2C orders must meet **one** of the following conditions:
* Created manually (individually or in bulk via Excel upload), **or**
* Imported via Jetpack's Shopify or ShipStation integration
For unsupported platforms or B2B orders, the tracking page will default to the carrier's standard tracking page. See the FAQs below for details on middleware providers.
***
## Enabling Branded Tracking Pages
Branded Tracking Pages are **enabled by default** and will automatically be used for all eligible orders.
The Brand Tracking page in your dashboard is where you upload your company information, preview the customer-facing page, and enable or disable the feature.
From the Jetpack dashboard:
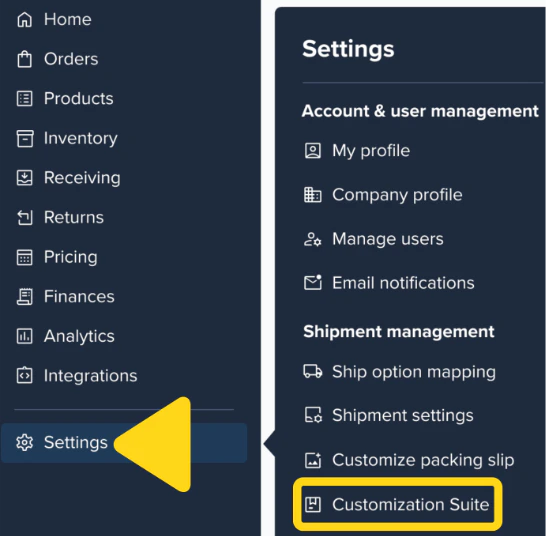
1. Click **Settings** on the left-hand navigation bar. Additional menu options will appear.
2. Select **Customization Suite**. You will be redirected to the Customization Suite page.
***
## Key Terms
| Term | Meaning |
| ------------------------------------------------- | ------------------------------------------------------------------------------------------------------------------------------------------------------------------------ |
| **Branded Tracking Pages** | The feature that lets you customize the carrier tracking page provided to customers, plus the **Brand Tracking** page in your dashboard where you manage those settings. |
| **Brand Tracking page (in your dashboard)** | The dashboard screen where you customize the brand name, brand logo, website URL, and favicon displayed on the tracking page provided to customers. |
| **Branded tracking page (provided to customers)** | The page your customers use to review carrier updates for their shipment. |
***
## Requirements
To use Branded Tracking Pages, your B2C orders must meet **one** of the following conditions:
* Created manually (individually or in bulk via Excel upload), **or**
* Imported via Jetpack's Shopify or ShipStation integration
For unsupported platforms or B2B orders, the tracking page will default to the carrier's standard tracking page. See the FAQs below for details on middleware providers.
***
## Enabling Branded Tracking Pages
Branded Tracking Pages are **enabled by default** and will automatically be used for all eligible orders.
The Brand Tracking page in your dashboard is where you upload your company information, preview the customer-facing page, and enable or disable the feature.
From the Jetpack dashboard:
1. Click **Settings** on the left-hand navigation bar. Additional menu options will appear.
2. Select **Customization Suite**. You will be redirected to the Customization Suite page.
 Click **Manage branded tracking page** (located under the **Branded Tracking page** tile). You will be redirected to the Branded Tracking page.
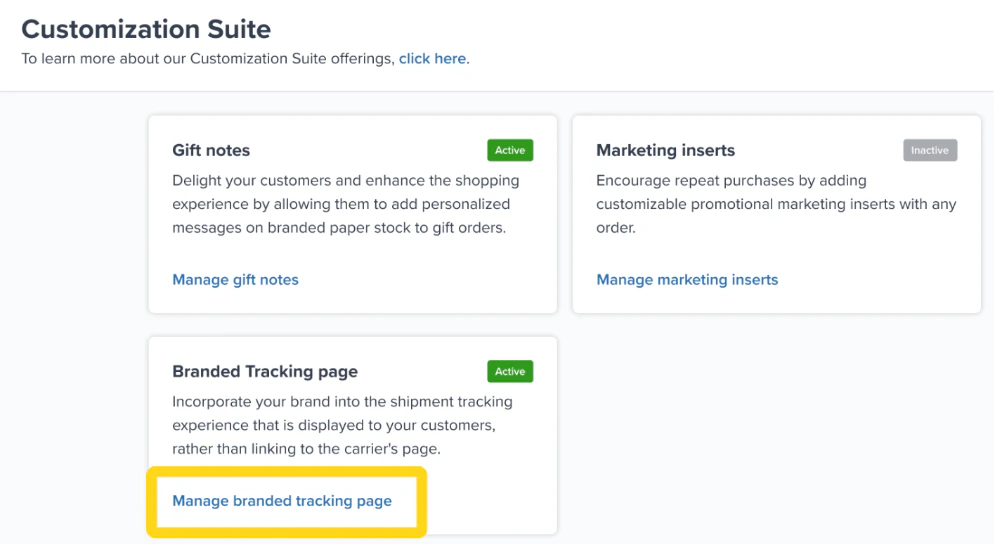 If the **Branded Tracking page** tile is not visible, contact Jetpack Care via Slack or email to have it enabled for your account.
Fill out each field with your brand details:
| Field | Required | Purpose | File requirements |
| --------------- | -------- | ------------------------------------------------------------------------ | --------------------------------------------------------------------------------- |
| **Brand Name** | Required | Displayed on the browser tab when customers access the tracking page | — |
| **Brand Logo** | Required | Displayed at the top of the tracking page | 96x96 px (square) **or** 240x96 px (rectangular); max 1 MB; JPG/JPEG, GIF, or PNG |
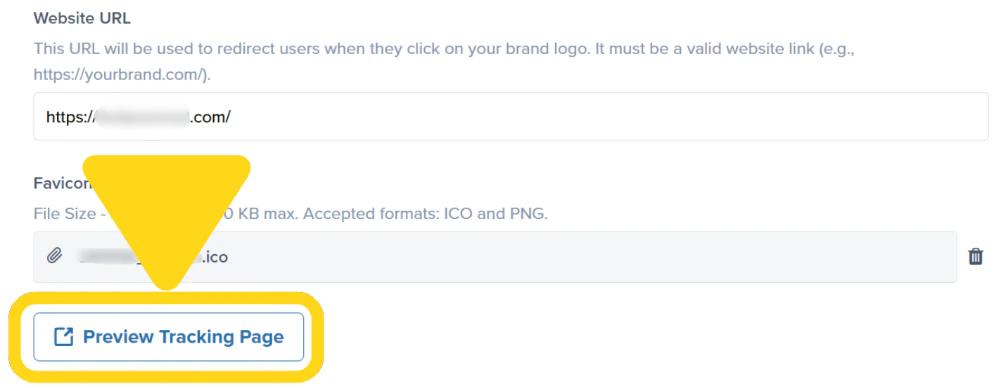
| **Website URL** | Required | Used to redirect customers to your store when they click your Brand Logo | — |
| **Favicon** | Optional | Displays on the browser tab next to the Brand Name | 32x32 px; max 50 KB; ICO or PNG |
If the **Branded Tracking page** tile is not visible, contact Jetpack Care via Slack or email to have it enabled for your account.
Fill out each field with your brand details:
| Field | Required | Purpose | File requirements |
| --------------- | -------- | ------------------------------------------------------------------------ | --------------------------------------------------------------------------------- |
| **Brand Name** | Required | Displayed on the browser tab when customers access the tracking page | — |
| **Brand Logo** | Required | Displayed at the top of the tracking page | 96x96 px (square) **or** 240x96 px (rectangular); max 1 MB; JPG/JPEG, GIF, or PNG |
| **Website URL** | Required | Used to redirect customers to your store when they click your Brand Logo | — |
| **Favicon** | Optional | Displays on the browser tab next to the Brand Name | 32x32 px; max 50 KB; ICO or PNG |
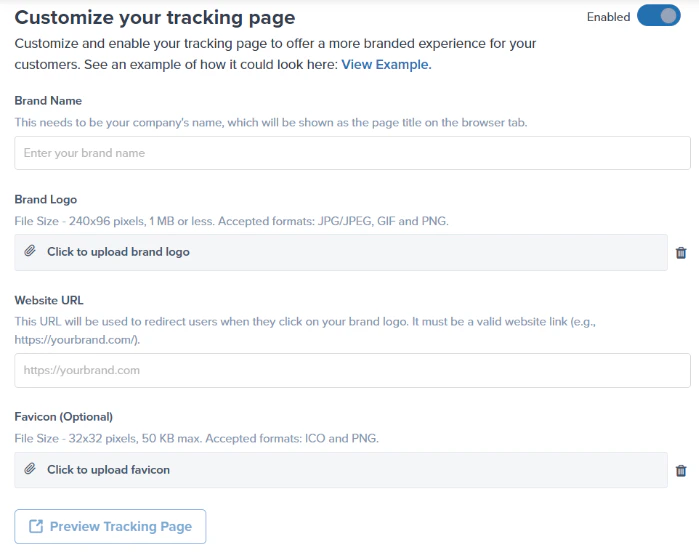 Click **Save Changes** in the **Unsaved Changes** bar.
 Click **Preview Tracking Page** to review a sample of the tracking page that will be displayed to customers.
 Click the toggle next to **Disabled**. A confirmation pop-up will appear.
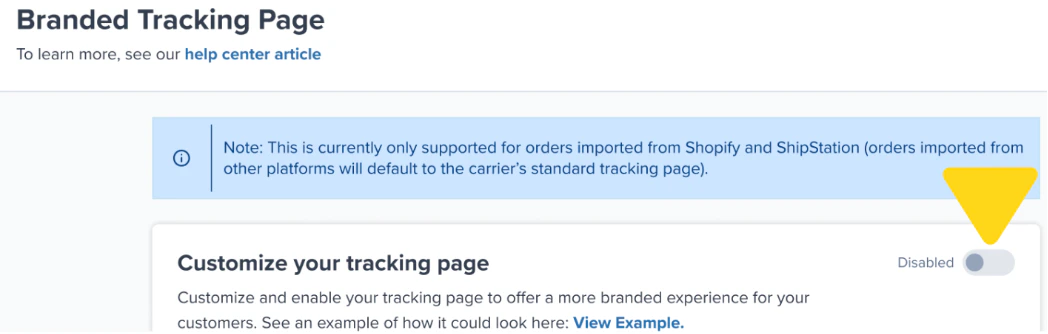 If you can't change the toggle, make sure all required fields from the previous step are completed.
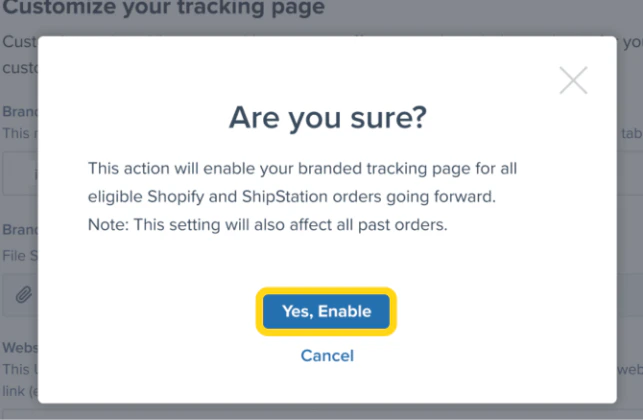
Click **Yes, Enable**.
If you can't change the toggle, make sure all required fields from the previous step are completed.
Click **Yes, Enable**.
 Branded tracking pages will now be shown for applicable orders.
***
## FAQs
All orders utilizing the **zone skipping** method will display a Jetpack-branded or your custom-branded tracking page, regardless of whether the Branded Tracking feature is enabled.
The tracking page will default to the standard carrier tracking page for B2B orders, and for orders imported from unsupported integrations.
Branded Tracking Pages currently only support **ShipStation** as a middleware provider.
* **Shopify → ShipStation → Jetpack:** your customer will see your branded tracking page.
* **Shopify → other middleware (e.g., NetSuite) → Jetpack:** your customer will still see the standard carrier tracking page.
***
## Let's Dive Deeper
How tracking numbers sync back to your store and customers
Add your logo and messaging to packing slips for WMS merchants
Back to the main tools guide
Branded tracking pages will now be shown for applicable orders.
***
## FAQs
All orders utilizing the **zone skipping** method will display a Jetpack-branded or your custom-branded tracking page, regardless of whether the Branded Tracking feature is enabled.
The tracking page will default to the standard carrier tracking page for B2B orders, and for orders imported from unsupported integrations.
Branded Tracking Pages currently only support **ShipStation** as a middleware provider.
* **Shopify → ShipStation → Jetpack:** your customer will see your branded tracking page.
* **Shopify → other middleware (e.g., NetSuite) → Jetpack:** your customer will still see the standard carrier tracking page.
***
## Let's Dive Deeper
How tracking numbers sync back to your store and customers
Add your logo and messaging to packing slips for WMS merchants
Back to the main tools guide
Questions? Contact Jetpack Care.
If the Branded Tracking page tile isn't showing in your Customization Suite, or you need help with logo sizing, integrations, or eligibility, reach out to Jetpack Care via Slack, phone, or email.