
Questions? Contact Jetpack Care.
If you have any questions or run into issues, you can always contact Jetpack Care for help. Our team is always here to assist via Slack, phone, or email!
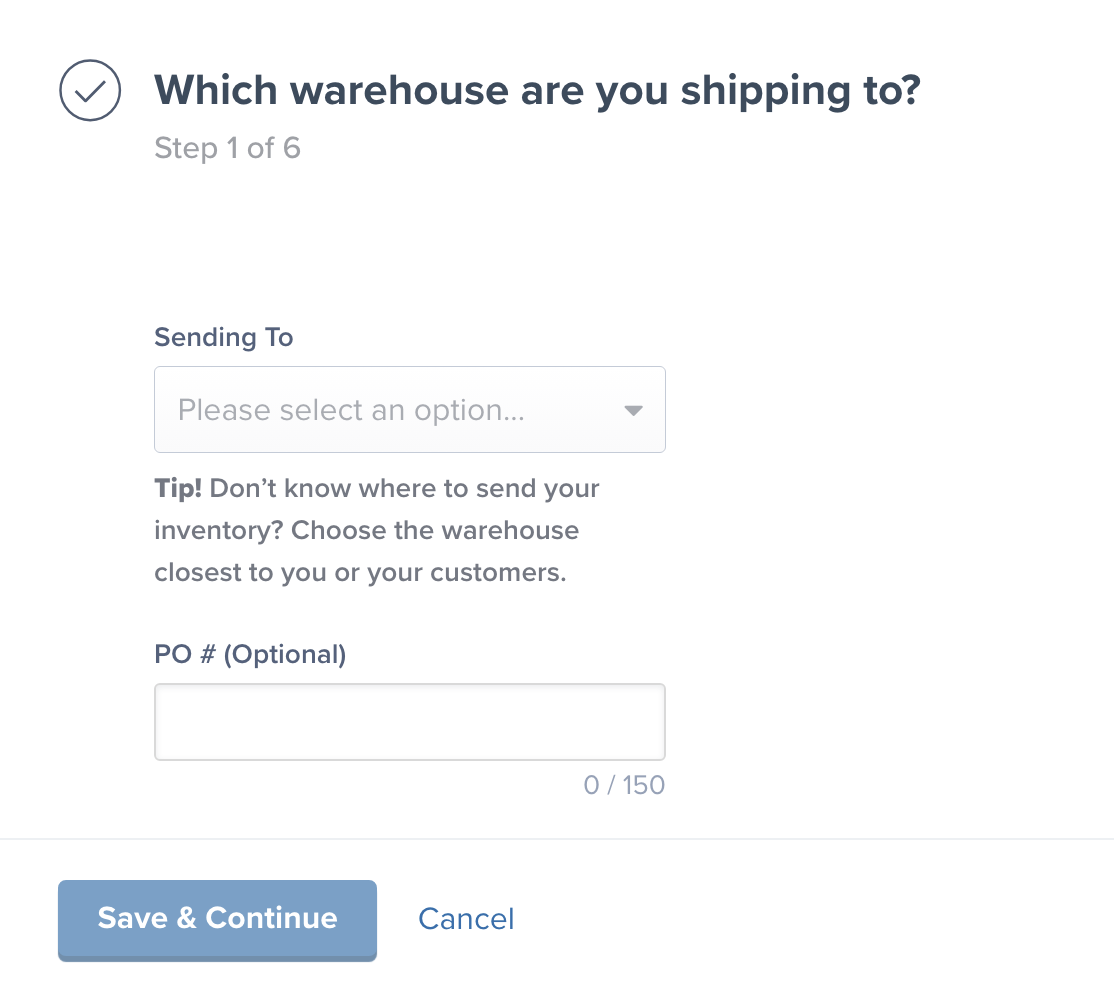 ***
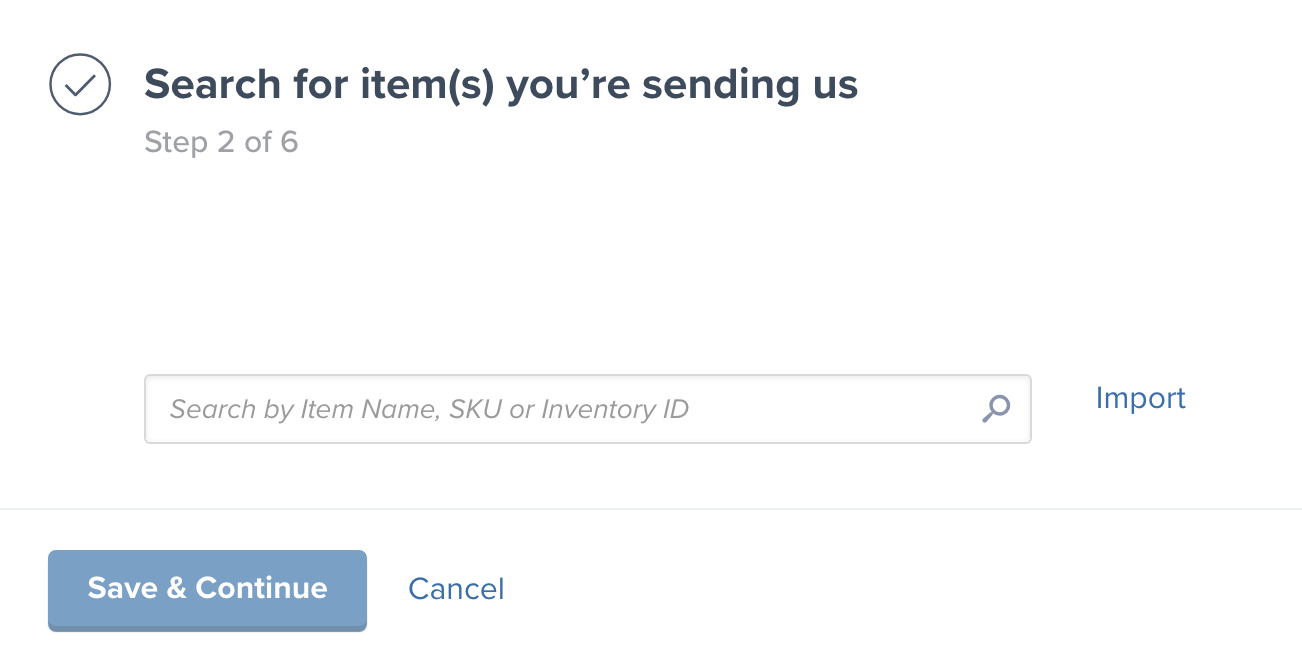
### Step 2: Add Your Products
**To select products for your WRO:**
Search for the items you are sending to Jetpack by:
* **SKU**
* **Product Name**
* **Jetpack ID**
* **Inventory ID** (as listed on the Product Details page)
You can add multiple products during this step.
***
### Step 2: Add Your Products
**To select products for your WRO:**
Search for the items you are sending to Jetpack by:
* **SKU**
* **Product Name**
* **Jetpack ID**
* **Inventory ID** (as listed on the Product Details page)
You can add multiple products during this step.
 **Important Considerations:**
* If your items have **expiration dates**, ensure they are entered correctly
* If your products are classified as **DG/HAZMAT**, confirm they are marked correctly on the Product Details page
* Any discrepancies between the WRO and physical items will result in a URO (Unexpected Receiving Order)
**Important Considerations:**
* If your items have **expiration dates**, ensure they are entered correctly
* If your products are classified as **DG/HAZMAT**, confirm they are marked correctly on the Product Details page
* Any discrepancies between the WRO and physical items will result in a URO (Unexpected Receiving Order)
 ***
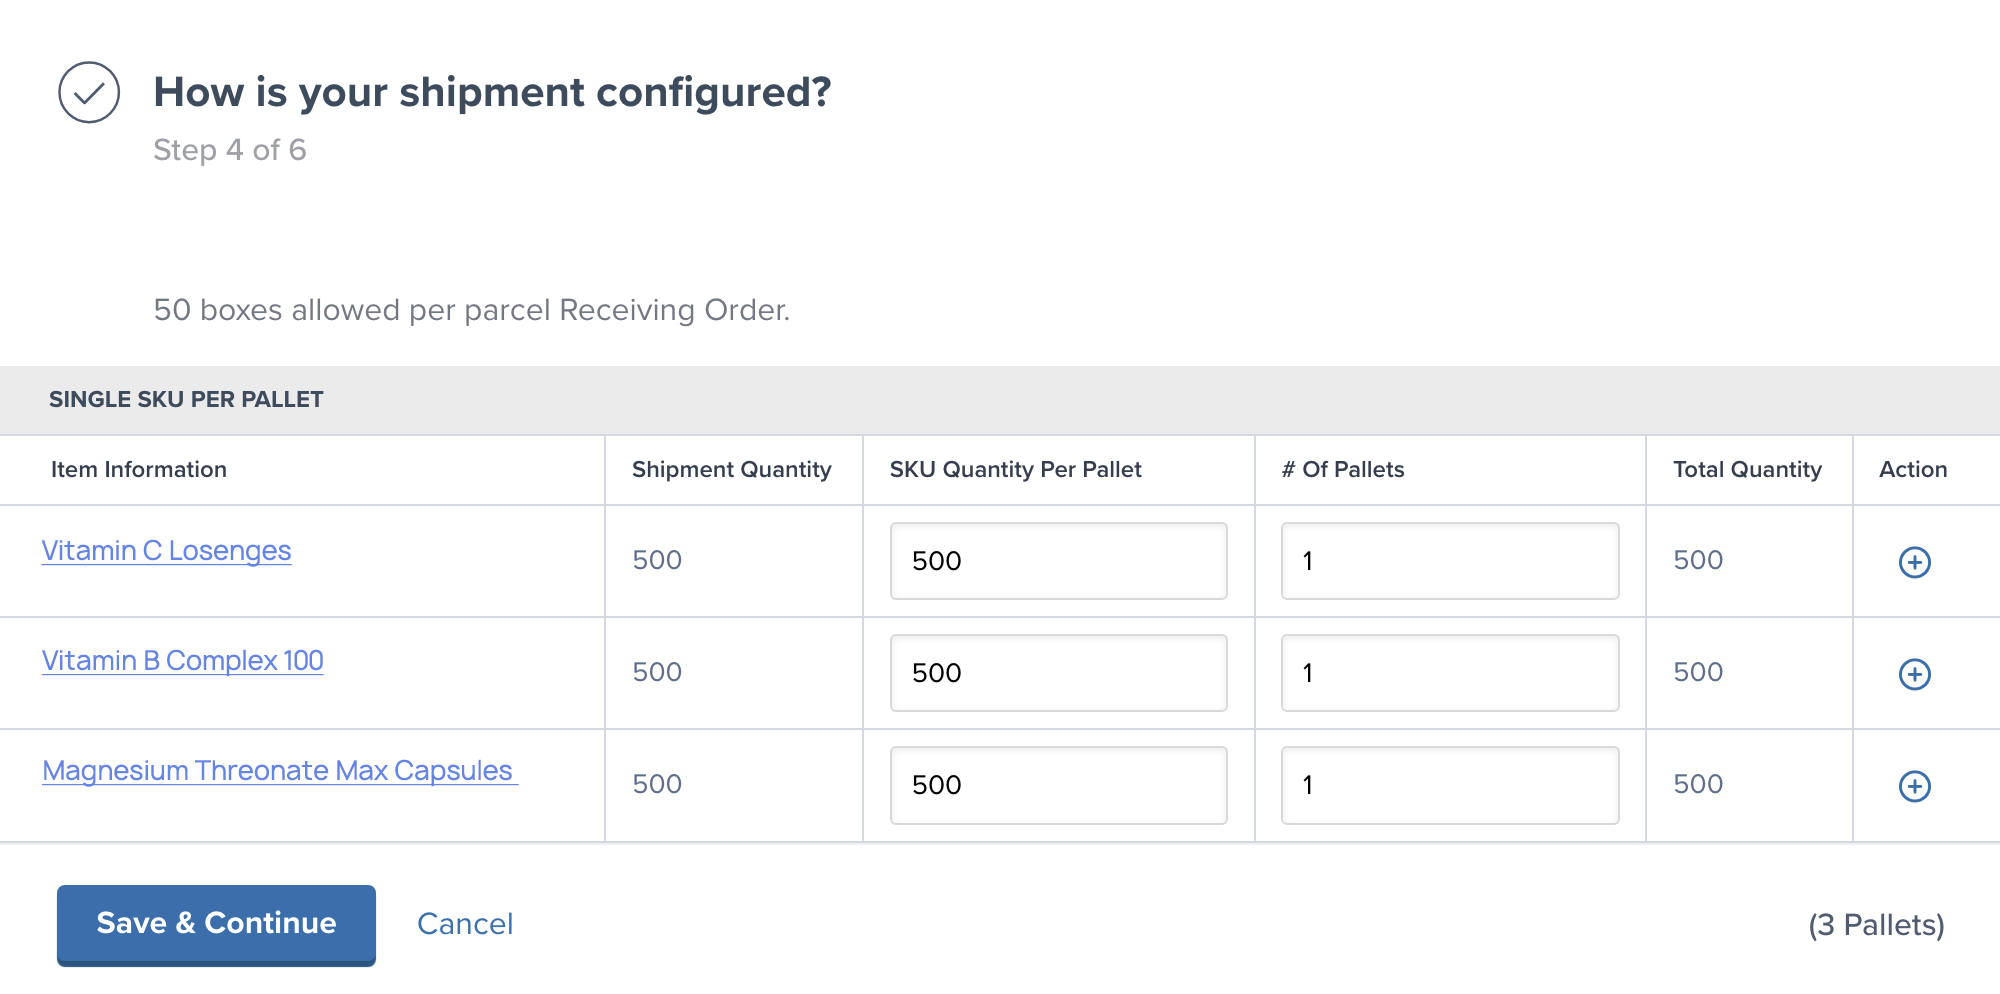
### Step 4: Enter Quantities and Box Information
**To provide detailed shipment information:**
For each product, provide:
1. **Quantity of each item**
2. **Number of boxes** that will contain this quantity
3. **Box dimensions** (length × width × height)
4. **Box weight**
5. **Quantity per box**
Use the **+ button** to add more rows if needed.
***
### Step 4: Enter Quantities and Box Information
**To provide detailed shipment information:**
For each product, provide:
1. **Quantity of each item**
2. **Number of boxes** that will contain this quantity
3. **Box dimensions** (length × width × height)
4. **Box weight**
5. **Quantity per box**
Use the **+ button** to add more rows if needed.
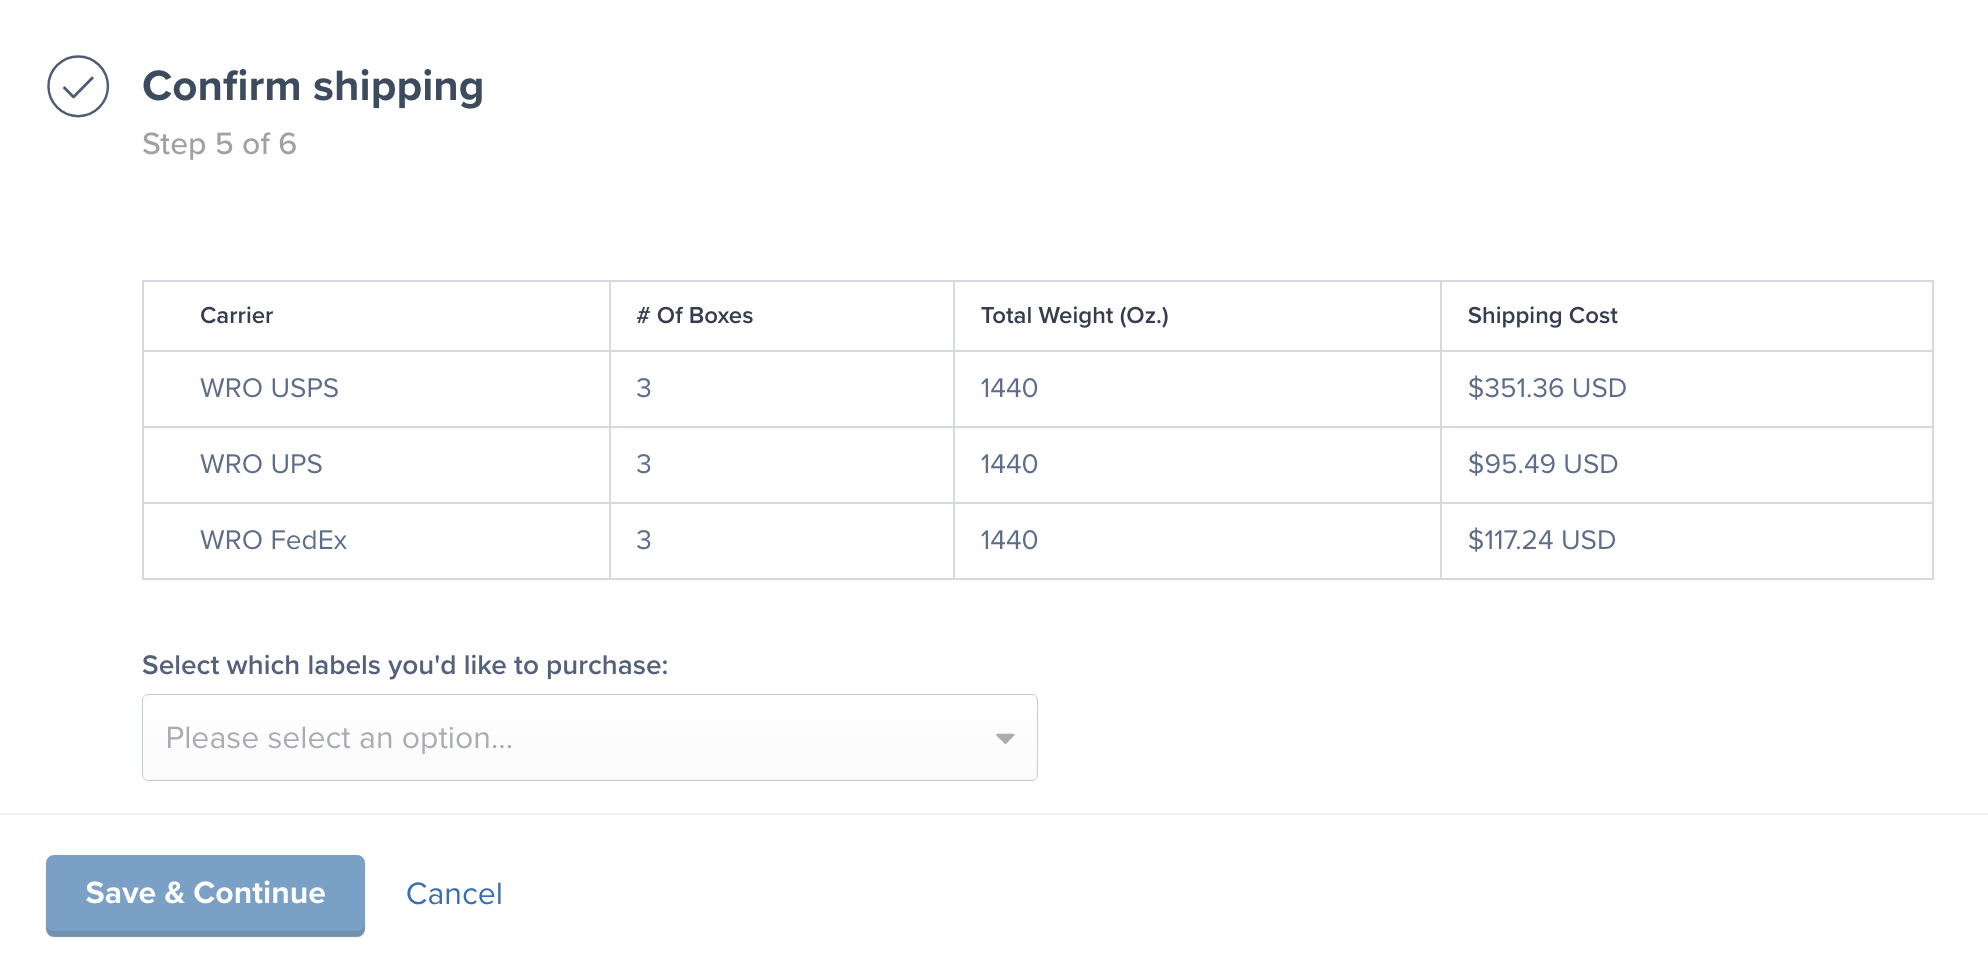 ***
### Step 5: Finalize Your WRO
**Before submitting the WRO, carefully review:**
* Correct fulfillment center selected
* All products and quantities accurate
* Expiration dates correct (if applicable)
* Box information complete
* Shipping details confirmed
Once finalized, the confirmation page will display and your label/packing slip will download. It may take a few minutes for shipping labels to generate.
***
## Booking Dock Appointments for Freight Shipments
If you're sending your inventory via freight and not parcel, read through our guide on [how to book a dock appointment](/fulfillment/sending-inventory/booking-dock-appointments). Booking a dock appointment is required for all freight shipments, only takes a moment, and ensures a smooth delivery to our hub.
***
## Tracking Your WRO Status
**To monitor your WRO progress in the Jetpack dashboard:**
**Go to:** Inventory → Warehouse Receiving Orders
**Status Categories:**
* **Awaiting**: Shipments in transit to fulfillment center
* **Partially Arrived**: Some boxes have arrived (WRO is on hold)
* **Processing**: Jetpack is actively receiving the shipment
* **Completed**: WRO is fully processed and inventory available
***
### Step 5: Finalize Your WRO
**Before submitting the WRO, carefully review:**
* Correct fulfillment center selected
* All products and quantities accurate
* Expiration dates correct (if applicable)
* Box information complete
* Shipping details confirmed
Once finalized, the confirmation page will display and your label/packing slip will download. It may take a few minutes for shipping labels to generate.
***
## Booking Dock Appointments for Freight Shipments
If you're sending your inventory via freight and not parcel, read through our guide on [how to book a dock appointment](/fulfillment/sending-inventory/booking-dock-appointments). Booking a dock appointment is required for all freight shipments, only takes a moment, and ensures a smooth delivery to our hub.
***
## Tracking Your WRO Status
**To monitor your WRO progress in the Jetpack dashboard:**
**Go to:** Inventory → Warehouse Receiving Orders
**Status Categories:**
* **Awaiting**: Shipments in transit to fulfillment center
* **Partially Arrived**: Some boxes have arrived (WRO is on hold)
* **Processing**: Jetpack is actively receiving the shipment
* **Completed**: WRO is fully processed and inventory available
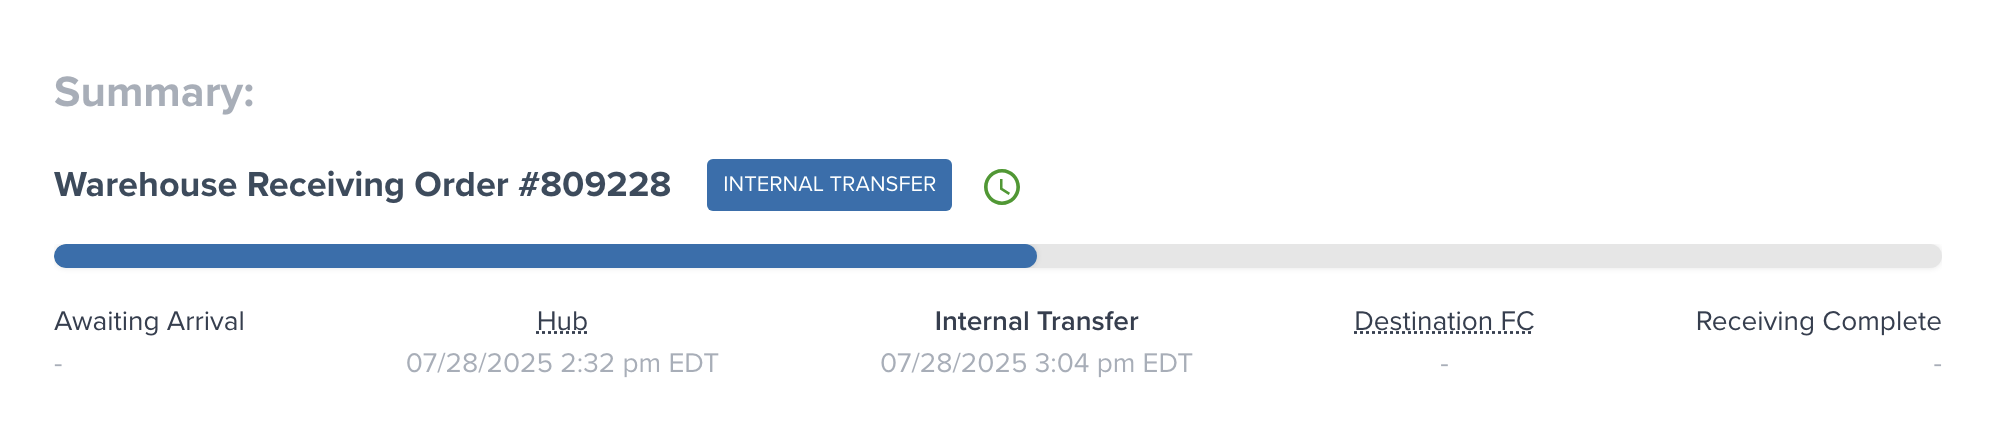
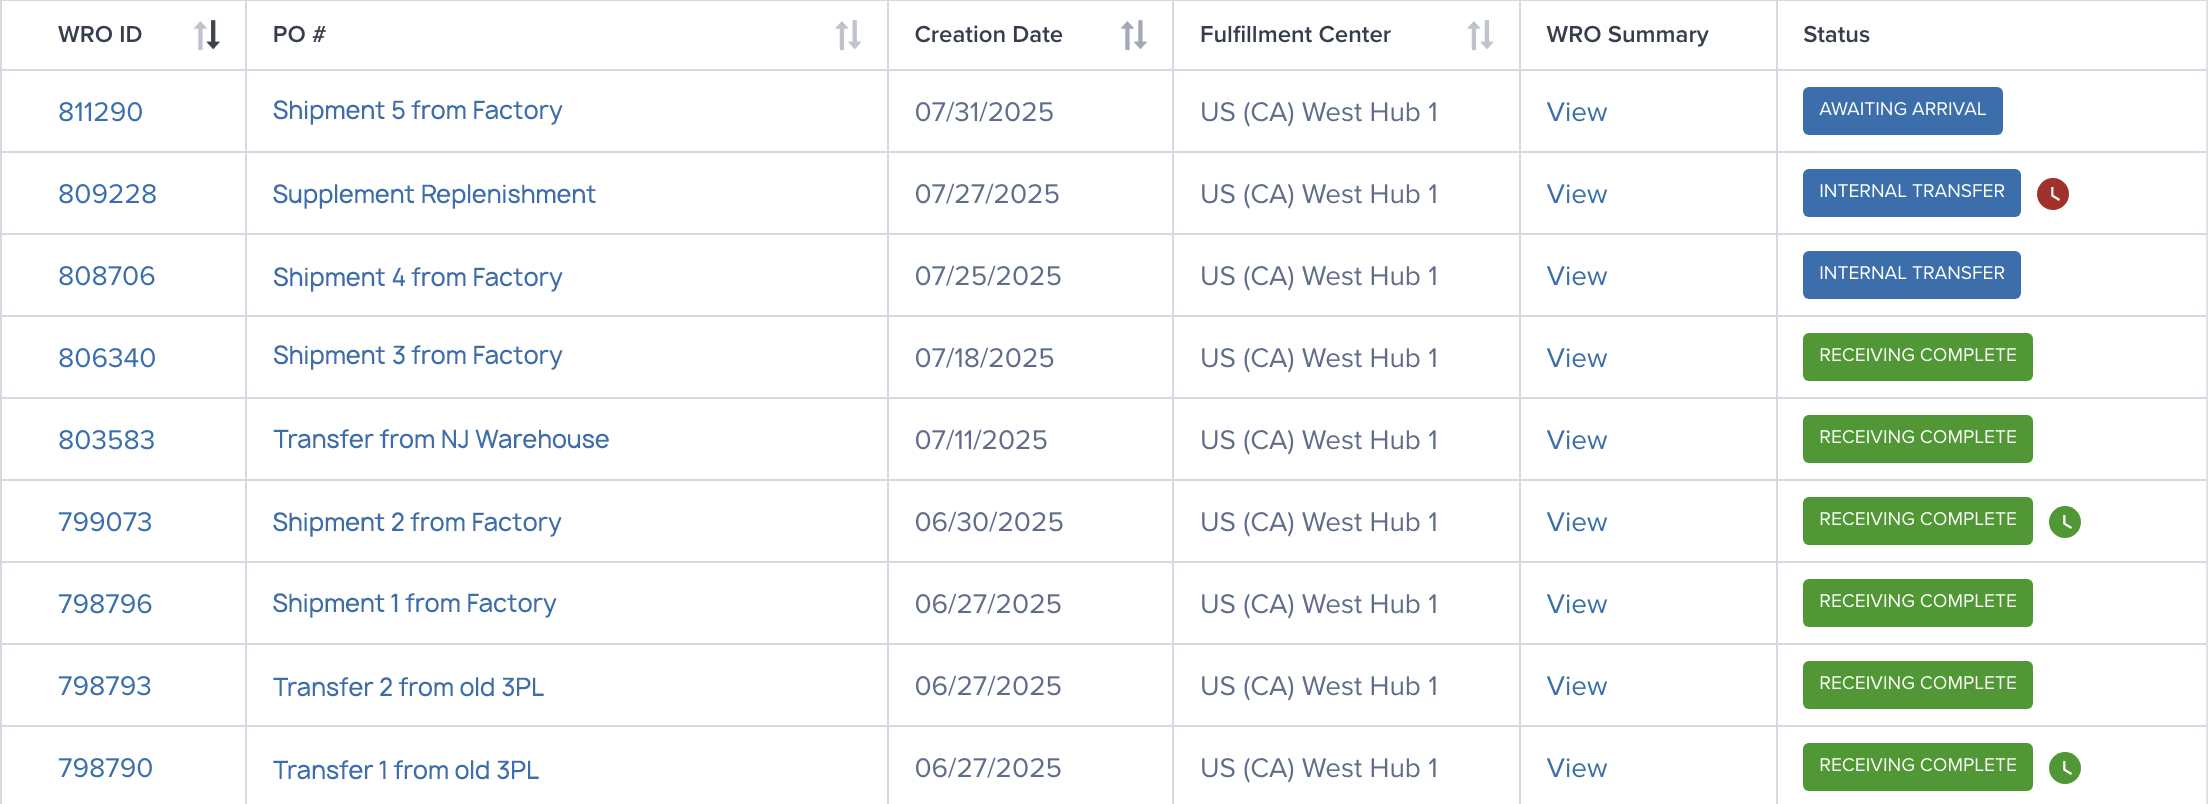 Clicking into an individual WRO will reveal the shipment's details, as well as a handy timeline to show you exactly where in the process your inbound shipment is.
 ***
## Common WRO Mistakes to Avoid
**When creating your WRO, watch out for these common issues:**
* **Incorrect expiration dates** that don't match physical products
* **Missing DG/HAZMAT classifications** on products that require them
* **Inaccurate quantities** between WRO and actual shipment
* **Forgetting to print and attach** WRO labels to boxes/pallets
* **Wrong fulfillment center selection** without coordinating with your team
* **Incomplete box information** that slows down receiving
***
## Common WRO Mistakes to Avoid
**When creating your WRO, watch out for these common issues:**
* **Incorrect expiration dates** that don't match physical products
* **Missing DG/HAZMAT classifications** on products that require them
* **Inaccurate quantities** between WRO and actual shipment
* **Forgetting to print and attach** WRO labels to boxes/pallets
* **Wrong fulfillment center selection** without coordinating with your team
* **Incomplete box information** that slows down receiving
If you have any questions or run into issues, you can always contact Jetpack Care for help. Our team is always here to assist via Slack, phone, or email!