> ## Documentation Index
> Fetch the complete documentation index at: https://help.jetpack3pl.com/llms.txt
> Use this file to discover all available pages before exploring further.
# Sales Channels and Products
> Manage product listings from multiple integrations in a single unified view, with Seller SKUs organized by store name to prevent duplicate base products in your catalog.
Sales channels are integrated into your Jetpack dashboard to help manage product listings from various integrations like Shopify, Amazon, and others. Instead of seeing multiple base products created for the same listing from different integrations, you'll see one product with a main SKU under the Product Details tab, and each integration's Seller SKU along with the store name listed under the Sales Channels tab.
## How Sales Channels Are Automatically Added to Products
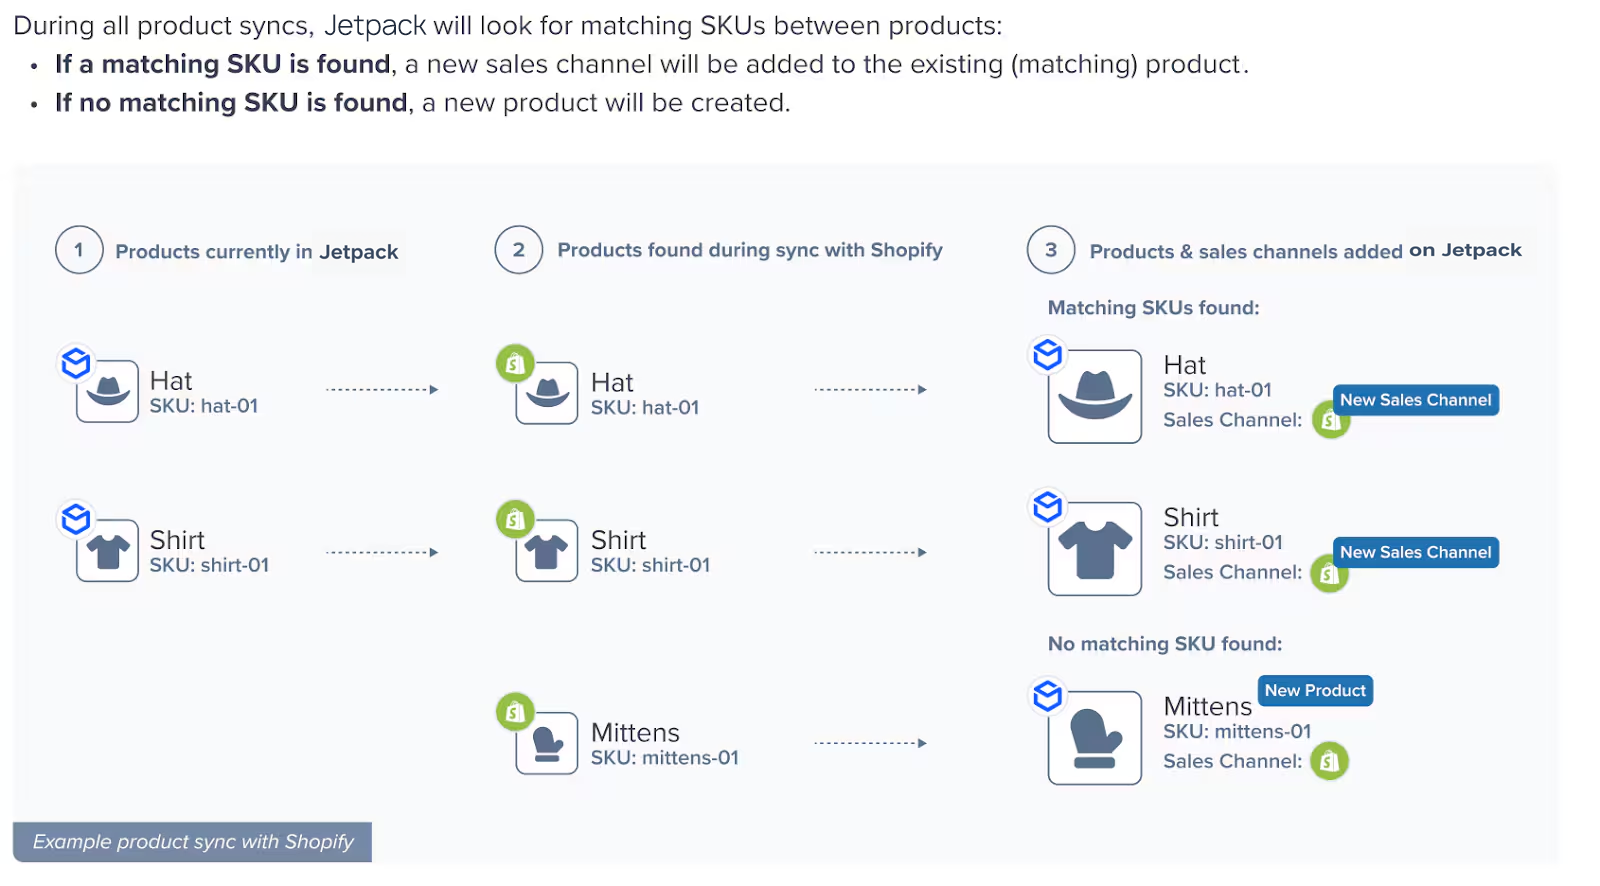
Jetpack automatically processes synced products based on matching SKUs. When a product or order syncs from an integration, Jetpack reviews the product's SKU (from the Product Details tab) and all Seller SKUs already in your catalog to import the correct information.
**The automatic matching process works like this:**
When a product syncs from an integration, Jetpack checks if that SKU already exists in your catalog:
* **If the SKU matches an existing product**: The integration is added as a new sales channel to that product, with the Seller SKU listed under the Sales Channels tab
* **If the SKU doesn't match any existing product**: A new base product is created with that SKU
 ***
## Why Jetpack Adds Sales Channels to Products
Adding different Seller SKUs for various sales channels prevents duplicate base products from being created for multiple listings of the same item.
**Here's a practical example:**
Let's say you have a product named "Hat" with a SKU of "Hat-123" in your dashboard:
* **In a US Shopify store**, the hat's SKU is "Hat-123" (matching the dashboard SKU), so the US Shopify store is automatically added as a sales channel under the "Hat" product, with "Hat-123" shown as the Seller SKU.
* **In a Canadian Shopify store**, the hat's SKU is "CA-Hat-123", which does not match any existing SKU in the dashboard. You can add this as a sales channel manually to the "Hat" product. Once added, the dashboard will search for both "CA-Hat-123" and "Hat-123" during fulfillment.
Update the product's Seller SKU in the Jetpack dashboard before syncing products or importing orders to prevent duplicate base products from being created.
***
## Sales Channels Tab Overview
The Sales Channels tab provides a centralized view of all the integrations and stores where your product is listed.
**What you'll see on the Sales Channels tab:**
* **The integration name** (e.g., Shopify, Amazon, API)
* **Store name(s)** from that integration
* **Corresponding Seller SKU(s)** for each store
* **Status** of each sales channel connection
**Understanding the status indicators:**
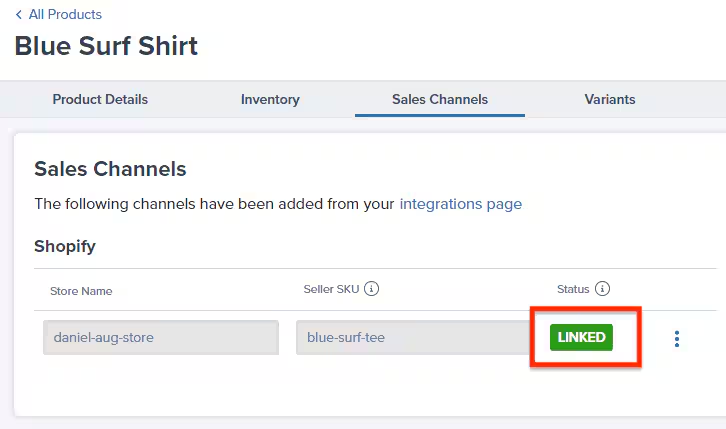
* **Linked**: A matching product (based on the Store Name and Seller SKU) was found during a sync. This means orders for this product will fulfill correctly.
* **Pending**: The newly added Seller SKU has not yet been matched in a sync. It will update to Linked after the next sync. If it doesn't update, ensure the Seller SKU matches between Jetpack and your integration.
***
## Why Jetpack Adds Sales Channels to Products
Adding different Seller SKUs for various sales channels prevents duplicate base products from being created for multiple listings of the same item.
**Here's a practical example:**
Let's say you have a product named "Hat" with a SKU of "Hat-123" in your dashboard:
* **In a US Shopify store**, the hat's SKU is "Hat-123" (matching the dashboard SKU), so the US Shopify store is automatically added as a sales channel under the "Hat" product, with "Hat-123" shown as the Seller SKU.
* **In a Canadian Shopify store**, the hat's SKU is "CA-Hat-123", which does not match any existing SKU in the dashboard. You can add this as a sales channel manually to the "Hat" product. Once added, the dashboard will search for both "CA-Hat-123" and "Hat-123" during fulfillment.
Update the product's Seller SKU in the Jetpack dashboard before syncing products or importing orders to prevent duplicate base products from being created.
***
## Sales Channels Tab Overview
The Sales Channels tab provides a centralized view of all the integrations and stores where your product is listed.
**What you'll see on the Sales Channels tab:**
* **The integration name** (e.g., Shopify, Amazon, API)
* **Store name(s)** from that integration
* **Corresponding Seller SKU(s)** for each store
* **Status** of each sales channel connection
**Understanding the status indicators:**
* **Linked**: A matching product (based on the Store Name and Seller SKU) was found during a sync. This means orders for this product will fulfill correctly.
* **Pending**: The newly added Seller SKU has not yet been matched in a sync. It will update to Linked after the next sync. If it doesn't update, ensure the Seller SKU matches between Jetpack and your integration.
 ***
## Locating a Product's Sales Channels Tab
To view or manage the sales channels for any product, you'll need to navigate to that product's details page.
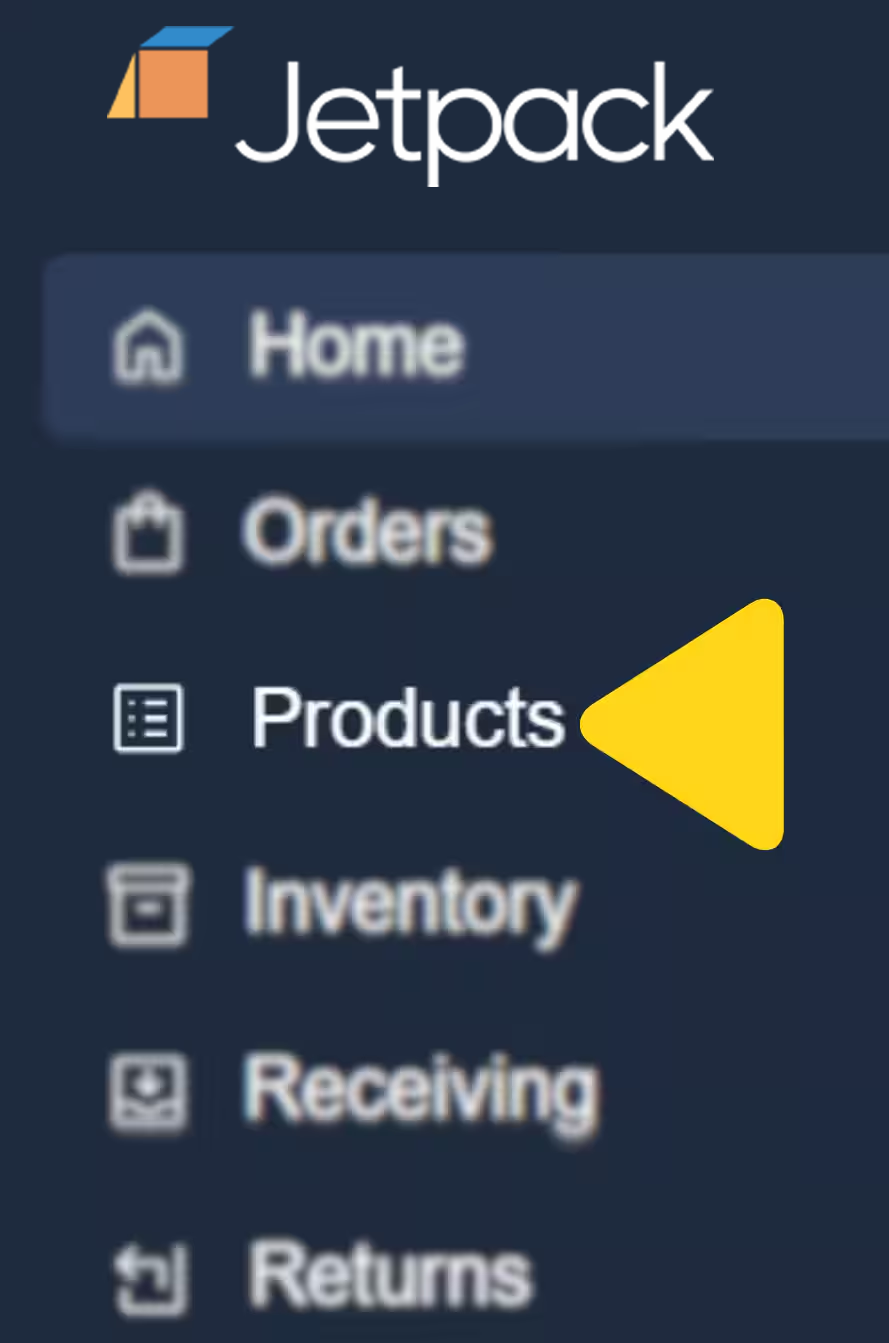
From the Jetpack dashboard, click **Products** in the left-hand navigation bar. You will be redirected to the Product Catalog page.
***
## Locating a Product's Sales Channels Tab
To view or manage the sales channels for any product, you'll need to navigate to that product's details page.
From the Jetpack dashboard, click **Products** in the left-hand navigation bar. You will be redirected to the Product Catalog page.
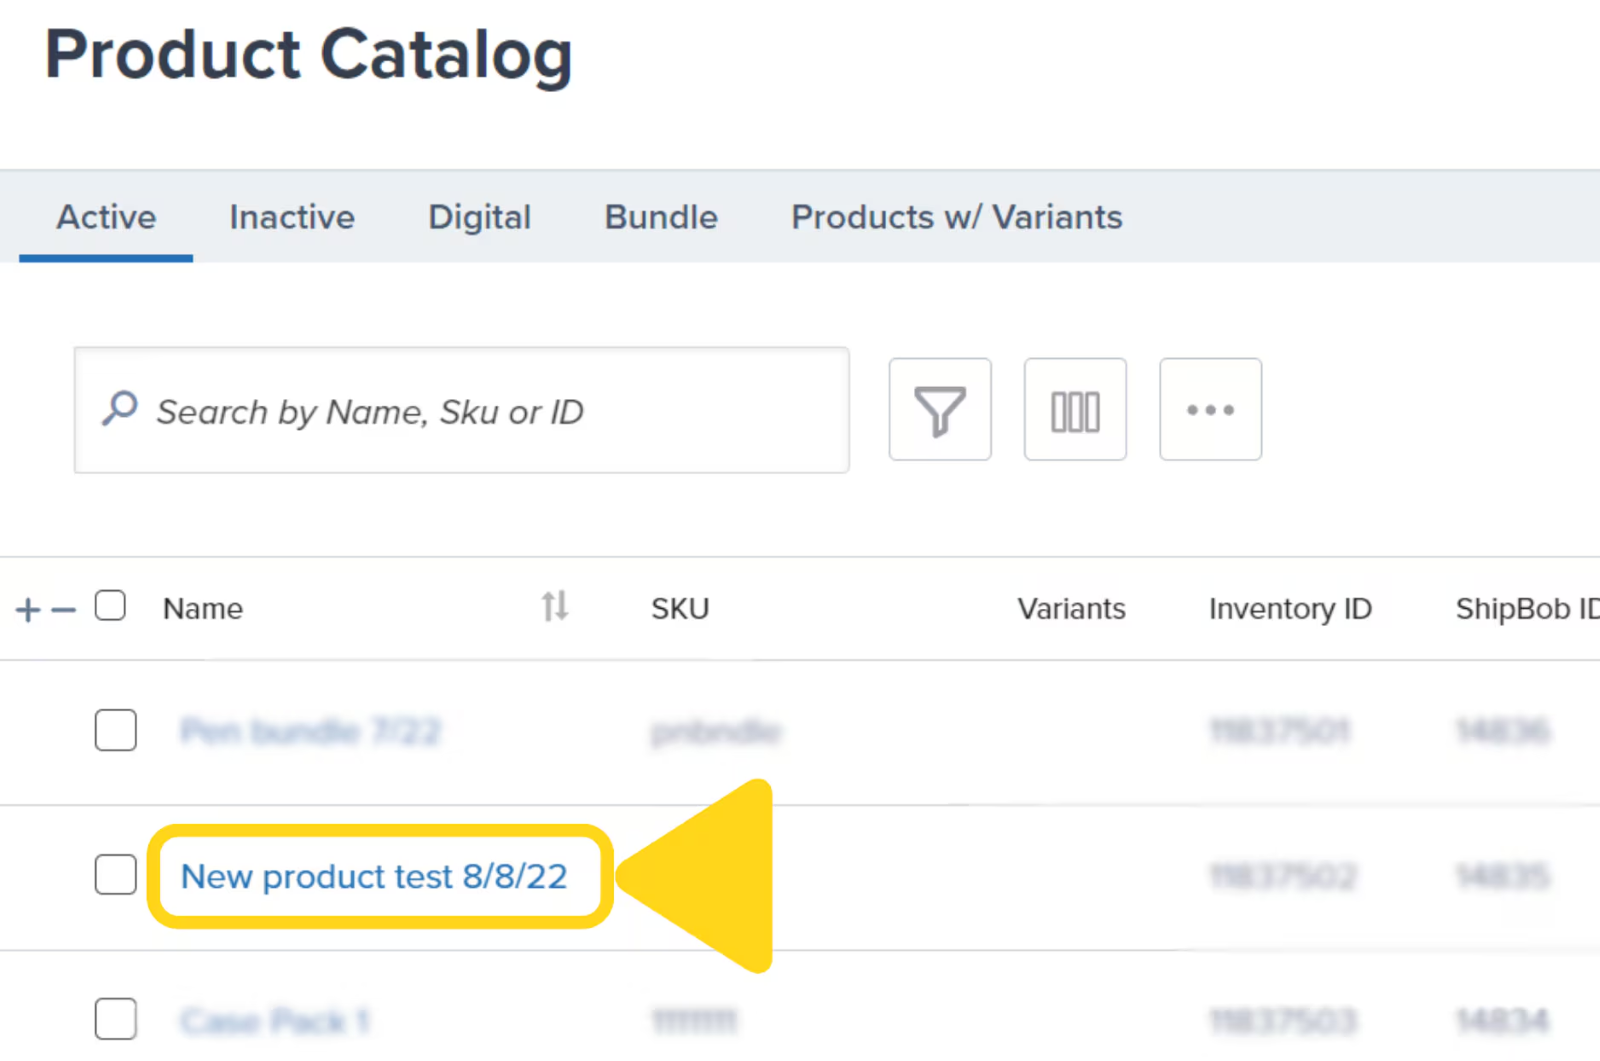
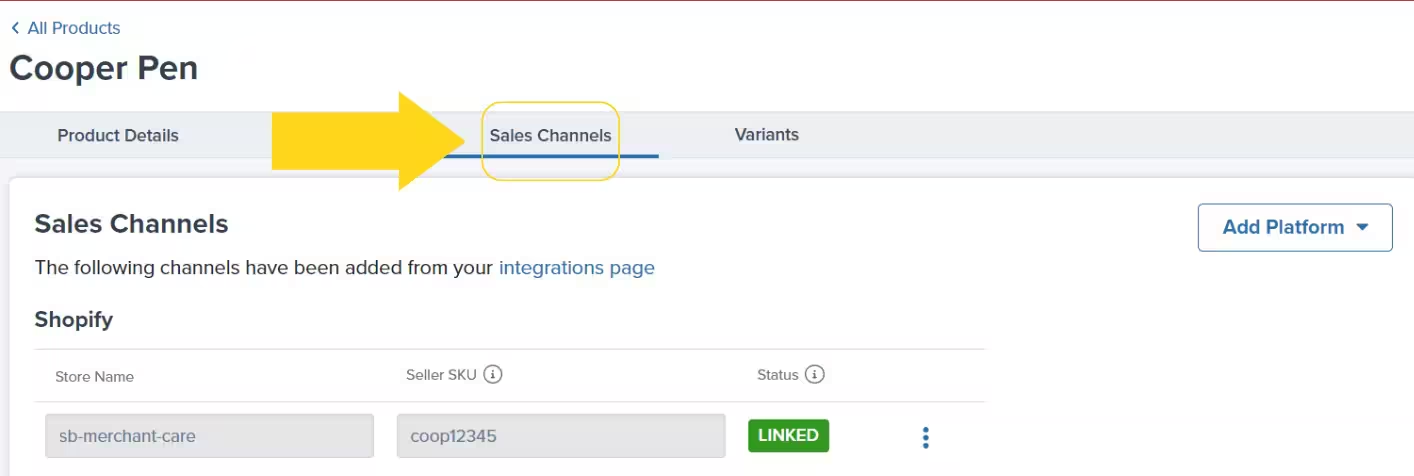
 Locate the product for which you want to review or update sales channels, then click on the product's hyperlinked name to open the Product Details page.
 Select the **Sales Channels** tab to view the corresponding information.
 ***
## Manually Adding a Platform to the Sales Channels Tab
If you need to add a sales channel that isn't already connected to your product, you can do so manually from the Sales Channels tab.
From the product's Sales Channels tab, click the **Add Platform** button.
***
## Manually Adding a Platform to the Sales Channels Tab
If you need to add a sales channel that isn't already connected to your product, you can do so manually from the Sales Channels tab.
From the product's Sales Channels tab, click the **Add Platform** button.
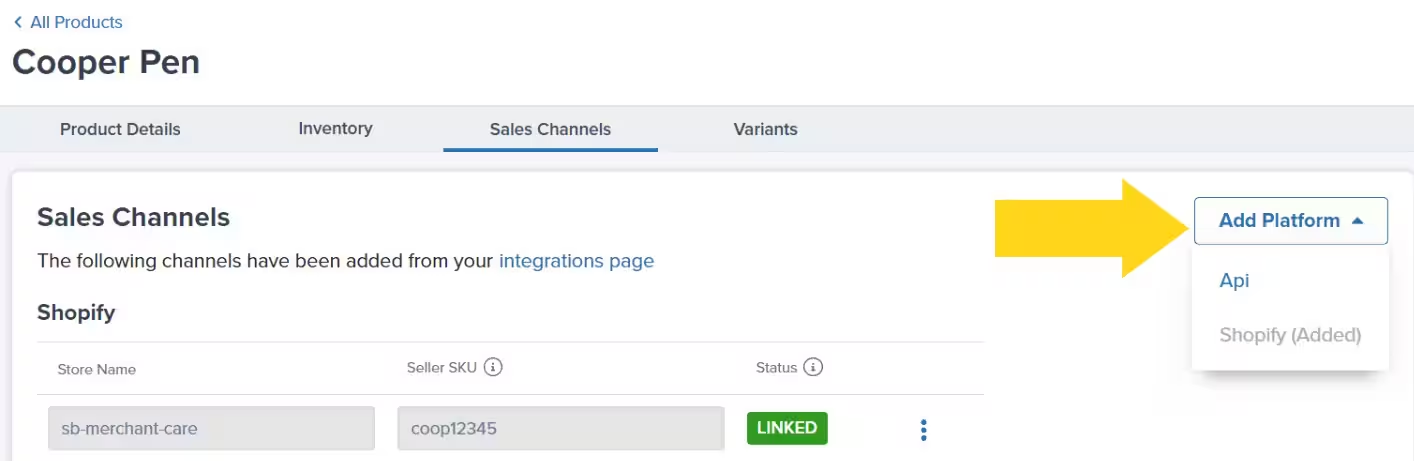 Select the intended sales channel platform from the drop-down menu. Platforms already added will be grayed out and labeled as **(Added)**.
Input the SKU from the sales channel in the textbox under **Seller SKU** next to the desired store name.
Click **Save** at the top right.
Select the intended sales channel platform from the drop-down menu. Platforms already added will be grayed out and labeled as **(Added)**.
Input the SKU from the sales channel in the textbox under **Seller SKU** next to the desired store name.
Click **Save** at the top right.
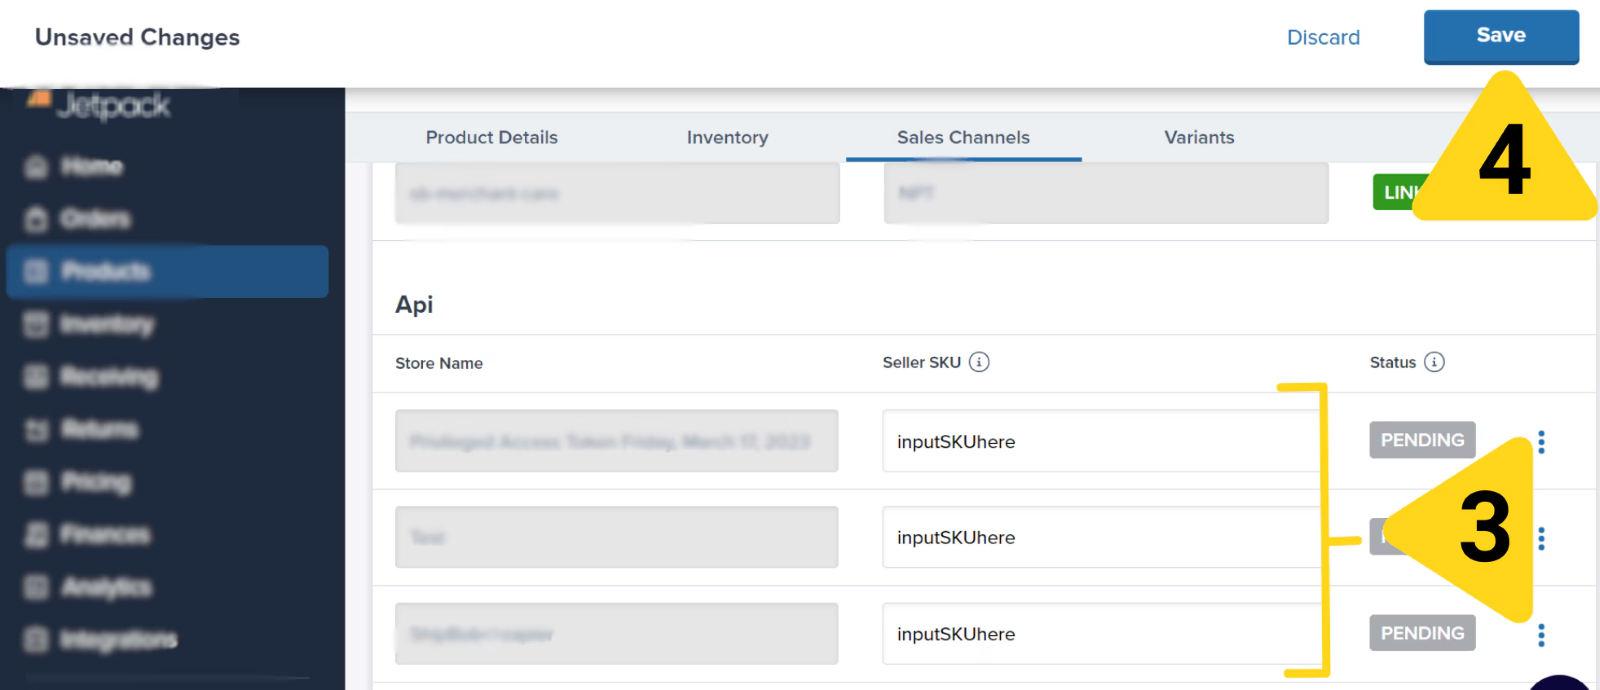 A success message will appear to confirm the update. The store name will display a **Pending** status until a sync identifies a matching SKU.
**For multiple listings of the same product on one sales channel:**
If you have multiple listings with different SKUs on the same platform (e.g., two different Shopify stores), you can add additional Seller SKUs:
Click the **three vertical dots icon** next to the store name.
A success message will appear to confirm the update. The store name will display a **Pending** status until a sync identifies a matching SKU.
**For multiple listings of the same product on one sales channel:**
If you have multiple listings with different SKUs on the same platform (e.g., two different Shopify stores), you can add additional Seller SKUs:
Click the **three vertical dots icon** next to the store name.
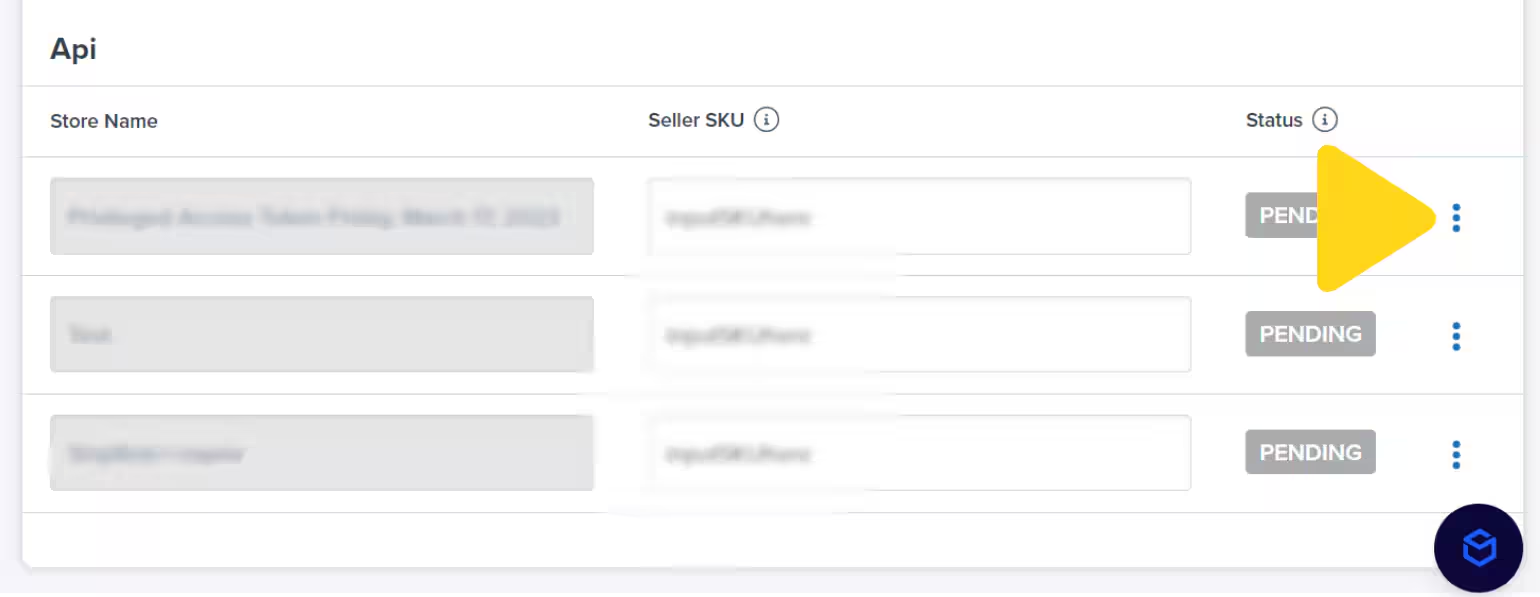 Select **Add Seller SKU** from the menu.
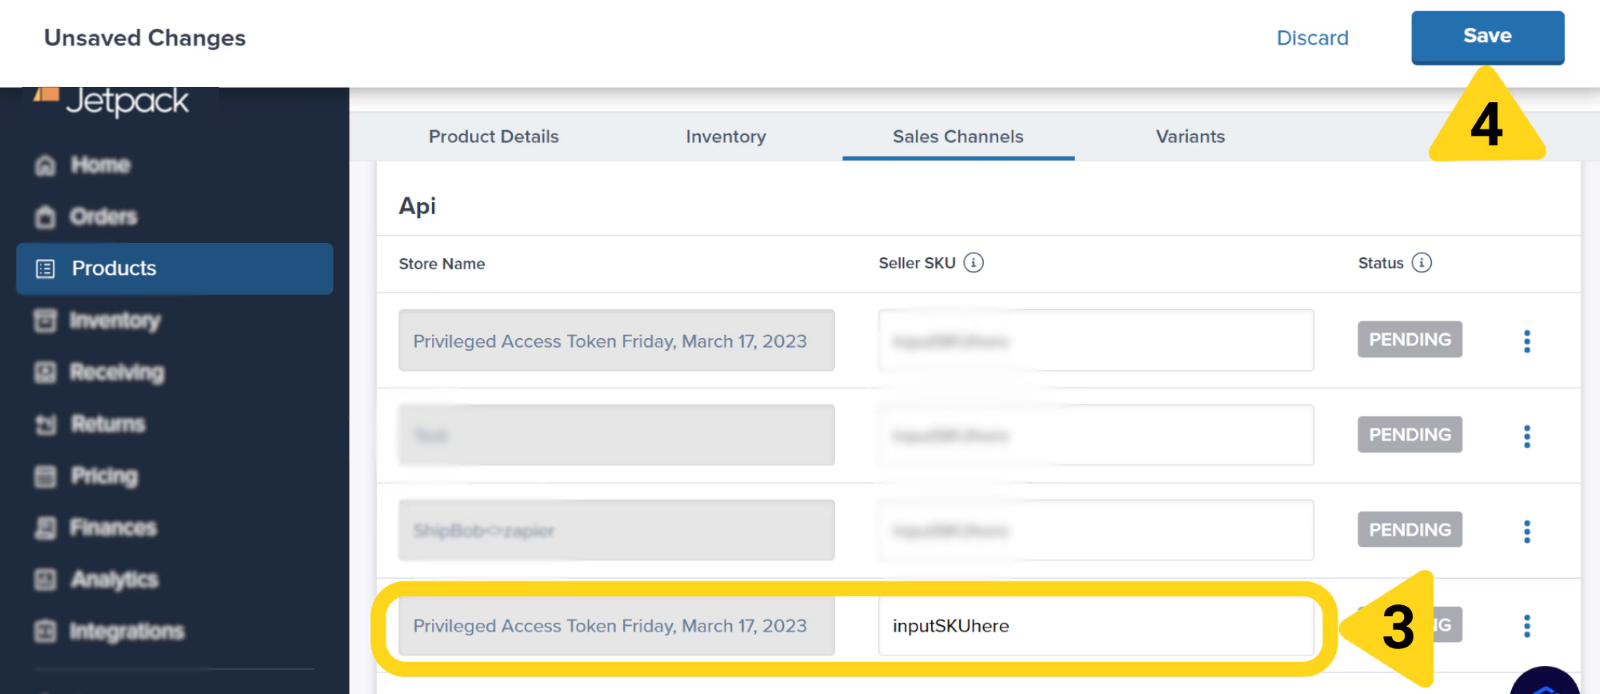
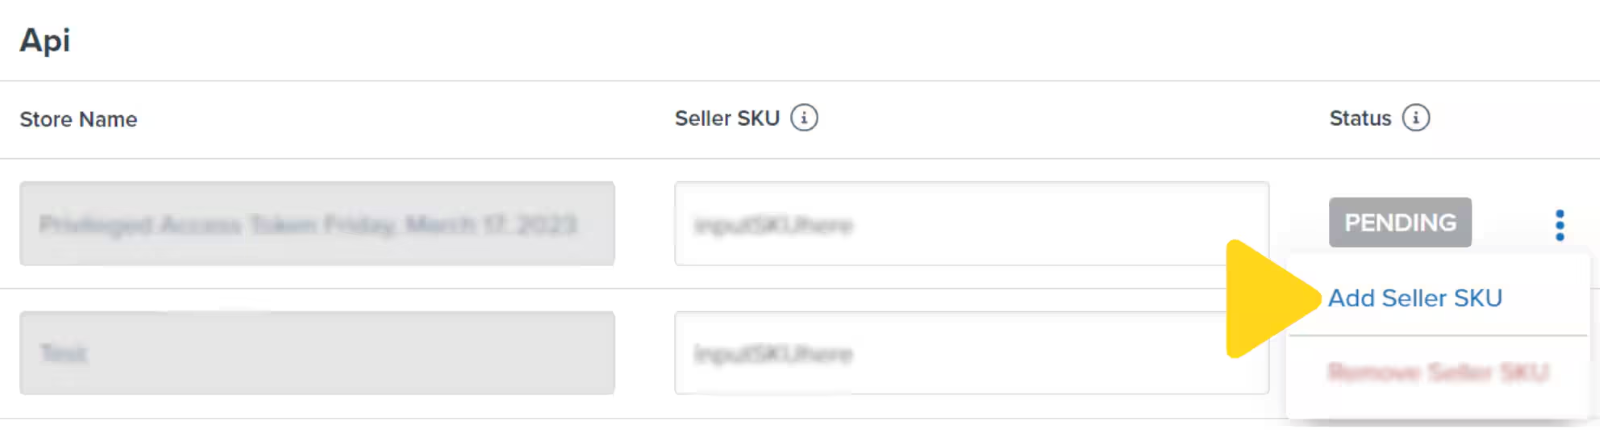 Input the SKU in the textbox.
Click **Save**.
Input the SKU in the textbox.
Click **Save**.
 ***
## Deleting Sales Channels
If you need to remove a sales channel connection from a product, you can delete it from the Sales Channels tab.
From the product's Sales Channels tab, click the **three vertical dots icon** next to the desired store name.
***
## Deleting Sales Channels
If you need to remove a sales channel connection from a product, you can delete it from the Sales Channels tab.
From the product's Sales Channels tab, click the **three vertical dots icon** next to the desired store name.
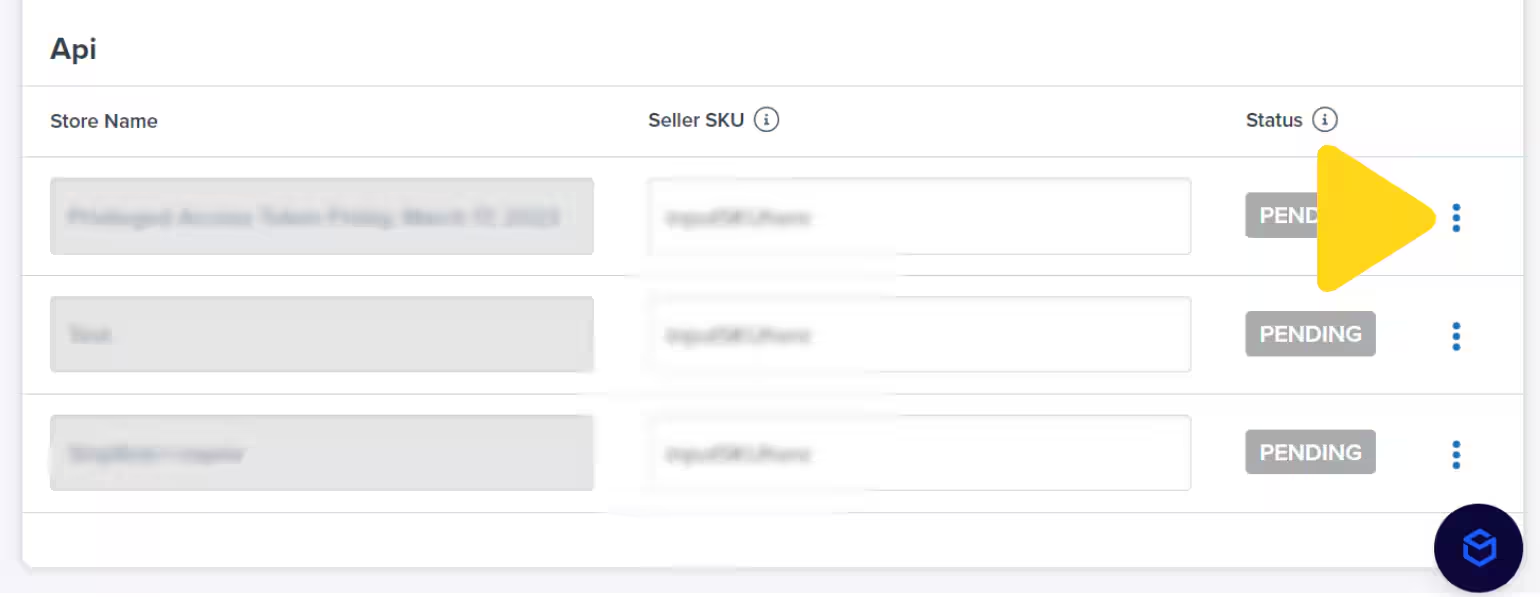 Select **Remove Seller SKU** from the drop-down menu.
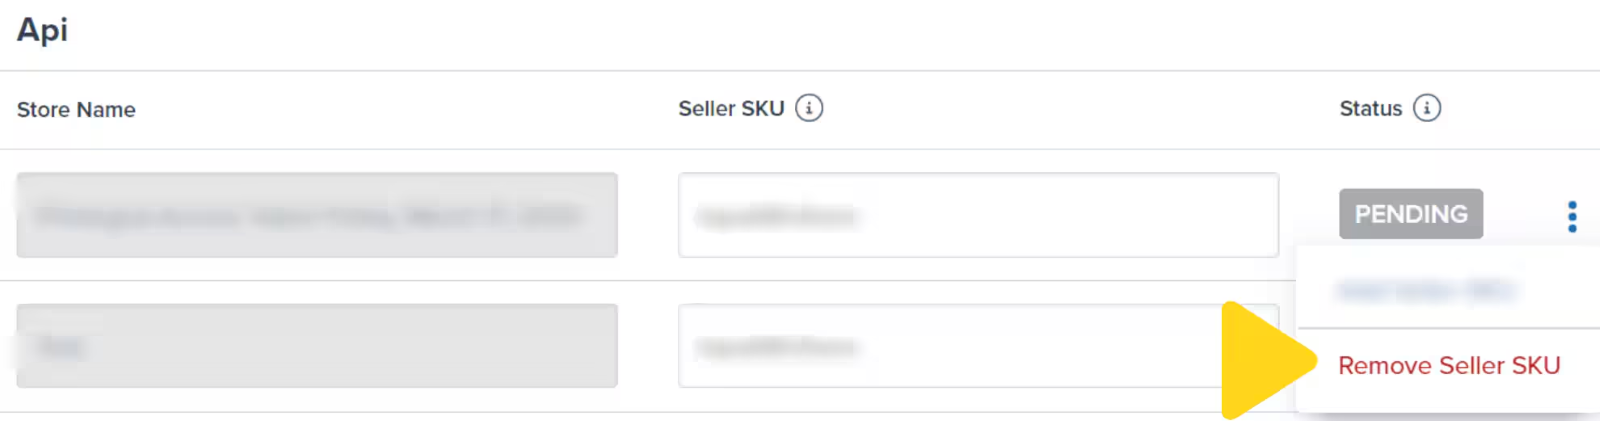 A pop-up window will appear. Review the message and click **Remove Seller SKU**.
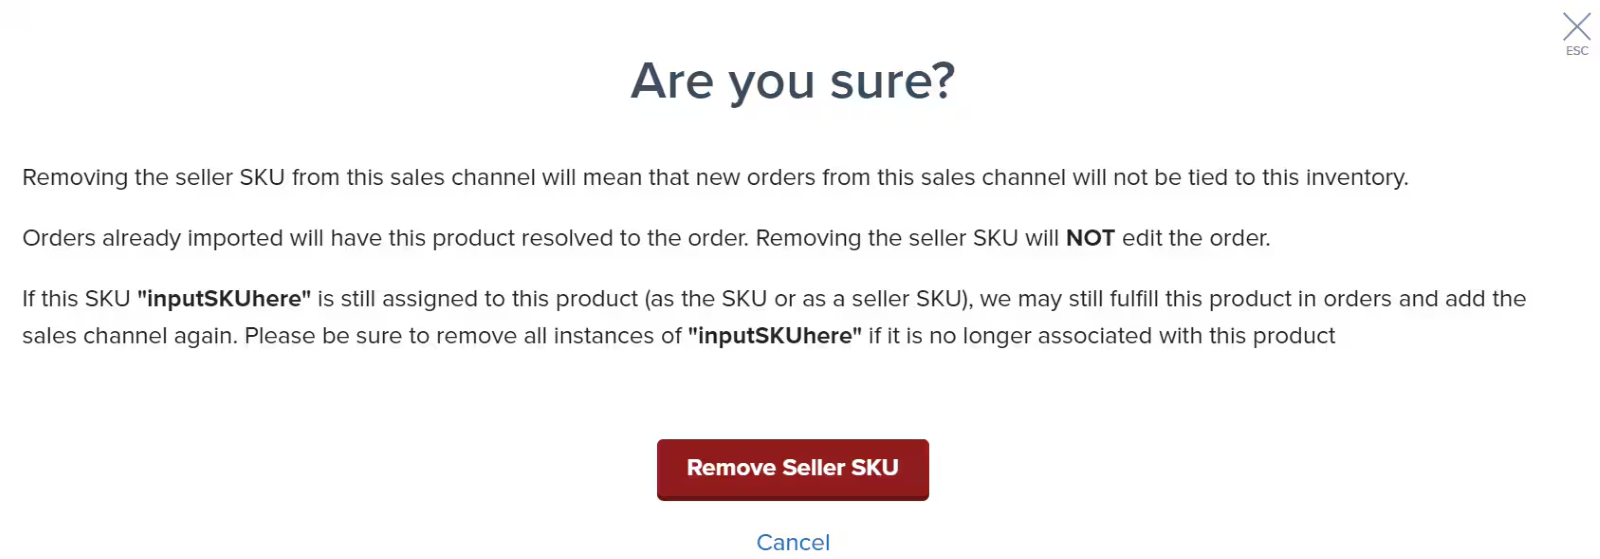 A success message will appear to confirm the deletion.
If you do not update the product's SKU (under the Product Details tab) after deleting a sales channel, the product will be re-linked once a product or order sync is completed. To prevent this, update your SKU in Jetpack and/or on the sales channel platform.
***
## Let's Dive Deeper
Master your product catalog management
Explore all product detail fields and tabs
Configure product settings and options
Manage product variations across stores
Reorganize your product catalog structure
Connect your ecommerce platforms
Import products from integrated stores
Selling non-physical items
A success message will appear to confirm the deletion.
If you do not update the product's SKU (under the Product Details tab) after deleting a sales channel, the product will be re-linked once a product or order sync is completed. To prevent this, update your SKU in Jetpack and/or on the sales channel platform.
***
## Let's Dive Deeper
Master your product catalog management
Explore all product detail fields and tabs
Configure product settings and options
Manage product variations across stores
Reorganize your product catalog structure
Connect your ecommerce platforms
Import products from integrated stores
Selling non-physical items

Questions? Contact Jetpack Care.
If you have any questions or run into issues, you can always contact Jetpack Care for help. Our team is always here to assist via Slack, phone, or email!