> ## Documentation Index
> Fetch the complete documentation index at: https://help.jetpack3pl.com/llms.txt
> Use this file to discover all available pages before exploring further.
# Managing Product Catalog Views
> Save custom column configurations and filter combinations to quickly organize and access your products exactly how you need them.
Product Catalog views let you save personalized layouts with specific filters and column arrangements, making it easy to switch between different ways of organizing your products. Your saved views appear as quick-access links at the top of your Product Catalog page, alongside default product lists like Active, Inactive, Digital, and Bundle.
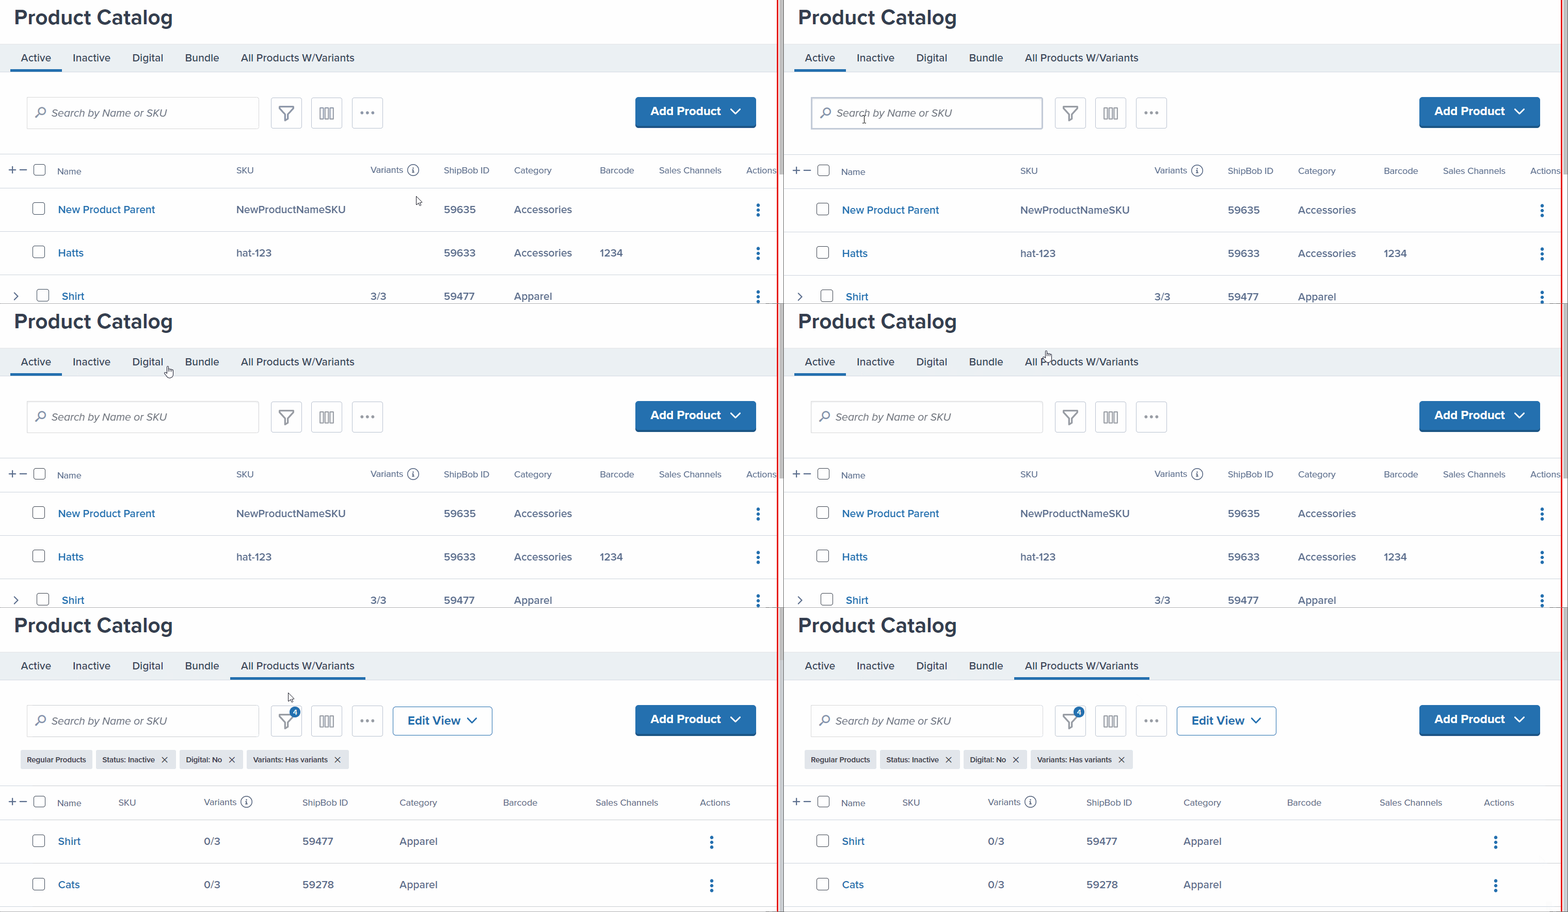 ## Creating a Saved View
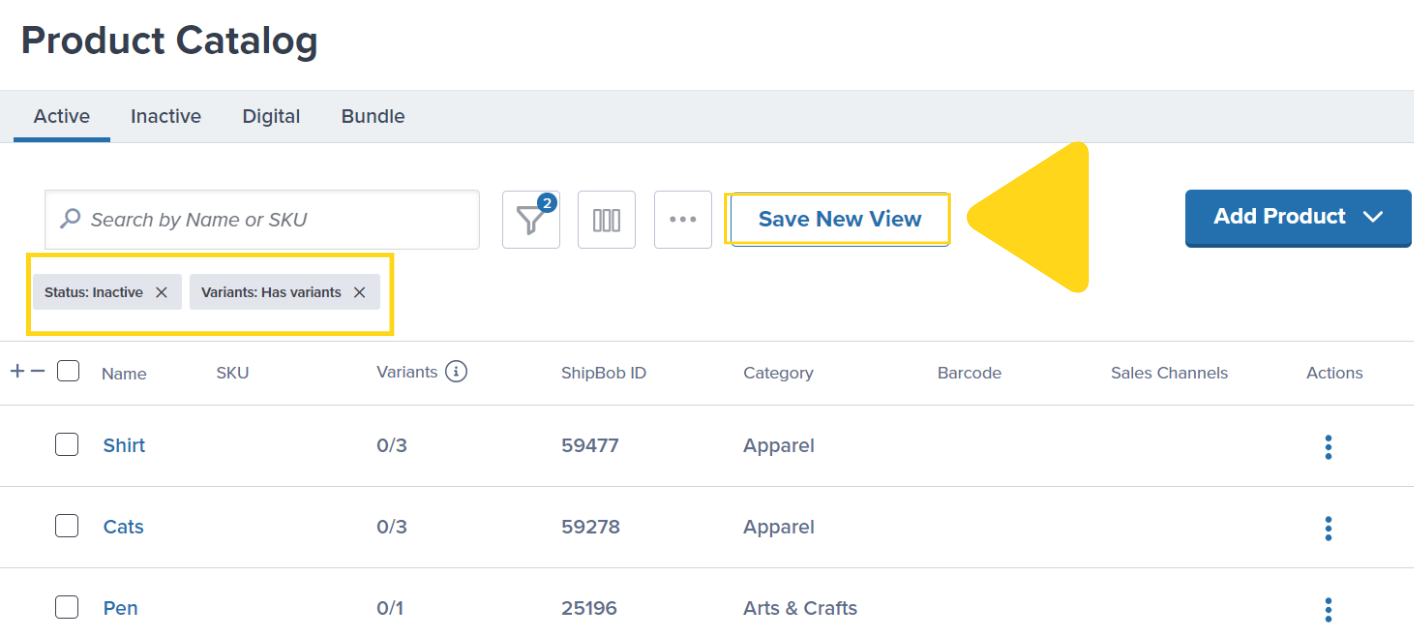
The active filters can be seen under the search bar. After filtering and/or rearranging columns on the Product Catalog page, follow these steps:
A pop-up menu will appear.
## Creating a Saved View
The active filters can be seen under the search bar. After filtering and/or rearranging columns on the Product Catalog page, follow these steps:
A pop-up menu will appear.
 In the textbox provided, type a descriptive name for your view.
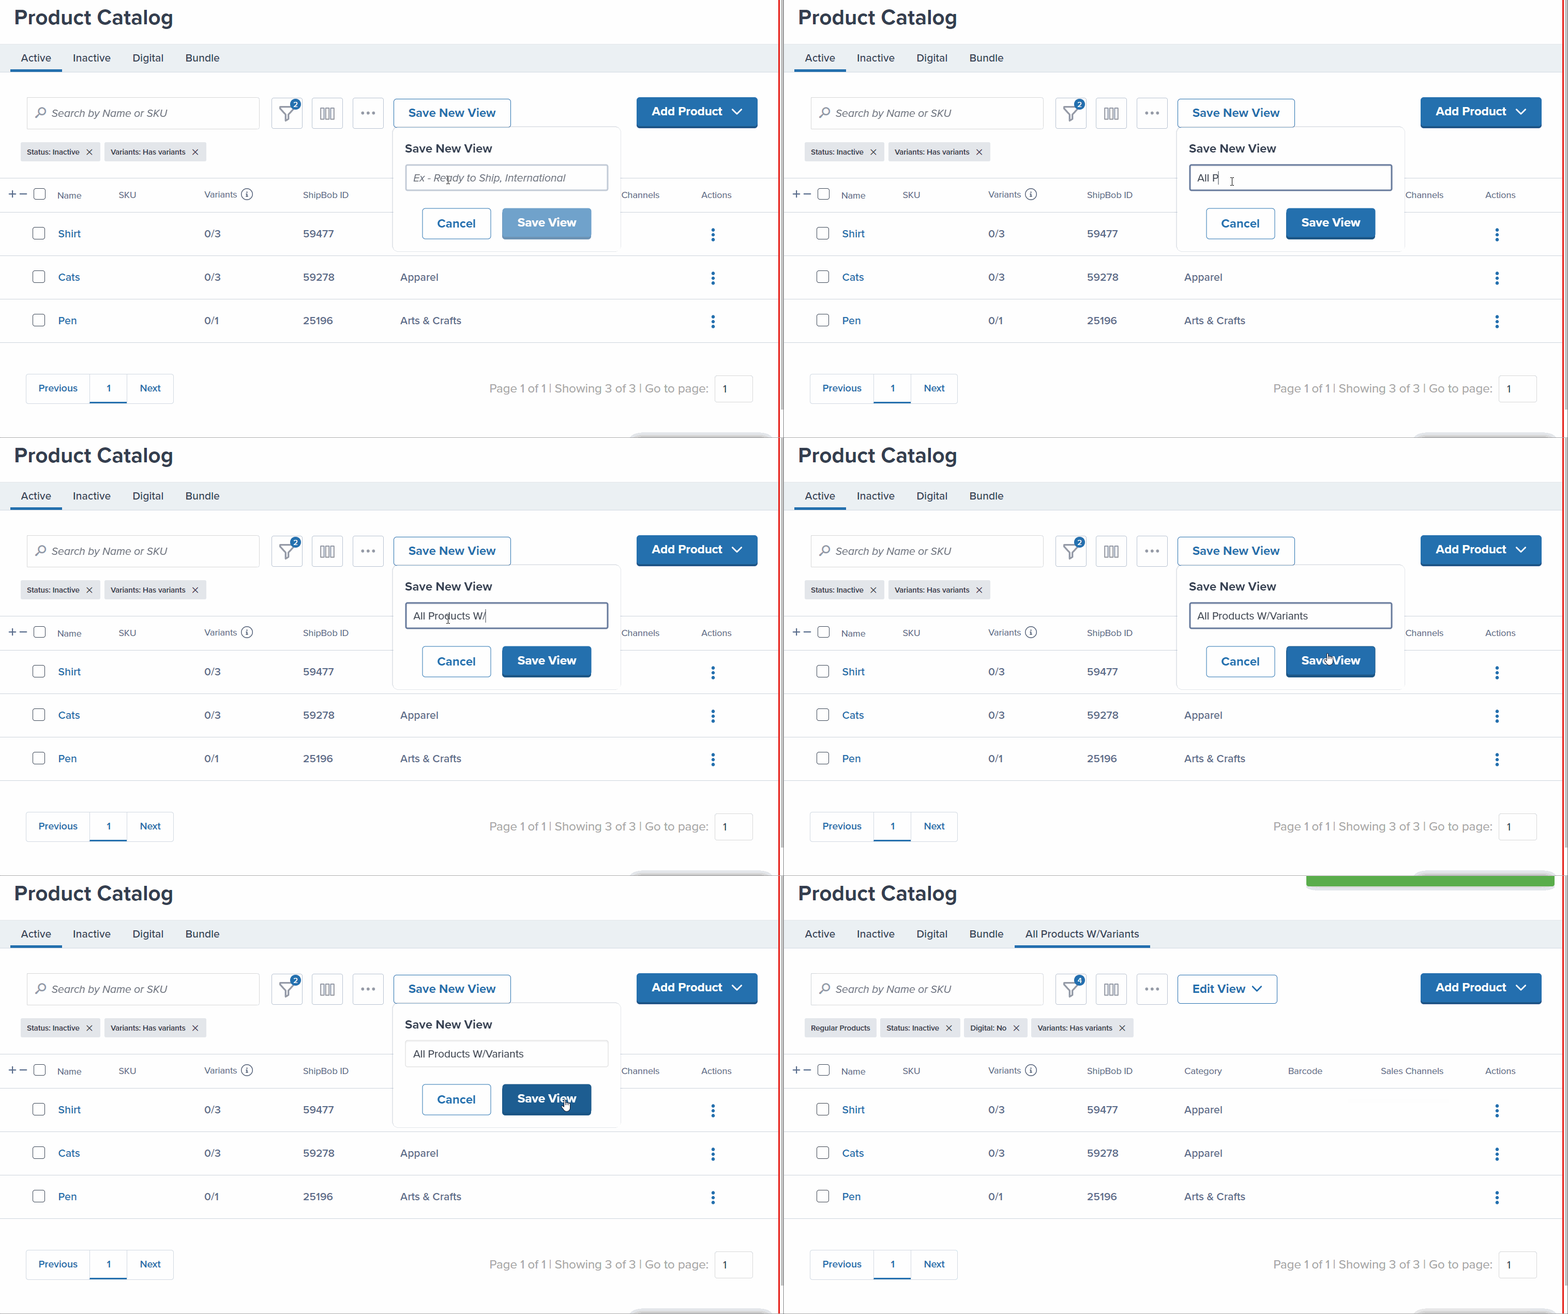 A success message will appear to confirm that your view is saved.
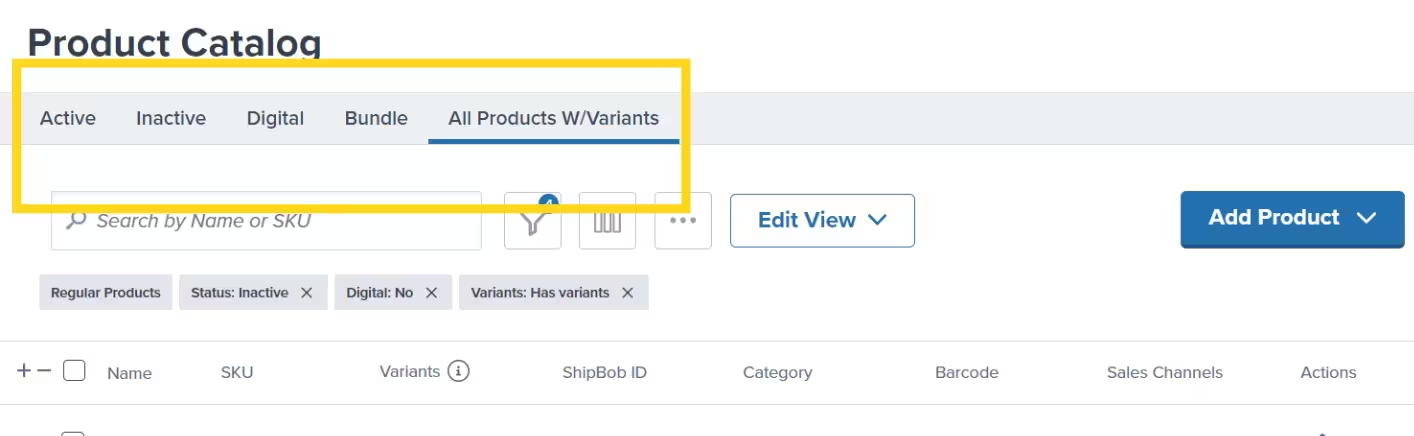
The saved view's name will appear at the top of your page, providing quick access along with hyperlinks to product lists (Active, Inactive, Digital, Bundle) and other saved views.
A success message will appear to confirm that your view is saved.
The saved view's name will appear at the top of your page, providing quick access along with hyperlinks to product lists (Active, Inactive, Digital, Bundle) and other saved views.
 ***
## Editing the Name of Saved Views
To update the name of a saved view:
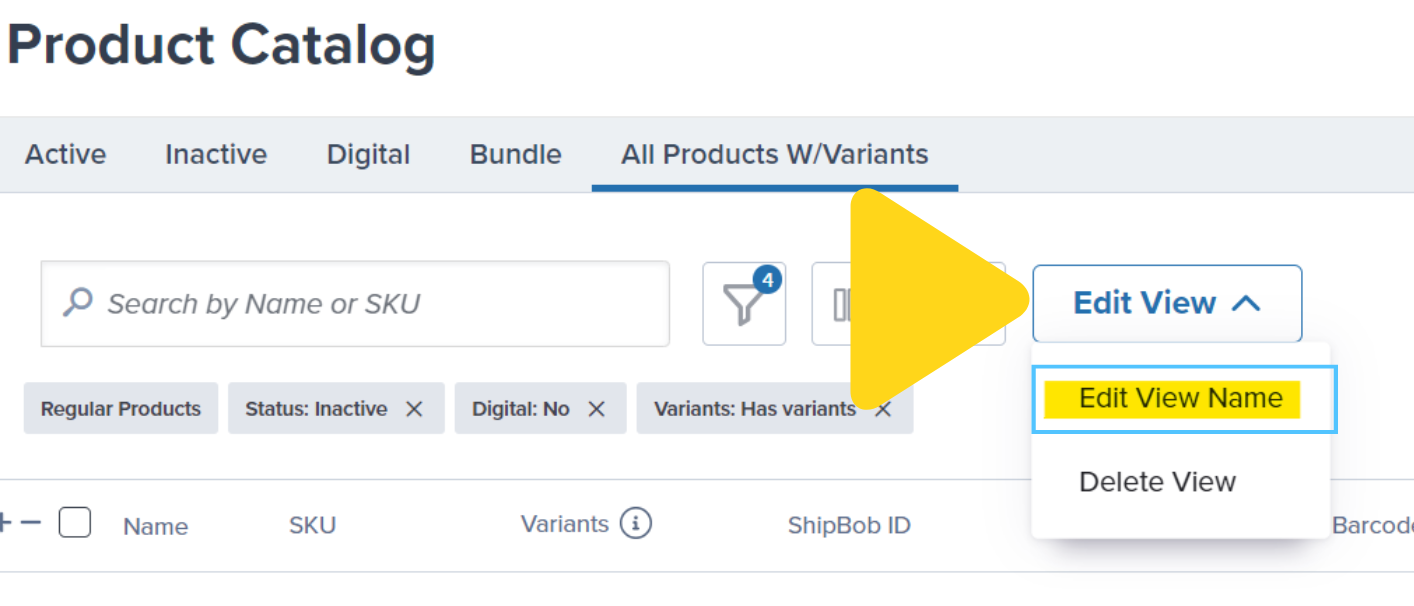
Select the hyperlinked view name from the top of the page.
From the drop-down menu, select **Edit View Name**. A pop-up menu will appear with the current name pre-populated in the textbox.
***
## Editing the Name of Saved Views
To update the name of a saved view:
Select the hyperlinked view name from the top of the page.
From the drop-down menu, select **Edit View Name**. A pop-up menu will appear with the current name pre-populated in the textbox.
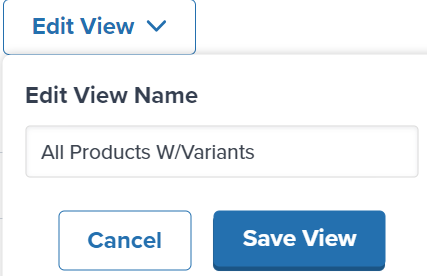
 In the textbox, enter the new name for your view.
A success message will appear to confirm that your view is saved.
***
## Editing Saved Views
To modify the filters and/or column arrangement of a saved view:
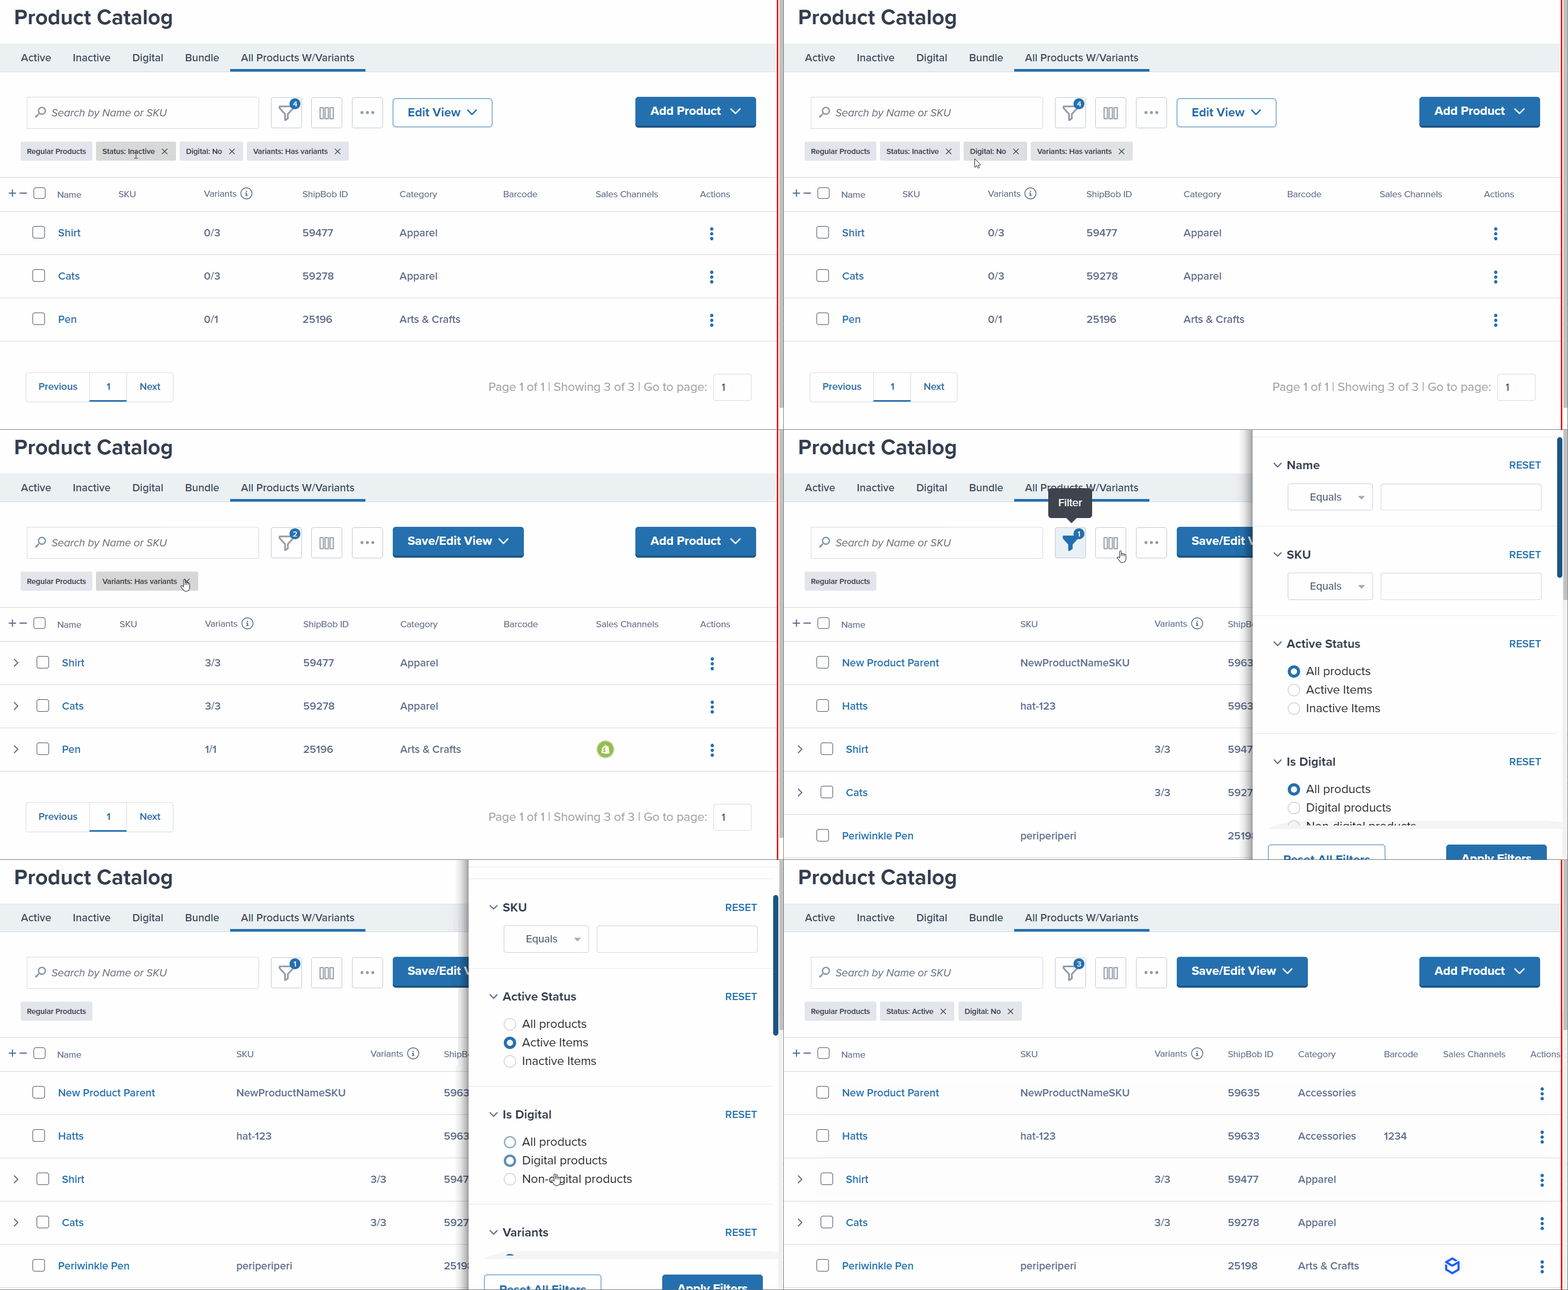
Click the **X** next to the filter name under the search bar.
Click the **funnel icon** for advanced filter options and to rearrange your columns.
Click **Apply Filters** to update the display.
In the textbox, enter the new name for your view.
A success message will appear to confirm that your view is saved.
***
## Editing Saved Views
To modify the filters and/or column arrangement of a saved view:
Click the **X** next to the filter name under the search bar.
Click the **funnel icon** for advanced filter options and to rearrange your columns.
Click **Apply Filters** to update the display.
 Then, to save these changes:
Locate and click the **Save/Edit View** drop-down.
Then, to save these changes:
Locate and click the **Save/Edit View** drop-down.
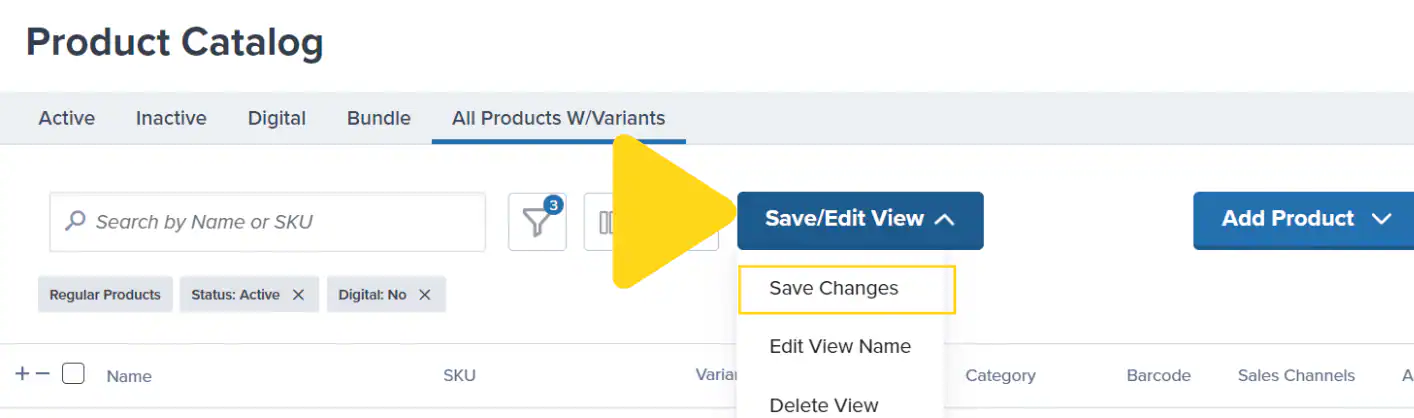 From the drop-down options, select **Save Changes**.
 A success message will appear to confirm that your view is saved.
***
## Exporting Saved Views to Excel
To export products from a saved view to Excel, follow these steps:
Select the view you want to export from the tabs at the top of the page.
Locate the icon with three horizontal dots to the right of the search bar.
From the drop-down menu, select **Export Products**. A pop-up window will appear.
A success message will appear to confirm that your view is saved.
***
## Exporting Saved Views to Excel
To export products from a saved view to Excel, follow these steps:
Select the view you want to export from the tabs at the top of the page.
Locate the icon with three horizontal dots to the right of the search bar.
From the drop-down menu, select **Export Products**. A pop-up window will appear.
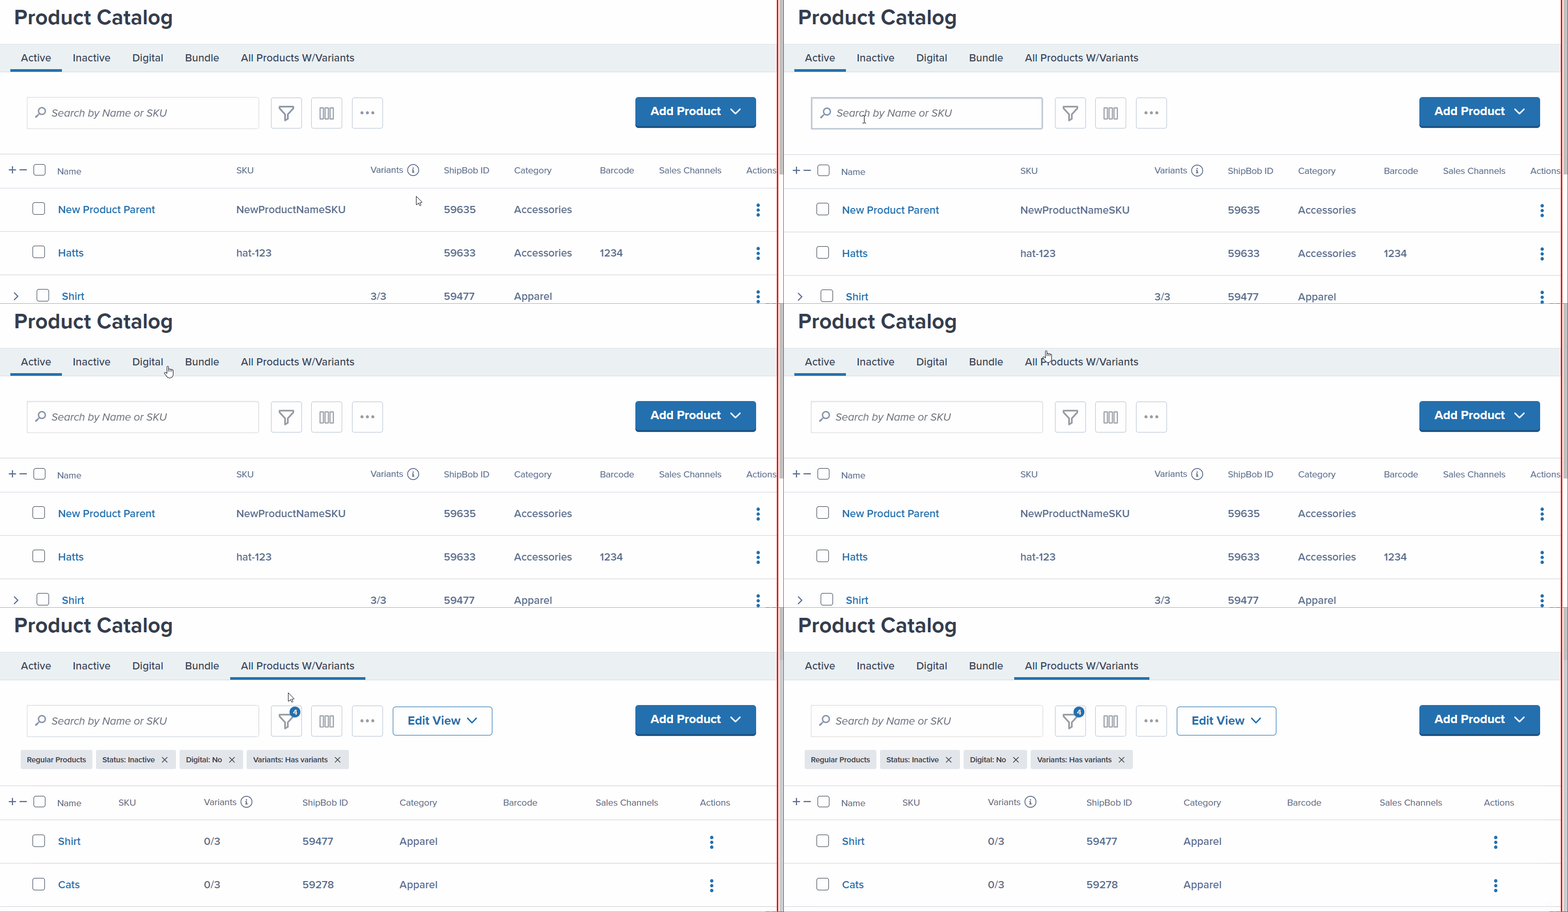 Confirm the export by clicking the **Yes, export** button.
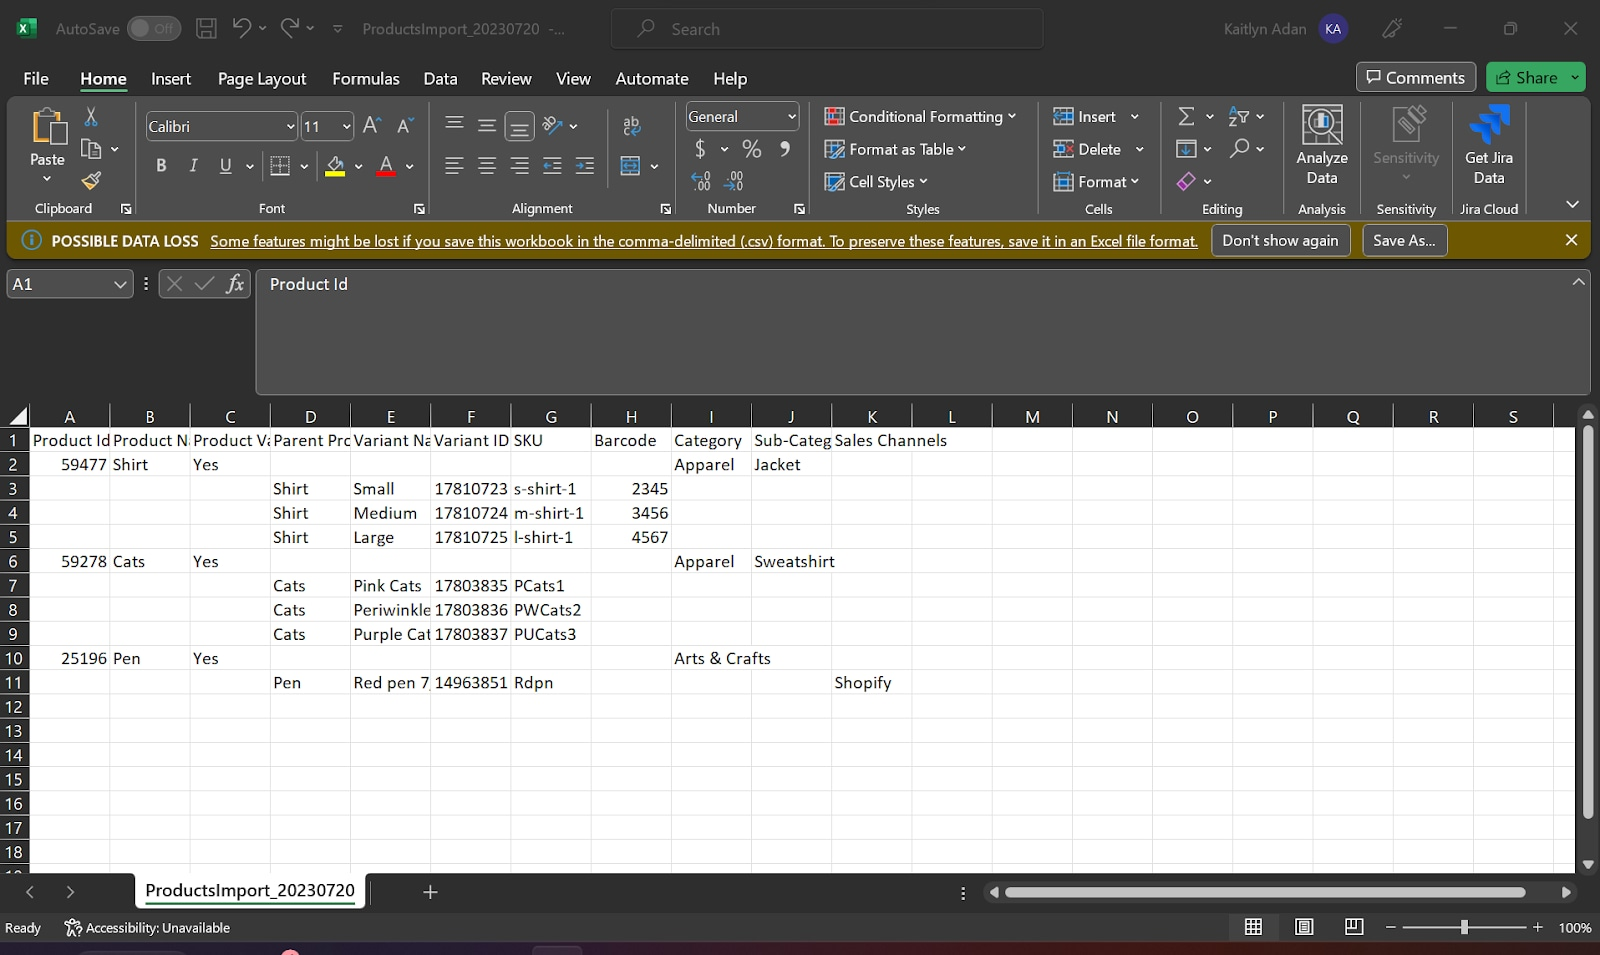
You will receive an email with a success message including the total number of products included in the export, with the subject "Your Product Catalog Export". Click the hyperlinked file in the email and open it on your computer.
Confirm the export by clicking the **Yes, export** button.
You will receive an email with a success message including the total number of products included in the export, with the subject "Your Product Catalog Export". Click the hyperlinked file in the email and open it on your computer.
 ***
## Deleting Saved Views
To delete a saved view:
Select the view from the tabs at the top of the page.
Open the **Edit View** drop-down menu.
***
## Deleting Saved Views
To delete a saved view:
Select the view from the tabs at the top of the page.
Open the **Edit View** drop-down menu.
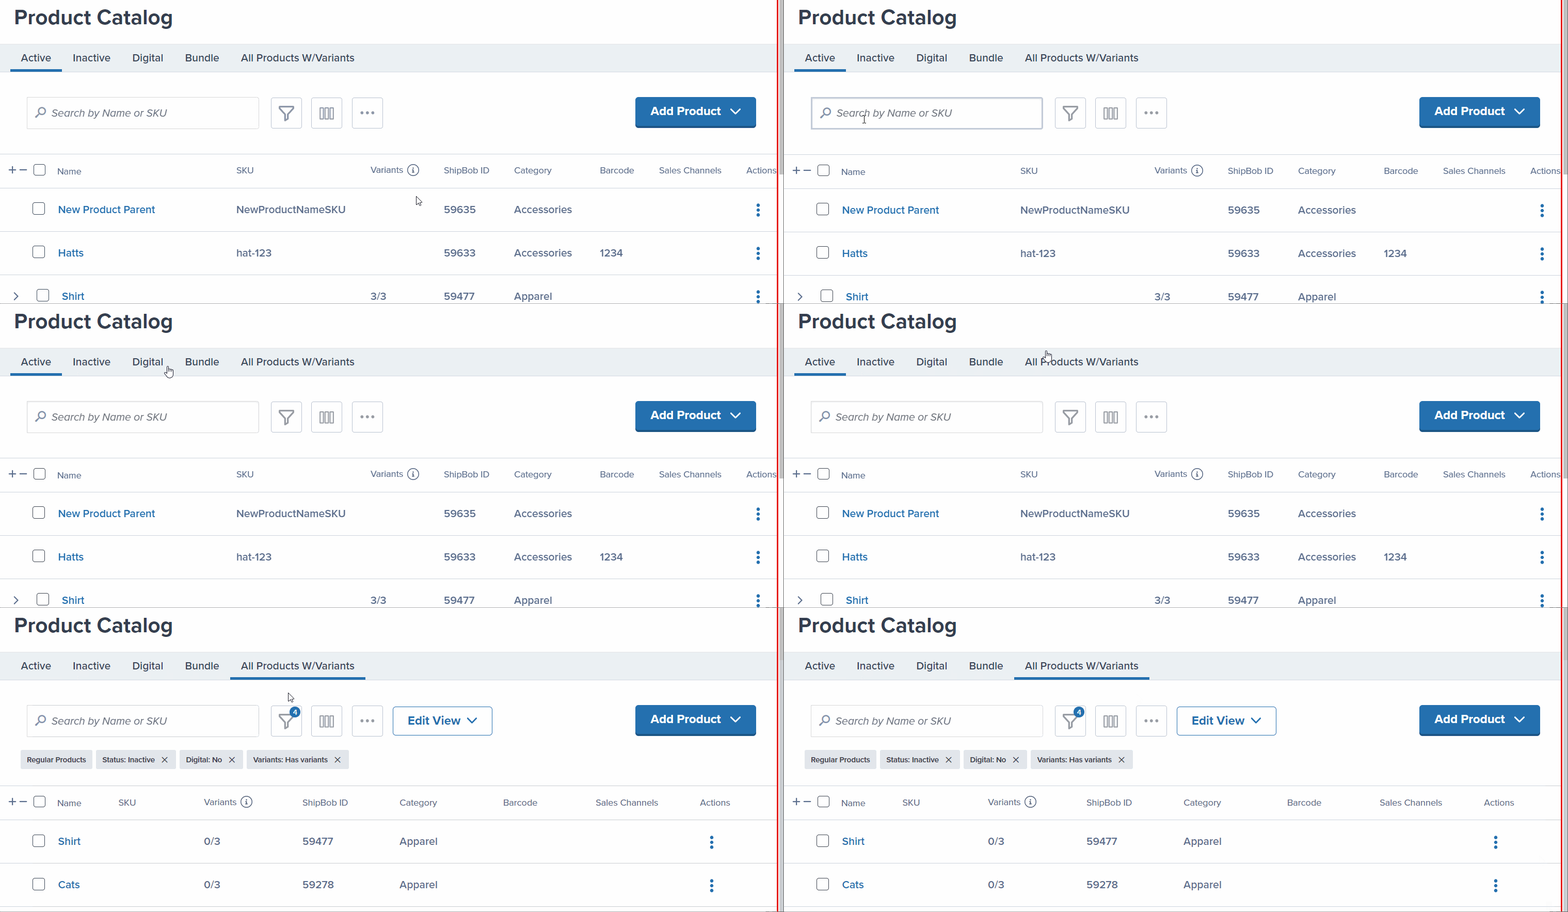 From the drop-down menu, select **Delete View**. A pop-up window will appear.
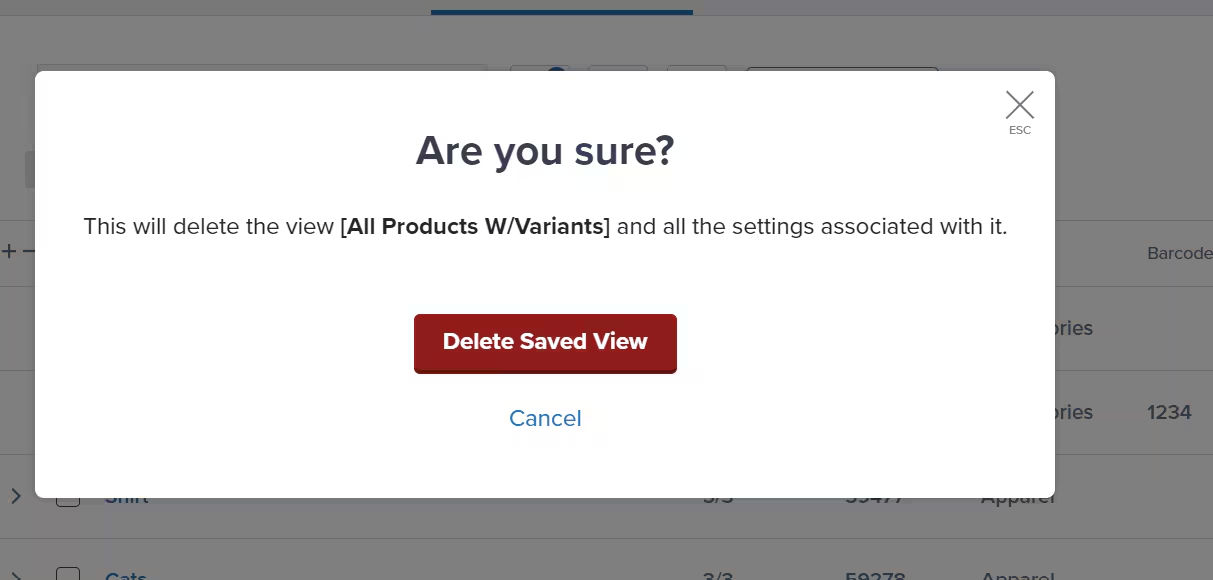 Confirm the deletion by clicking the **Delete Saved View** button.
A success message will appear to confirm that your view was deleted and removed from your Product Catalog page.
***
## Let's Dive Deeper
Master the Product Catalog interface and features
Update multiple products via Excel template
Configure essential product settings
Organize products with multiple options
Reorganize your product catalog structure
Configure individual product settings
Confirm the deletion by clicking the **Delete Saved View** button.
A success message will appear to confirm that your view was deleted and removed from your Product Catalog page.
***
## Let's Dive Deeper
Master the Product Catalog interface and features
Update multiple products via Excel template
Configure essential product settings
Organize products with multiple options
Reorganize your product catalog structure
Configure individual product settings

Questions? Contact Jetpack Care.
If you have any questions or run into issues, you can always contact Jetpack Care for help. Our team is always here to assist via Slack, phone, or email!