> ## Documentation Index
> Fetch the complete documentation index at: https://help.jetpack3pl.com/llms.txt
> Use this file to discover all available pages before exploring further.
# Adding Product Variants
> Learn how to organize products with multiple options (like sizes or colors) using parent products and variants for cleaner inventory management.
If you sell products that come in multiple options—like different sizes, colors, flavors, or scents—variants help you organize them efficiently in your Product Catalog. Instead of managing dozens of individual SKUs, you can group them under a single parent product for easier navigation and management.
## What Are Variants?
Variants are physical products that differ by characteristics like color, size, flavor, or scent, but are otherwise the same item. They're grouped together under a parent/primary product for organizational purposes.
**For example:**
* **Parent Product**: "Cat Mug" (organizational container, not physical)
* **Variants**: Blue Cat Mug (SKU: CAT-BLUE), Green Cat Mug (SKU: CAT-GREEN), Orange Cat Mug (SKU: CAT-ORANGE)
Each variant is a real, physical product with its own SKU, dimensions, weight, and inventory levels. The parent product is just a container that keeps them organized in your catalog.
Use variants when products share the same core identity but differ in one or two attributes. Examples: t-shirts in different sizes, candles in different scents, or phone cases in different colors.
 ***
## Key Terminology
Before we dive into creating variants, let's clarify some important terms:
A non-physical container used to group similar variant SKUs:
* Has a **Name** and **Category** but no SKU or shipping details
* Must have at least **2 variants** (maximum 100)
* Cannot be created retroactively from a base product
* Used solely for organization—never stored or shipped
A physical product that differs by characteristics (color, size, etc.):
* Nested under a parent/primary product in the catalog
* Has its own SKU, dimensions, weight, and inventory
* Each variant gets measured individually via Cubiscan during [receiving](/fulfillment/sending-inventory/creating-wro)
A standalone physical product with no variants:
* Can be **converted into a variant**, but cannot become a parent/primary product
* Useful for products sold in only one configuration
Variants and parent/primary products are **not** automatically classified as [identical products](/fulfillment/sending-inventory/best-practices/identical-products). If your variants have the same dimensions and weight, you may want to configure them as identical products to lock in consistent measurements.
***
## Creating a New Parent Product with Variants
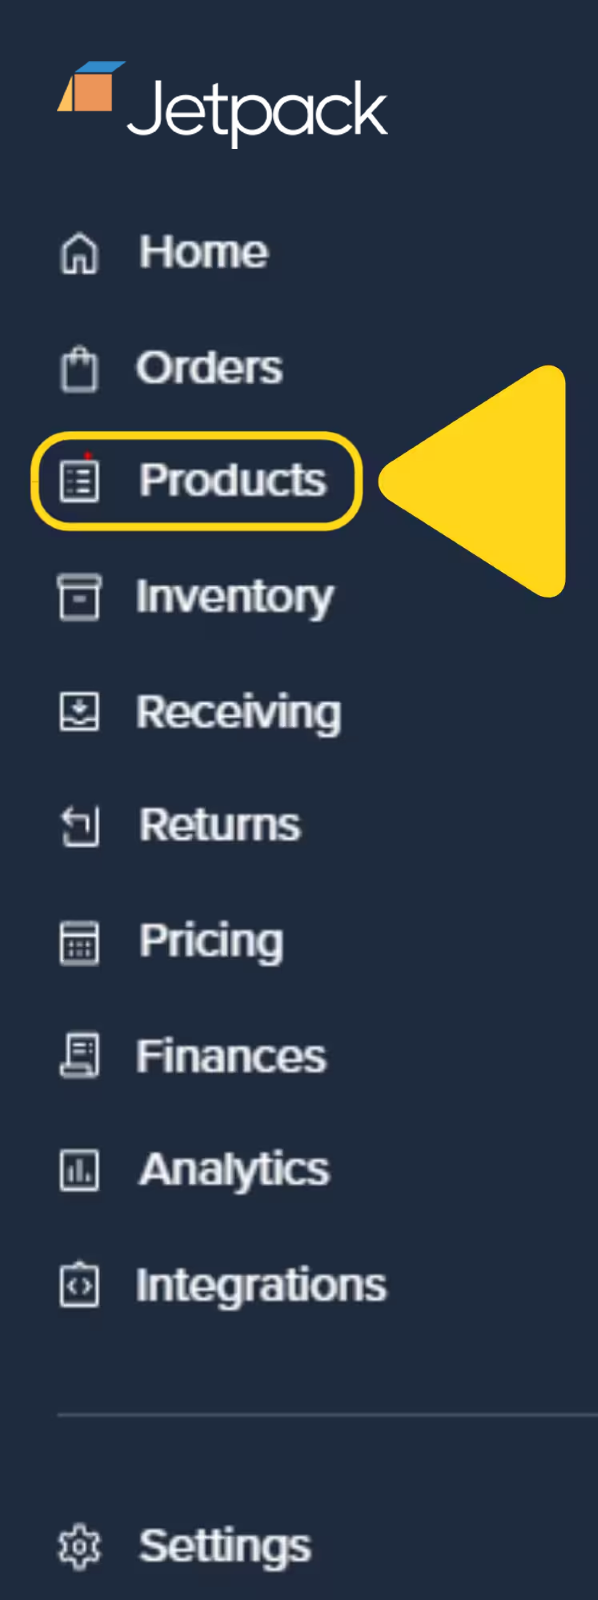
Click **Products** in the left-hand navigation.
***
## Key Terminology
Before we dive into creating variants, let's clarify some important terms:
A non-physical container used to group similar variant SKUs:
* Has a **Name** and **Category** but no SKU or shipping details
* Must have at least **2 variants** (maximum 100)
* Cannot be created retroactively from a base product
* Used solely for organization—never stored or shipped
A physical product that differs by characteristics (color, size, etc.):
* Nested under a parent/primary product in the catalog
* Has its own SKU, dimensions, weight, and inventory
* Each variant gets measured individually via Cubiscan during [receiving](/fulfillment/sending-inventory/creating-wro)
A standalone physical product with no variants:
* Can be **converted into a variant**, but cannot become a parent/primary product
* Useful for products sold in only one configuration
Variants and parent/primary products are **not** automatically classified as [identical products](/fulfillment/sending-inventory/best-practices/identical-products). If your variants have the same dimensions and weight, you may want to configure them as identical products to lock in consistent measurements.
***
## Creating a New Parent Product with Variants
Click **Products** in the left-hand navigation.
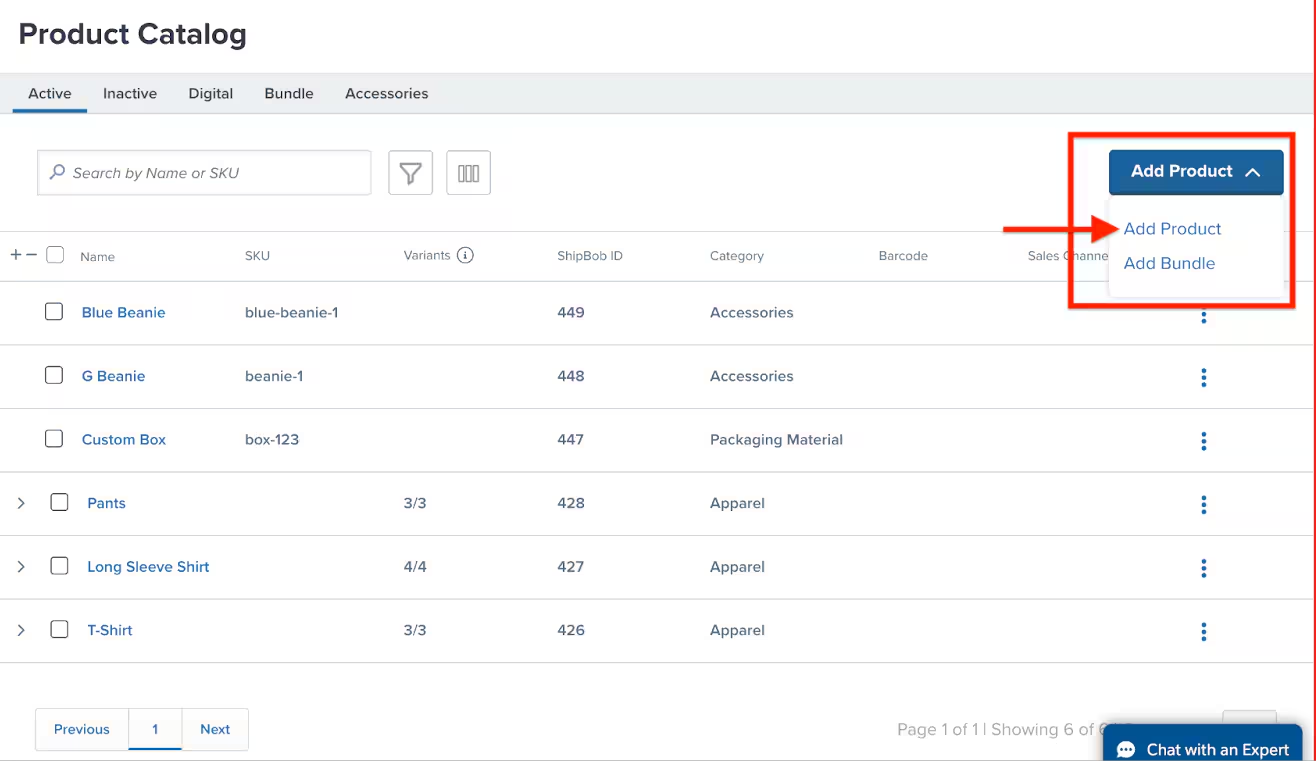
 Then click the **Add Product** button in the top-right corner and select **Add Product** from the dropdown.
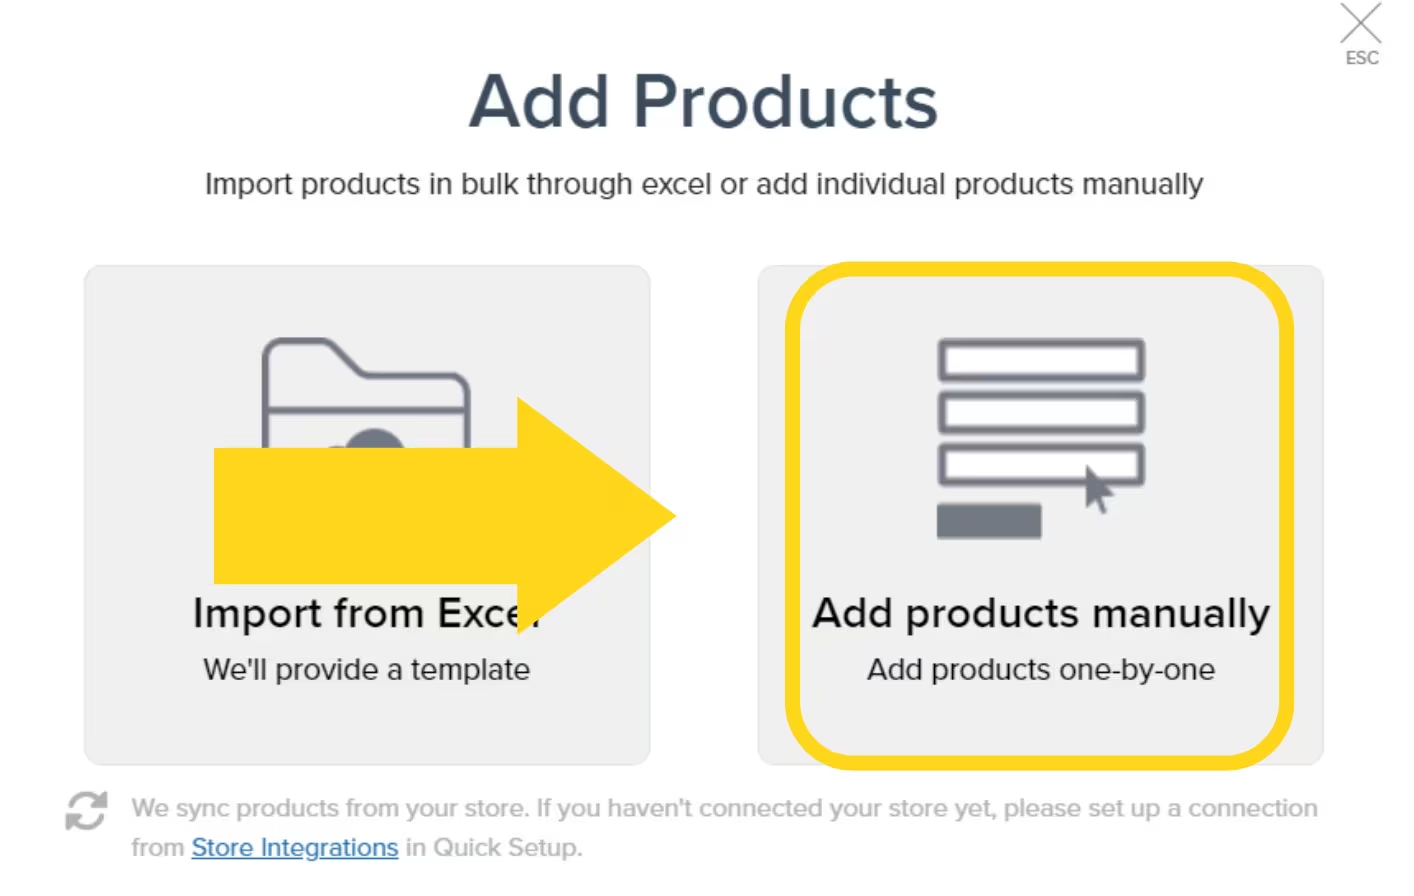
 In the pop-up window, choose **Add products manually**.
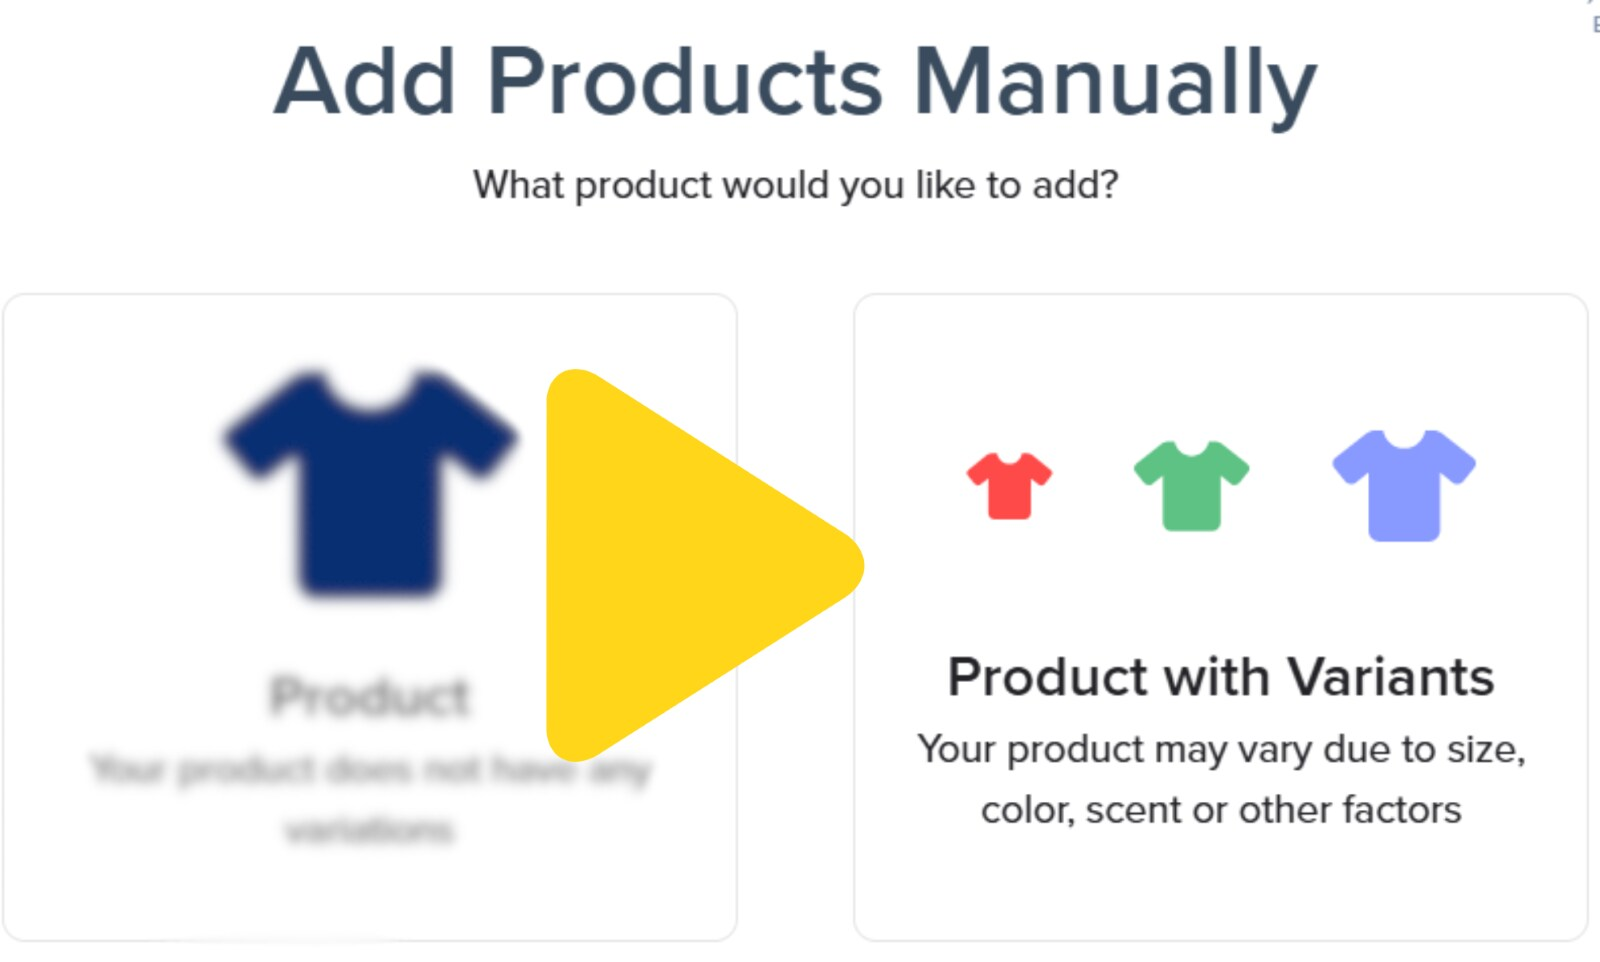
 Then select **Product with Variants** (this indicates the product will have 2+ variants).
 Enter a **name for the parent product** (e.g., "Cat Mug").
 Then select the appropriate **category** using the dropdown next to Product and Packaging. Use the search bar or expand icon (>) to find subcategories. Categories affect [packaging requirements](/fulfillment/account-setup/shipping-preferences/packaging-preferences).
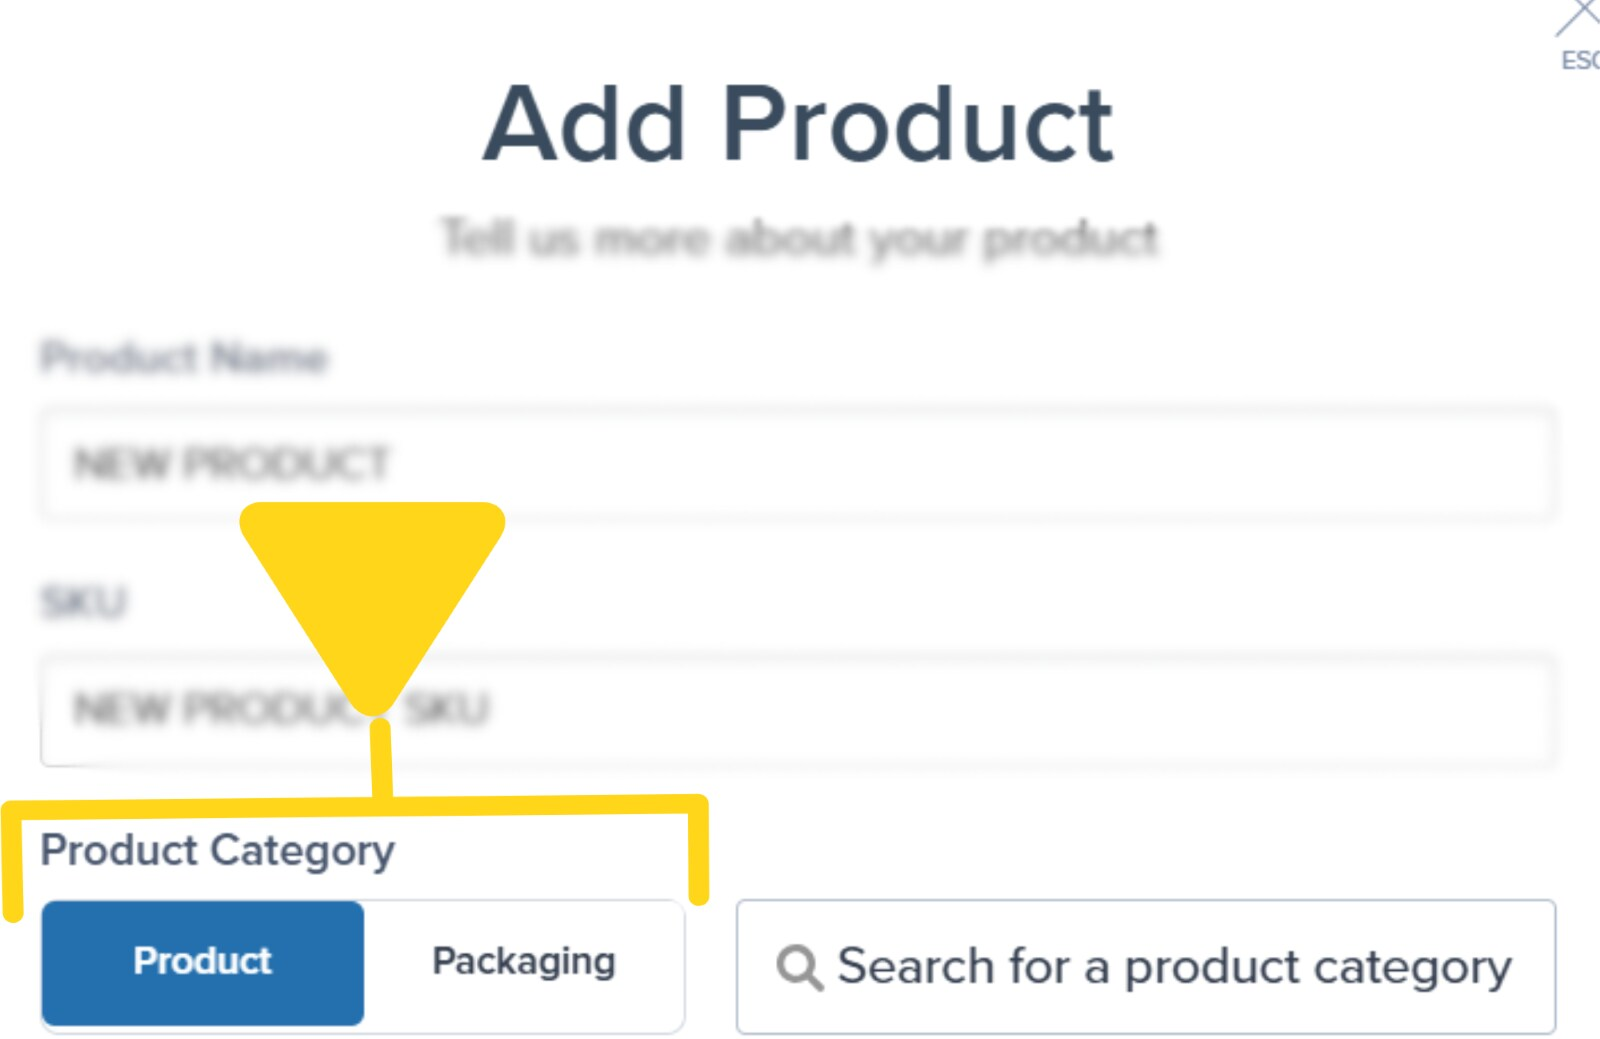 For each variant:
* Enter the **Variant Name** (e.g., "Blue Cat Mug")
* Enter its unique **SKU** (e.g., "CAT-BLUE")
* Click **Add Variant** to add another row
You must add at least 2 variants to save the parent product. You can add up to 100 variants per parent product.
Click **Add Product** to create the parent product and all variants.
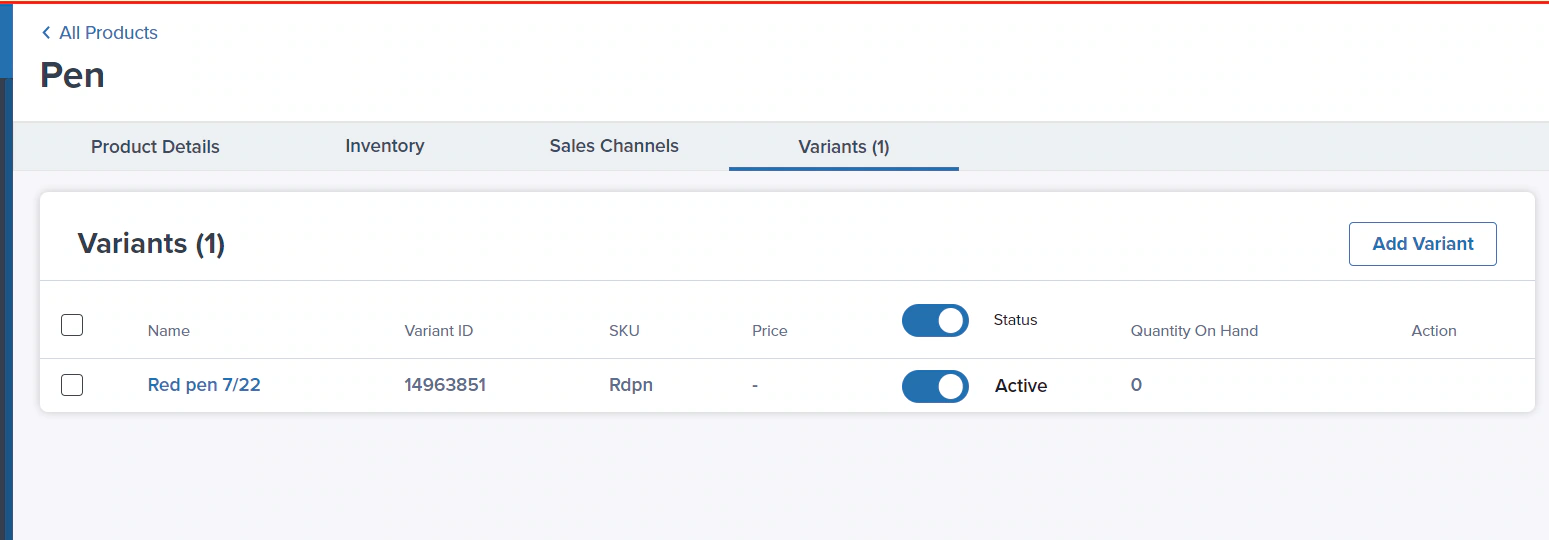
Once created, you can view each variant's details by clicking the **Variants tab** on the [Product Details page](/fulfillment/managing-products/product-details-page).
For each variant:
* Enter the **Variant Name** (e.g., "Blue Cat Mug")
* Enter its unique **SKU** (e.g., "CAT-BLUE")
* Click **Add Variant** to add another row
You must add at least 2 variants to save the parent product. You can add up to 100 variants per parent product.
Click **Add Product** to create the parent product and all variants.
Once created, you can view each variant's details by clicking the **Variants tab** on the [Product Details page](/fulfillment/managing-products/product-details-page).
 ***
## Converting Existing Products to Variants
Already have base products that you want to organize under a parent product? You can convert them to variants without losing any data.
Find the product you want to convert using the search bar or by scrolling, then click the **three vertical dots** under the Actions column and select **Convert to variant(s) and move under a product** from the dropdown.
***
## Converting Existing Products to Variants
Already have base products that you want to organize under a parent product? You can convert them to variants without losing any data.
Find the product you want to convert using the search bar or by scrolling, then click the **three vertical dots** under the Actions column and select **Convert to variant(s) and move under a product** from the dropdown.
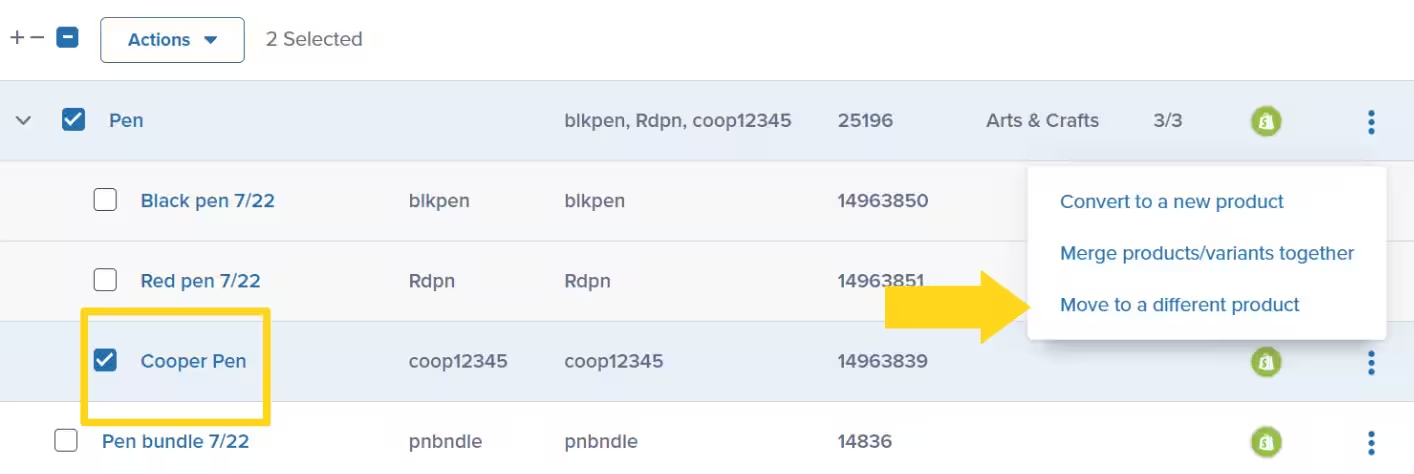 A pop-up will display the selected product(s).
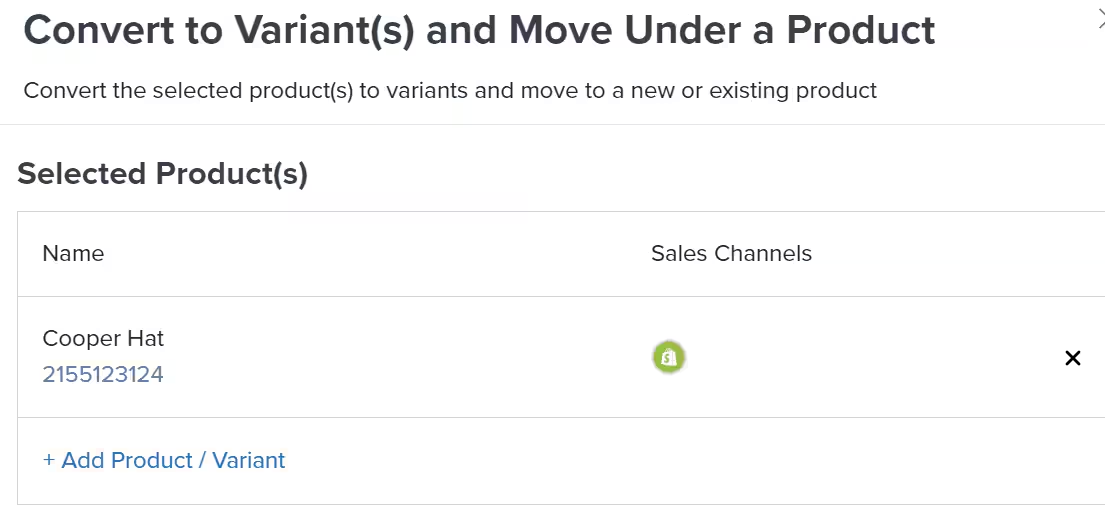 Optionally, click **+ Add Product / Variant** to add additional SKUs to convert at the same time.
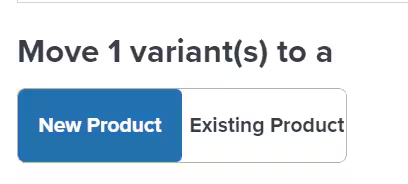
Choose whether to add these variants to:
* **New Product** - Enter a new parent product name and select a category
* **Existing Product** - Select an existing parent product that already has variants
When adding to an existing product, the parent must **already have variants**. You cannot add variants to a base product—only to an existing parent/primary product.
Optionally, click **+ Add Product / Variant** to add additional SKUs to convert at the same time.
Choose whether to add these variants to:
* **New Product** - Enter a new parent product name and select a category
* **Existing Product** - Select an existing parent product that already has variants
When adding to an existing product, the parent must **already have variants**. You cannot add variants to a base product—only to an existing parent/primary product.
 Click **Convert to Variant(s)** to complete the process. Your products will now appear as variants under the parent product you selected or created.
***
## Moving Variants to a Different Parent Product
Need to reorganize? You can move variants from one parent product to another.
Click the **three vertical dots** next to the variant you want to move, then choose **Move to a different product** from the menu.
A pop-up will appear showing the selected product(s).
Click **Convert to Variant(s)** to complete the process. Your products will now appear as variants under the parent product you selected or created.
***
## Moving Variants to a Different Parent Product
Need to reorganize? You can move variants from one parent product to another.
Click the **three vertical dots** next to the variant you want to move, then choose **Move to a different product** from the menu.
A pop-up will appear showing the selected product(s).
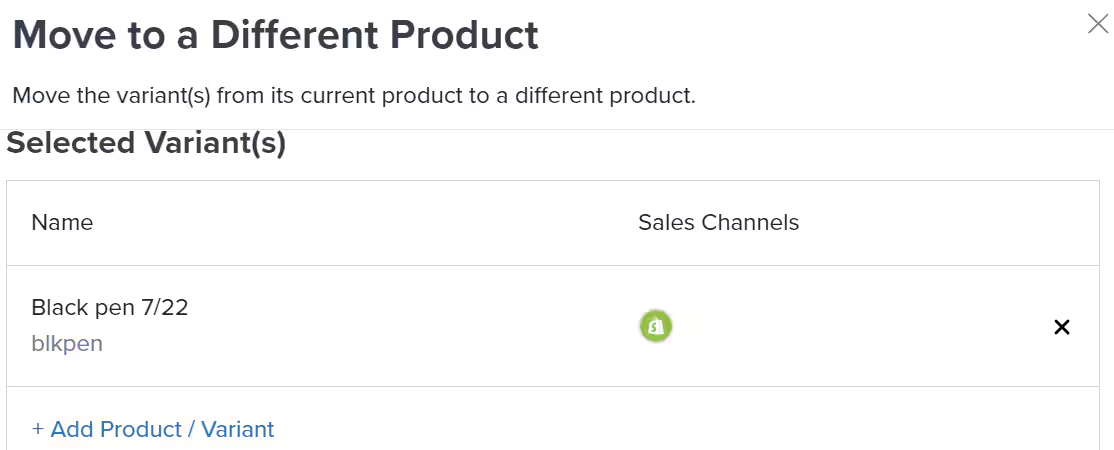 Optionally, click **+ Add Product / Variant** to add more SKUs to move together.
Choose your destination:
* **New Product** - Create a new parent product by entering a name and category
* **Existing Product** - Type the parent product name (must already have variants) and select it
Click **Move Variant(s)** to complete the transfer. The variant will now appear under its new parent product, and the old parent will update its variant count accordingly.
If you're reorganizing a large number of variants or need help structuring your Product Catalog, your Jetpack Care team can help via Slack or phone.
***
## Creating Parent Products and Variants in Bulk
If you have many variants to add, use our Excel template to bulk upload them all at once.
**To prepare for bulk upload:**
1. Click the **Add Product** button
2. Select **Add Product** from the dropdown
3. Choose **Import from Excel** in the pop-up window
Optionally, click **+ Add Product / Variant** to add more SKUs to move together.
Choose your destination:
* **New Product** - Create a new parent product by entering a name and category
* **Existing Product** - Type the parent product name (must already have variants) and select it
Click **Move Variant(s)** to complete the transfer. The variant will now appear under its new parent product, and the old parent will update its variant count accordingly.
If you're reorganizing a large number of variants or need help structuring your Product Catalog, your Jetpack Care team can help via Slack or phone.
***
## Creating Parent Products and Variants in Bulk
If you have many variants to add, use our Excel template to bulk upload them all at once.
**To prepare for bulk upload:**
1. Click the **Add Product** button
2. Select **Add Product** from the dropdown
3. Choose **Import from Excel** in the pop-up window
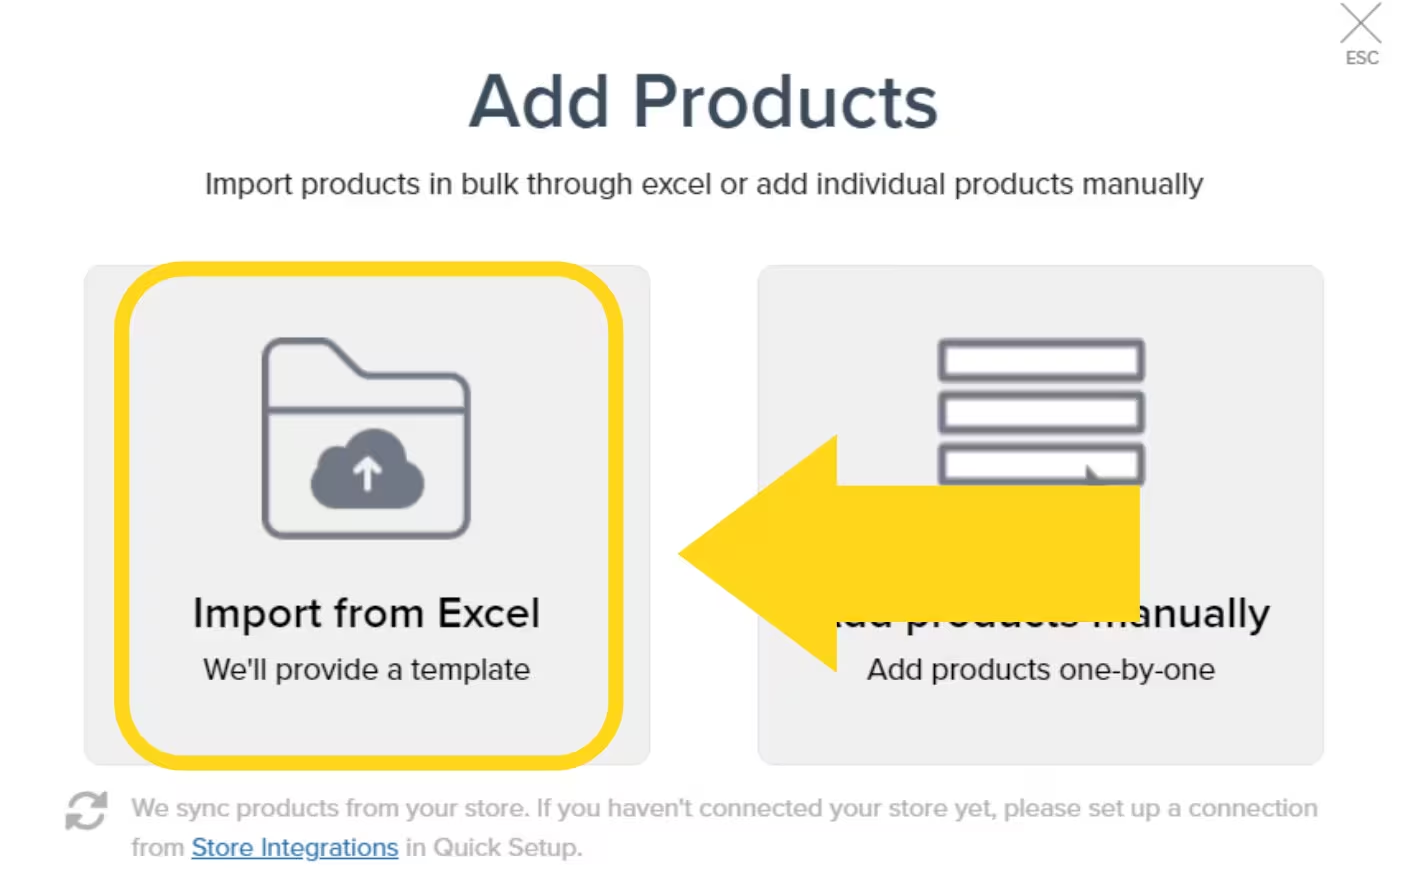 4. Click the **import product template** link to download the Excel file
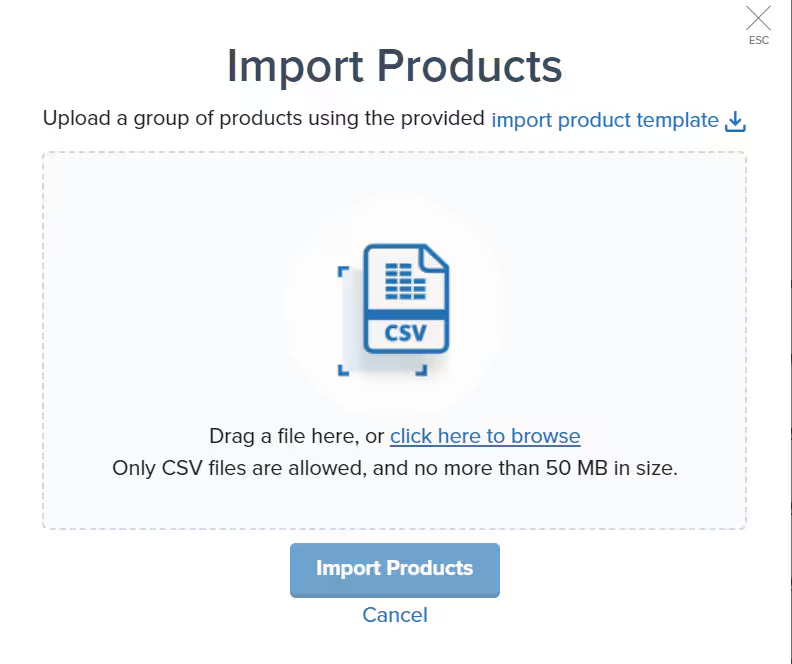 5. Open the file and delete the sample data (but keep all column headers)
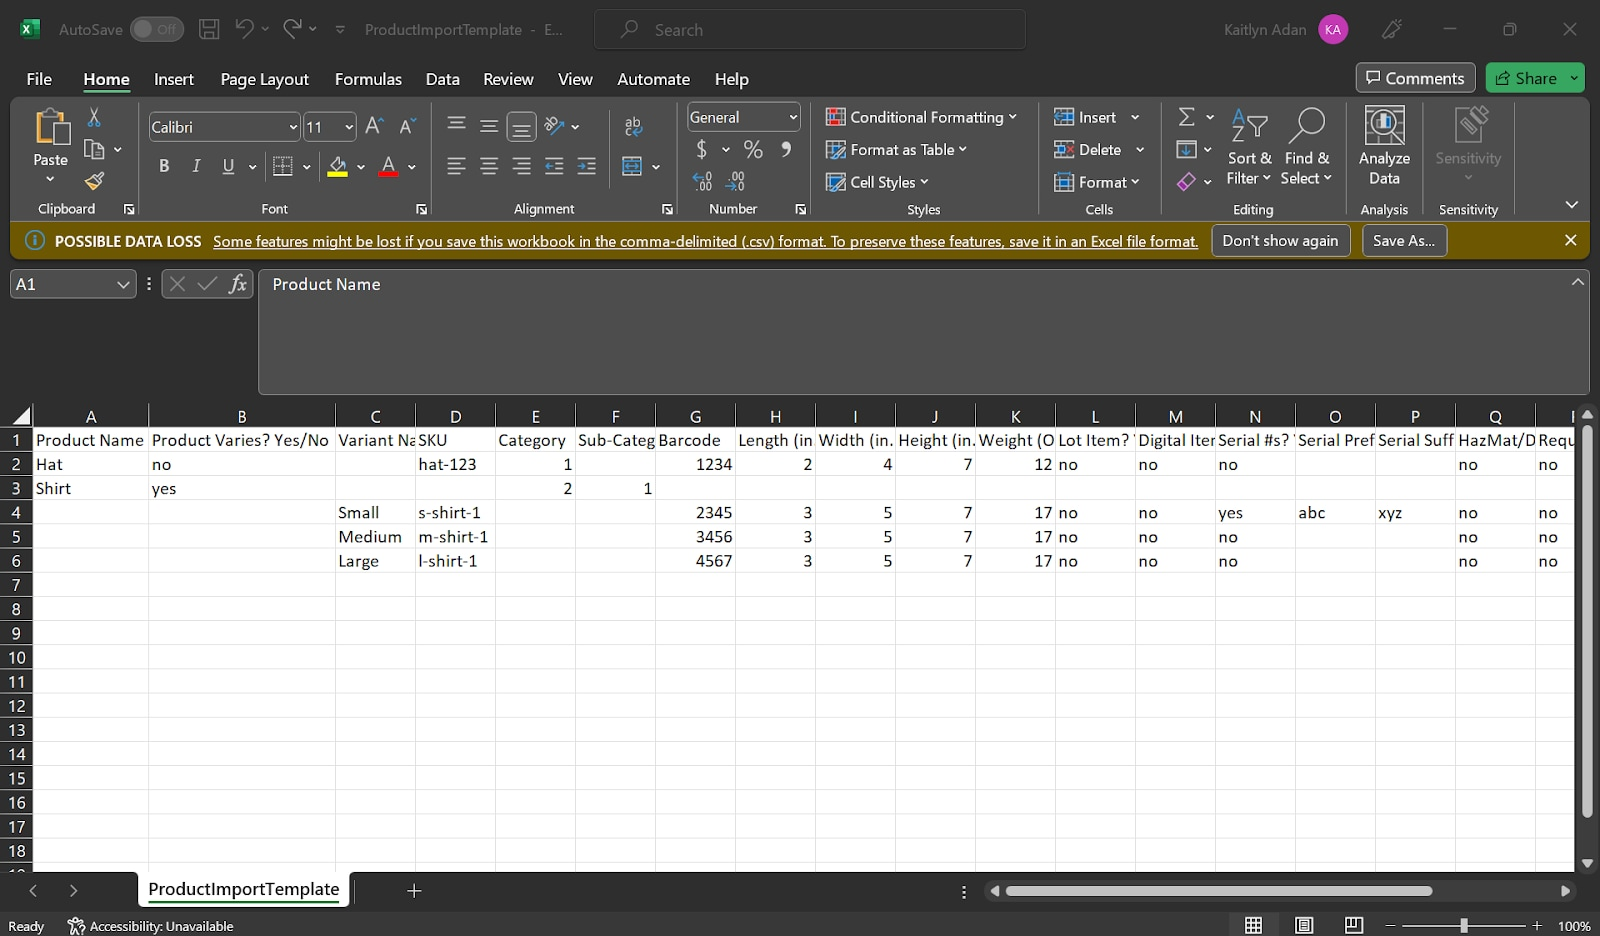 **To format the Excel template:**
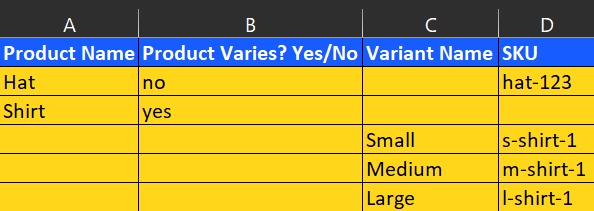
**For the parent product (first row):**
* Enter the **Product Name** (e.g., "Cat Mug")
* Set **Product Varies?** to **Yes**
* Leave other columns blank for now
**For each variant (subsequent rows):**
* Enter the **Variant Name** (e.g., "Blue Cat Mug")
* Enter the unique **SKU** (e.g., "CAT-BLUE")
* Leave the **Product Name** and **Product Varies** columns blank
| Product Name | Product Varies? | Variant Name | SKU |
| ------------ | --------------- | -------------- | ---------- |
| Cat Mug | Yes | | |
| | | Blue Cat Mug | CAT-BLUE |
| | | Green Cat Mug | CAT-GREEN |
| | | Orange Cat Mug | CAT-ORANGE |
This creates one parent product ("Cat Mug") with three variants.
**To format the Excel template:**
**For the parent product (first row):**
* Enter the **Product Name** (e.g., "Cat Mug")
* Set **Product Varies?** to **Yes**
* Leave other columns blank for now
**For each variant (subsequent rows):**
* Enter the **Variant Name** (e.g., "Blue Cat Mug")
* Enter the unique **SKU** (e.g., "CAT-BLUE")
* Leave the **Product Name** and **Product Varies** columns blank
| Product Name | Product Varies? | Variant Name | SKU |
| ------------ | --------------- | -------------- | ---------- |
| Cat Mug | Yes | | |
| | | Blue Cat Mug | CAT-BLUE |
| | | Green Cat Mug | CAT-GREEN |
| | | Orange Cat Mug | CAT-ORANGE |
This creates one parent product ("Cat Mug") with three variants.
 **To upload your file:**
6. Save your changes
7. Drag and drop the file into the upload area, or click the link to browse for it
8. Click **Import Products**
**To upload your file:**
6. Save your changes
7. Drag and drop the file into the upload area, or click the link to browse for it
8. Click **Import Products**
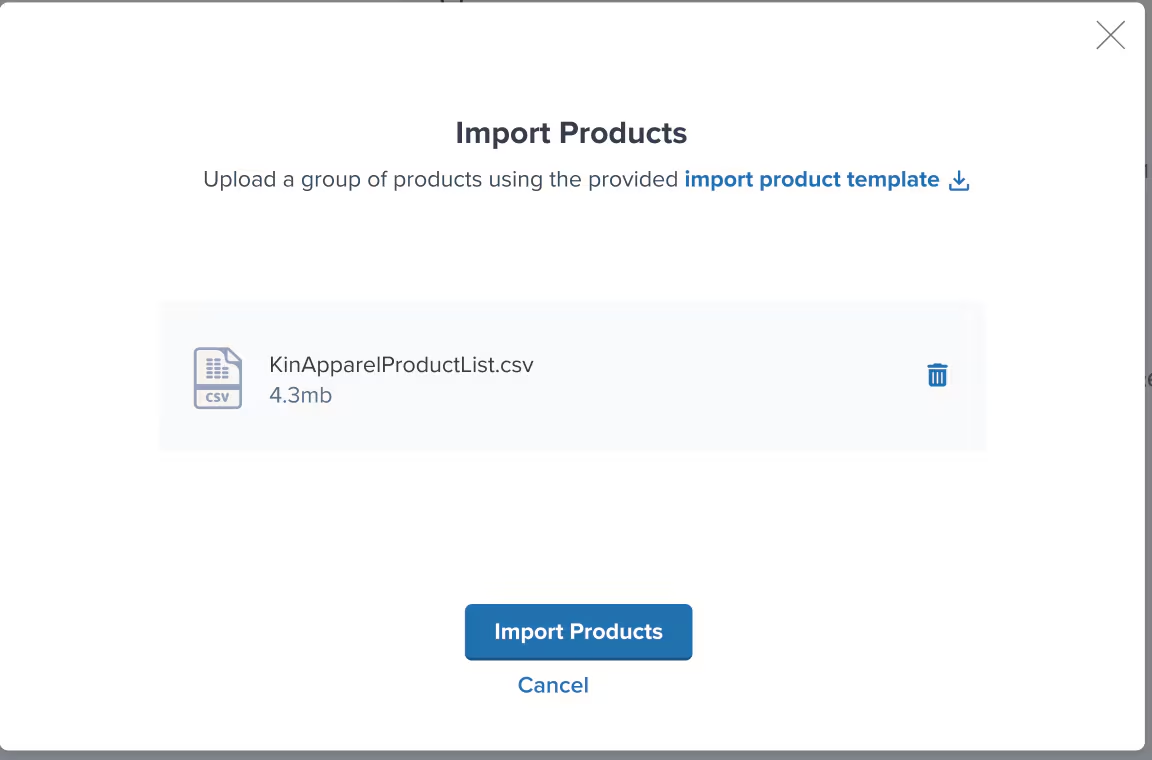 You'll receive an email summary of your bulk upload, and the new products will appear under the **Active** tab after you refresh your Products page.
If any products fail to import, click **Download import template** (hyperlinked in the error message) to see why they failed. If issues persist, contact your Jetpack Care team via Slack or email.
Learn more about [bulk updating product details](/fulfillment/managing-products/more-tools/bulk-updating-product-details).
***
## Managing Variants After Creation
Once you've created variants, you can manage them from the [Product Details page](/fulfillment/managing-products/product-details-page):
### Viewing Variants
* Navigate to the parent product
* Click the **Variants tab**
* See all variants grouped under that parent
### Editing Individual Variants
* Click on any variant name to open its Product Details page
* Configure settings like [packaging requirements](/fulfillment/account-setup/shipping-preferences/packaging-preferences), [customs information](/fulfillment/account-setup/shipping-preferences/customs-commercial-invoices), or [return preferences](/fulfillment/returns/setting-returns-preferences)
* Each variant has its own independent settings
### Adding More Variants Later
* Open the parent product's Variants tab
* Click **Add Variant**
* Enter the new variant's name and SKU
### Toggling Variant Status
* Set variants to **Active** or **Inactive**
* Only Active variants can be received via [WROs](/fulfillment/sending-inventory/creating-wro)
* Inactive variants will cause orders to move to Exception status
***
## Best Practices for Using Variants
### 1. Plan Your Structure Before Creating
Decide on your parent product names and how you'll organize variants (by color, size, etc.) before bulk uploading. This saves time reorganizing later.
### 2. Use Consistent Naming Conventions
Keep variant names and SKUs consistent for easier management:
* Good: Blue Cat Mug (CAT-BLUE), Green Cat Mug (CAT-GREEN)
* Confusing: Cat Mug - Blue (BLUE-CAT), Mug Cat Green (CAT-G)
### 3. Consider Identical Products Settings
If your variants have the same dimensions and weight, configure them as [identical products](/fulfillment/sending-inventory/best-practices/identical-products) to lock in measurements and ensure consistent pricing.
### 4. Keep Variants Organized
Don't create too many unrelated variants under one parent. If products differ significantly (e.g., mugs vs. plates), create separate parent products.
### 5. Review After Bulk Uploads
Always check your Product Catalog after bulk uploads to ensure variants were created correctly and are under the right parent products.
***
## Let's Dive Deeper
Navigate and organize your full product catalog
Configure detailed settings for each variant
Quick overview of product configuration options
Add barcodes to variants for accurate picking
Reorganize and consolidate your product catalog
Create WROs to send variants to fulfillment centers
You'll receive an email summary of your bulk upload, and the new products will appear under the **Active** tab after you refresh your Products page.
If any products fail to import, click **Download import template** (hyperlinked in the error message) to see why they failed. If issues persist, contact your Jetpack Care team via Slack or email.
Learn more about [bulk updating product details](/fulfillment/managing-products/more-tools/bulk-updating-product-details).
***
## Managing Variants After Creation
Once you've created variants, you can manage them from the [Product Details page](/fulfillment/managing-products/product-details-page):
### Viewing Variants
* Navigate to the parent product
* Click the **Variants tab**
* See all variants grouped under that parent
### Editing Individual Variants
* Click on any variant name to open its Product Details page
* Configure settings like [packaging requirements](/fulfillment/account-setup/shipping-preferences/packaging-preferences), [customs information](/fulfillment/account-setup/shipping-preferences/customs-commercial-invoices), or [return preferences](/fulfillment/returns/setting-returns-preferences)
* Each variant has its own independent settings
### Adding More Variants Later
* Open the parent product's Variants tab
* Click **Add Variant**
* Enter the new variant's name and SKU
### Toggling Variant Status
* Set variants to **Active** or **Inactive**
* Only Active variants can be received via [WROs](/fulfillment/sending-inventory/creating-wro)
* Inactive variants will cause orders to move to Exception status
***
## Best Practices for Using Variants
### 1. Plan Your Structure Before Creating
Decide on your parent product names and how you'll organize variants (by color, size, etc.) before bulk uploading. This saves time reorganizing later.
### 2. Use Consistent Naming Conventions
Keep variant names and SKUs consistent for easier management:
* Good: Blue Cat Mug (CAT-BLUE), Green Cat Mug (CAT-GREEN)
* Confusing: Cat Mug - Blue (BLUE-CAT), Mug Cat Green (CAT-G)
### 3. Consider Identical Products Settings
If your variants have the same dimensions and weight, configure them as [identical products](/fulfillment/sending-inventory/best-practices/identical-products) to lock in measurements and ensure consistent pricing.
### 4. Keep Variants Organized
Don't create too many unrelated variants under one parent. If products differ significantly (e.g., mugs vs. plates), create separate parent products.
### 5. Review After Bulk Uploads
Always check your Product Catalog after bulk uploads to ensure variants were created correctly and are under the right parent products.
***
## Let's Dive Deeper
Navigate and organize your full product catalog
Configure detailed settings for each variant
Quick overview of product configuration options
Add barcodes to variants for accurate picking
Reorganize and consolidate your product catalog
Create WROs to send variants to fulfillment centers

Questions? Contact Jetpack Care.
If you have any questions or run into issues, you can always contact Jetpack Care for help. Our team is always here to assist via Slack, phone, or email!