> ## Documentation Index
> Fetch the complete documentation index at: https://help.jetpack3pl.com/llms.txt
> Use this file to discover all available pages before exploring further.

# Product Catalog Page

> Learn how to navigate your Product Catalog, add products, manage SKUs, and use filters and search tools to keep your inventory organized.

<div className="page-intro">
  Your Product Catalog is the central hub for managing all your SKUs in the Jetpack dashboard. This page displays every product you've added or synced from your sales channels, giving you complete control over your inventory organization and management.
</div>

## Navigating to the Product Catalog

<Steps>
  <Step title="Navigate to Products">
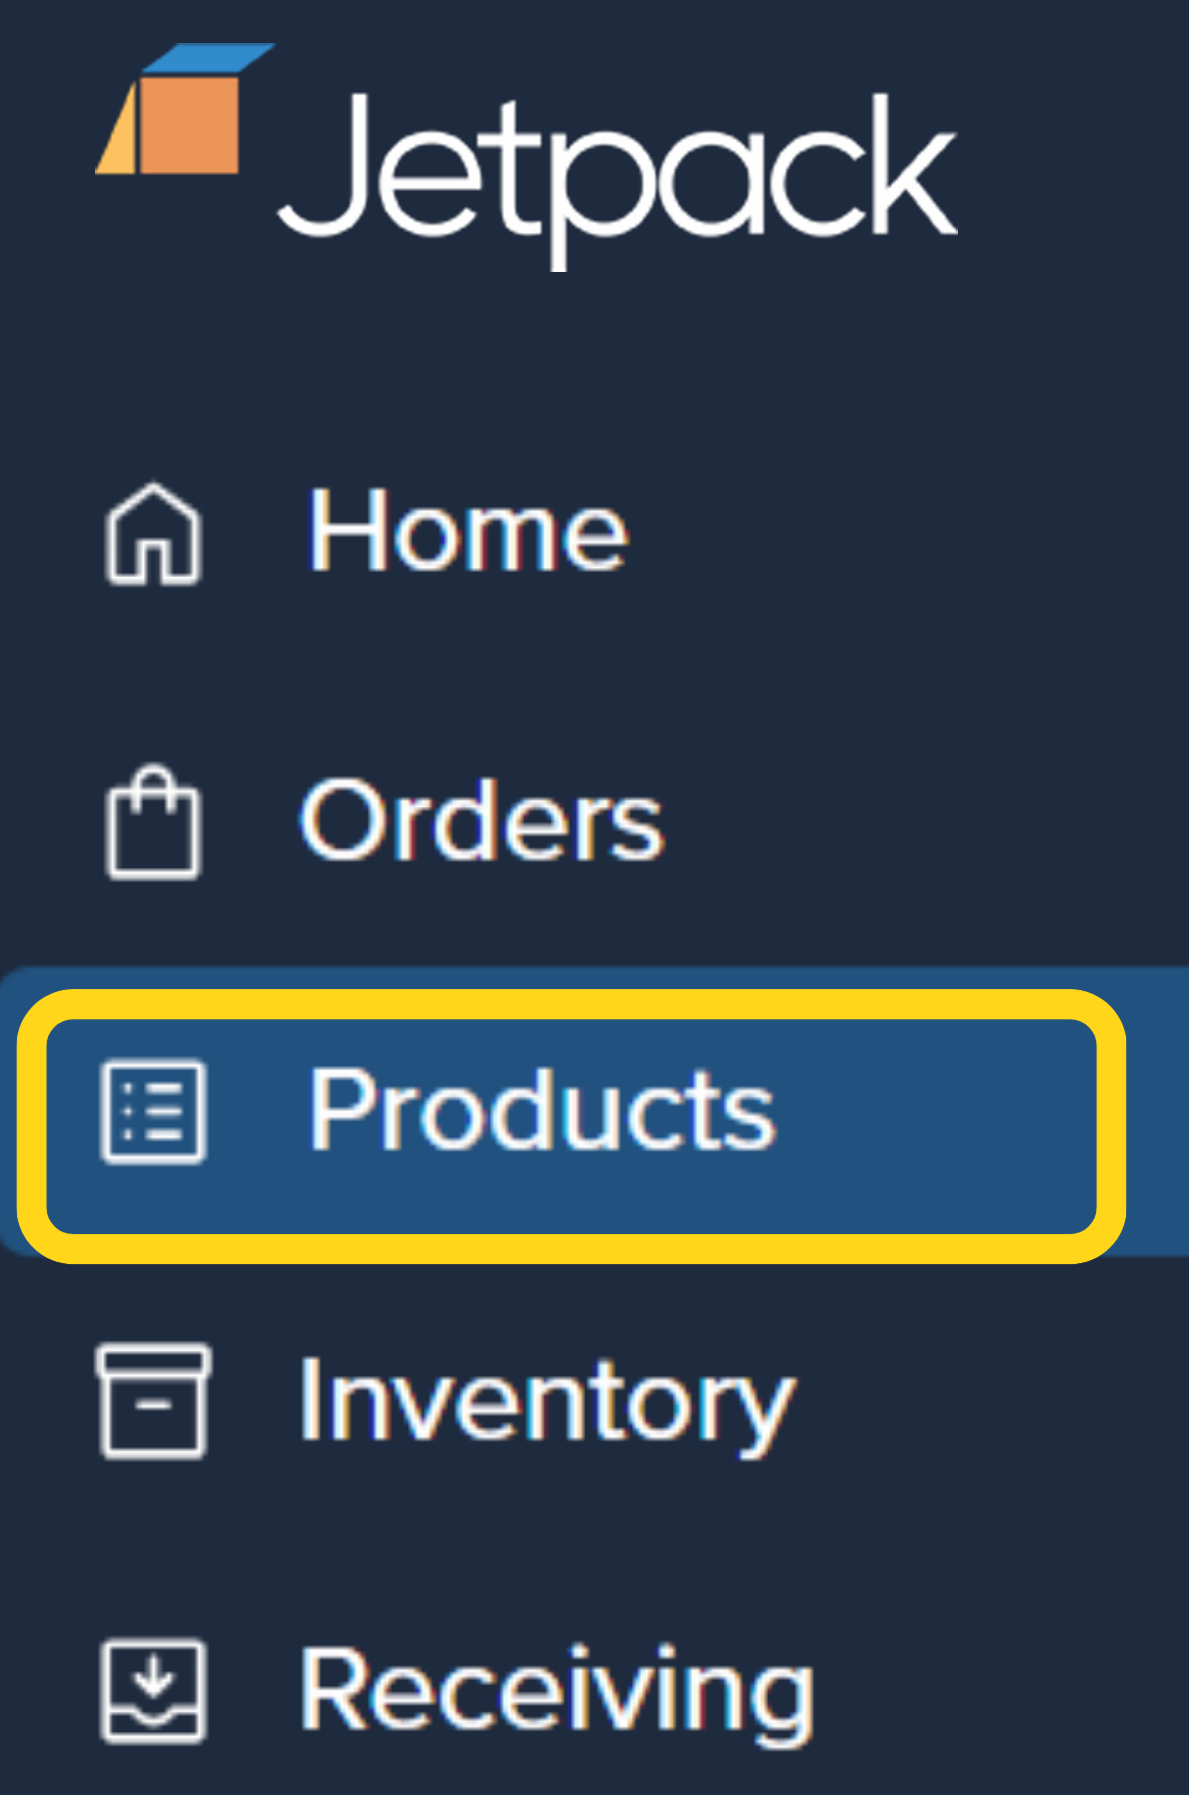
    From the Jetpack dashboard, click **Products** on the left-hand navigation bar.

    You'll be redirected to the Product Catalog page, which displays all your active and inactive products.

    <img src="https://mintcdn.com/jetpack/O_KVSI7218dE1Fgp/images/managing-products/navigate-products-sidebar.png?fit=max&auto=format&n=O_KVSI7218dE1Fgp&q=85&s=bb48589be3a3afed3c3eef9f2baad697" alt="Products menu item highlighted in left navigation" className="screenshot" width="1189" height="1795" data-path="images/managing-products/navigate-products-sidebar.png" />
  </Step>
</Steps>

<img src="https://mintcdn.com/jetpack/O_KVSI7218dE1Fgp/images/managing-products/product-catalog-overview.png?fit=max&auto=format&n=O_KVSI7218dE1Fgp&q=85&s=c695b0d69c1b929a33cb9995785db9e4" alt="Product Catalog page showing SKU list with filters" className="screenshot" width="1522" height="913" data-path="images/managing-products/product-catalog-overview.png" />

***

## Understanding Your Product View

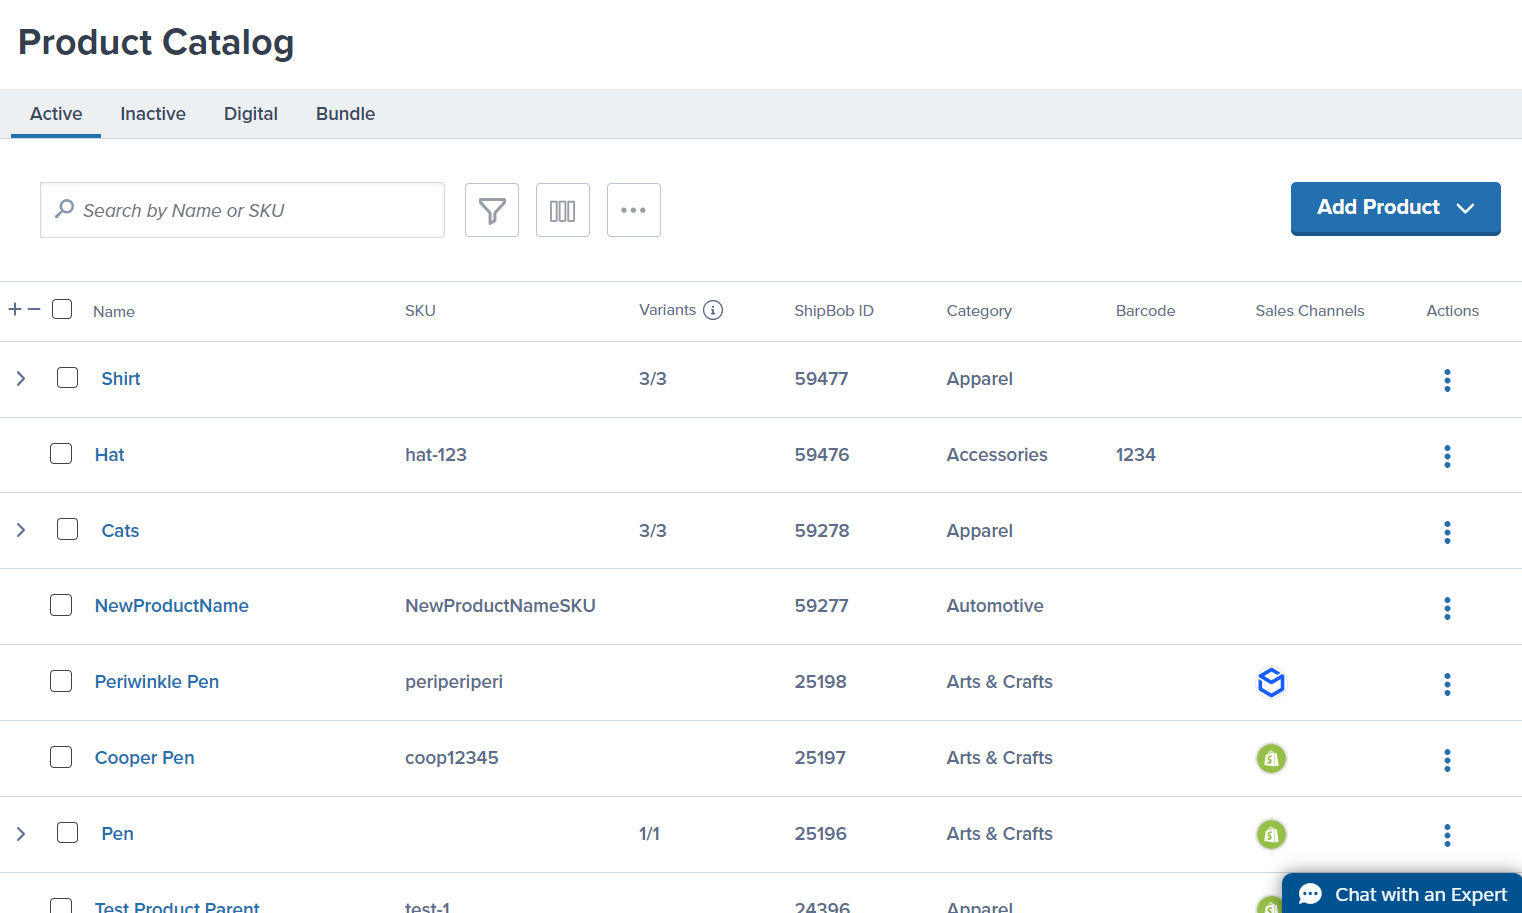
The Product Catalog displays all SKUs in your account. Every product you add manually or sync from an integration appears here, organized by default filters.

### Pre-Set Filters

Your products are automatically grouped into these default categories:

* **Active Products** - Currently available for fulfillment
* **Inactive Products** - Not currently being fulfilled
* **Digital Products** - Non-physical items
* **Bundles** - Products combining multiple SKUs

***

## Default Column Information

Each product in your Product Catalog displays specific information in columns across the page. The default columns include:

* **Name** - The product name as assigned by your company or imported from an integration
* **SKU** - A unique identification number for the product (imported SKUs sync from your ecommerce platform; manually created ones are set by you)
* **Variants** - Shows the count of Active variants versus total variants (e.g., "5/6" if 5 of 6 are active), useful for products available in multiple options like size or color
* **ShipBob ID** - The unique ID assigned by ShipBob (this field is read-only)
* **Category** - The product category you selected on the product details page
* **Barcode** - Indicates if a barcode scan is required during the picking process
* **Sales Channels** - Displays logos of the platforms (e.g., Shopify, Amazon) from which the product or variant was synced
* **Actions** - A set of options (accessed via 3 vertical dots) for actions such as converting to variants or merging products

<Info>
  For merchants shipping from US, Canada, or Mexico, you can also configure products as dangerous goods directly from the Product Catalog page.
</Info>

***

## Adding and Removing Columns

You can customize which columns appear in your Product Catalog view to display the information most relevant to your business.

### Available Additional Columns

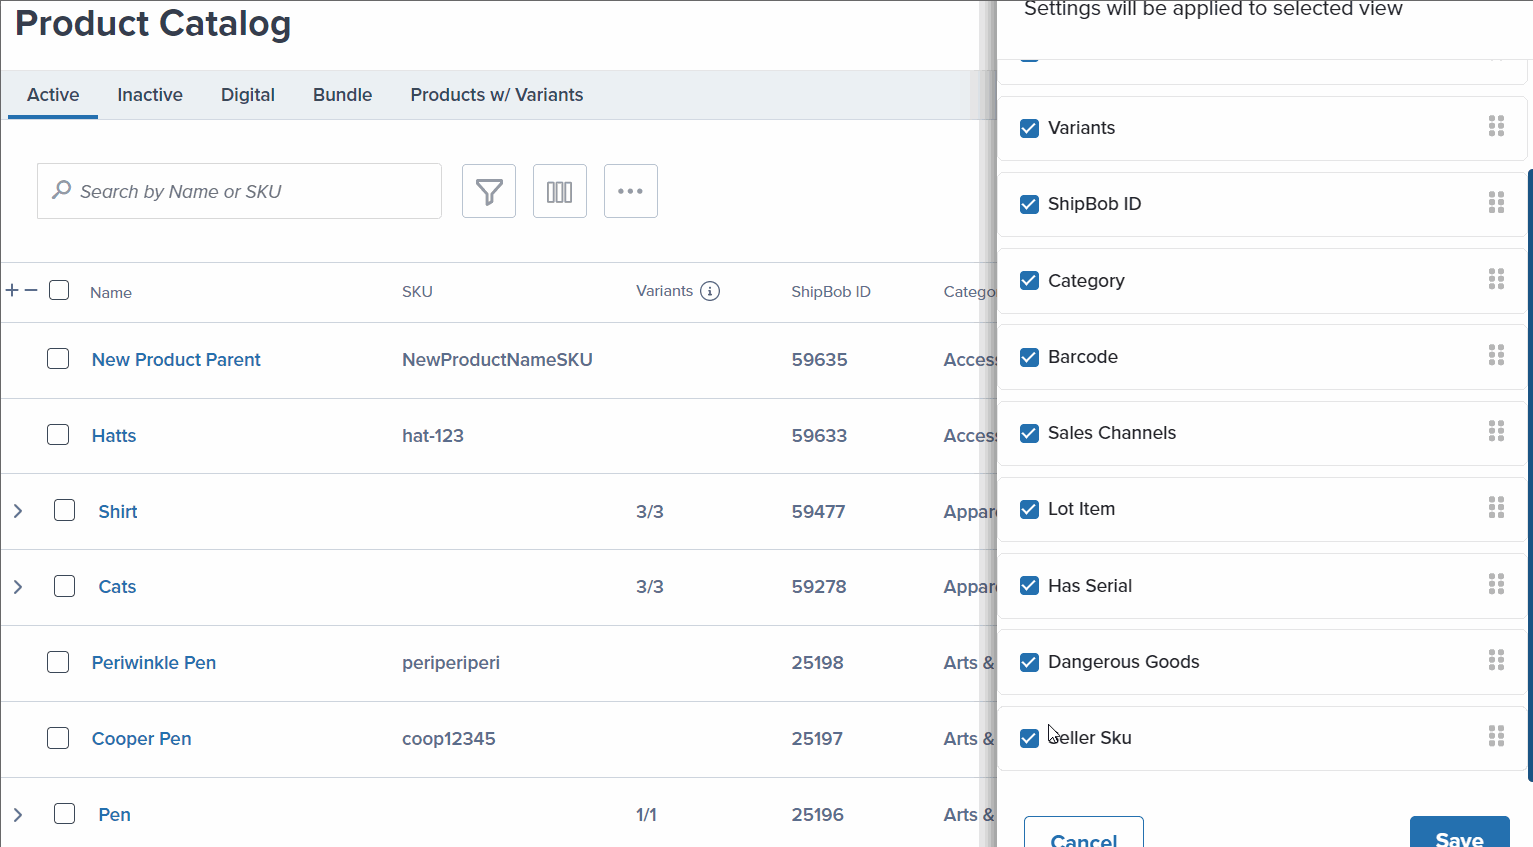
Beyond the default columns, you can add additional columns to your view:

* **Lot Item (Yes/No)** - Indicates if the product has a lot number and expiration date (Jetpack's logic ships products with the nearest expiration date first)
* **Has Serial (Yes/No)** - Shows whether a serial number scan is required on the product
* **Dangerous Goods (Yes/No)** - Indicates if the product is classified as dangerous goods
* **Seller SKU** - Displays SKUs from the product's sales channel

### How to Add or Remove Columns

<Steps>
  <Step title="Open column customization">
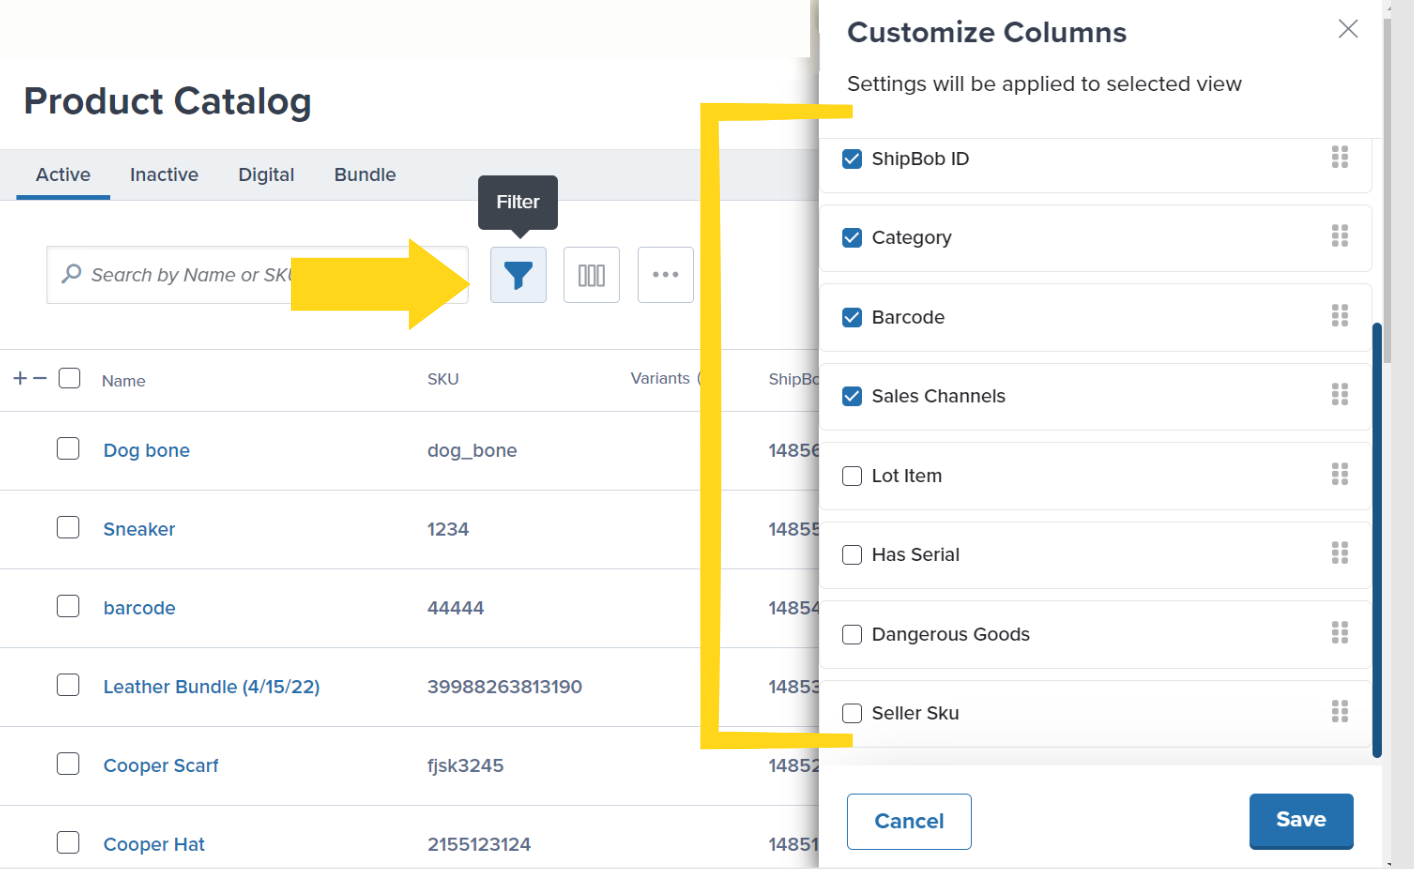
    Click the **3-column icon** in the toolbar at the top of the Product Catalog.

    <img src="https://mintcdn.com/jetpack/R1III1QgB0jm4riK/images/managing-products/customize-columns-icon.png?fit=max&auto=format&n=R1III1QgB0jm4riK&q=85&s=e3af03b0c81e250fb693606fb6444b67" alt="Customize columns icon location in toolbar" className="screenshot" width="1414" height="243" data-path="images/managing-products/customize-columns-icon.png" />
  </Step>

  <Step title="Select and arrange columns">
    In the pop-up menu on the right, check or uncheck the boxes next to the column headers you want to show or hide.

    <img src="https://mintcdn.com/jetpack/R1III1QgB0jm4riK/images/managing-products/customize-columns-panel.png?fit=max&auto=format&n=R1III1QgB0jm4riK&q=85&s=bd7f8e9d55013611028e1fb47d5f5bb8" alt="Customize columns panel with available column options" className="screenshot" width="1414" height="869" data-path="images/managing-products/customize-columns-panel.png" />

    Drag and drop column headers to rearrange their order if needed.
    <img src="https://mintcdn.com/jetpack/R1III1QgB0jm4riK/images/managing-products/customize-columns-sidebar-full.png?fit=max&auto=format&n=R1III1QgB0jm4riK&q=85&s=8a8fcbd979fa44b92f8bcb171092789f" alt="Full customize columns sidebar showing all available options" className="screenshot" width="1533" height="847" data-path="images/managing-products/customize-columns-sidebar-full.png" />
  </Step>

  <Step title="Apply changes">
    Click **Save** to update your view with the selected columns.
  </Step>

  <Step title="Save as custom view (optional)">
    To preserve this column configuration, click **Save New View**, enter a name for your view in the provided textbox, and click **Save View**.

    You can access your saved views from the view dropdown menu at any time.
  </Step>
</Steps>

***

## Using the Search Function

The search bar at the top of your Product Catalog allows you to quickly find specific products by typing a ShipBob ID, Product Name, or SKU. The page automatically filters results as you type.

***

## Filtering Products

Filters help you narrow down which products appear in your catalog based on specific criteria. Unlike columns, which control what information is displayed, filters control which products are shown.

<Steps>
  <Step title="Open filter menu">
    Click the **Filter** (funnel) icon next to the search bar.
  </Step>

  <Step title="Select filter criteria">
    In the pop-up menu, apply the desired filters. You can further refine search results by selecting from dropdown options.

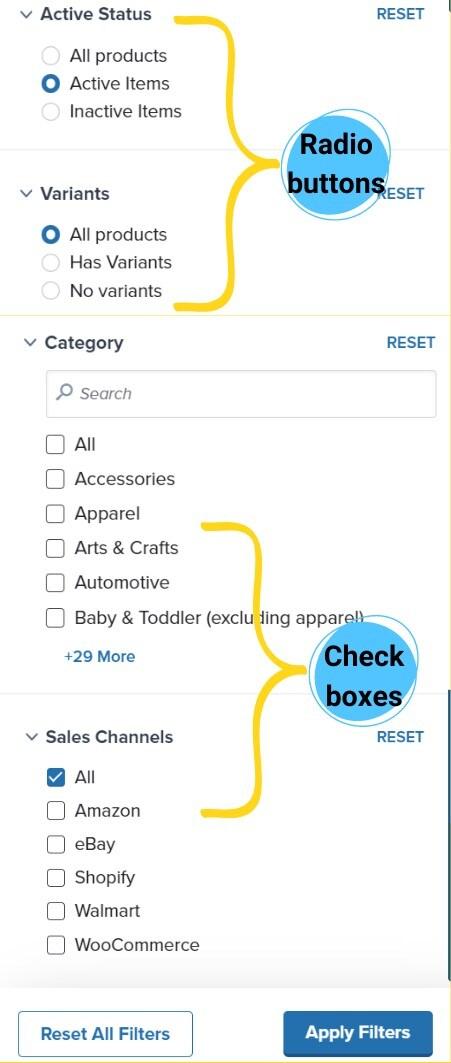
    Some filters will have preset options:

    * **Radio buttons** allow you to select one option at a time
    * **Checkboxes** allow you to select multiple options at once

    <img src="https://mintcdn.com/jetpack/R1III1QgB0jm4riK/images/managing-products/filter-options-panel.png?fit=max&auto=format&n=R1III1QgB0jm4riK&q=85&s=d42323eeced65592cdb2e863c6cabecc" alt="Filter panel showing radio buttons and checkboxes options" className="screenshot" width="451" height="1063" data-path="images/managing-products/filter-options-panel.png" />
  </Step>

  <Step title="Apply filters">
    Click **Apply Filters** to update your Product Catalog page.
  </Step>

  <Step title="Clear filters (optional)">
    To clear filters:

    * Click **RESET** next to a specific filter to clear only that filter
    * Click **Reset All Filters** to clear all filters at once
  </Step>
</Steps>

***

## Using the More Button

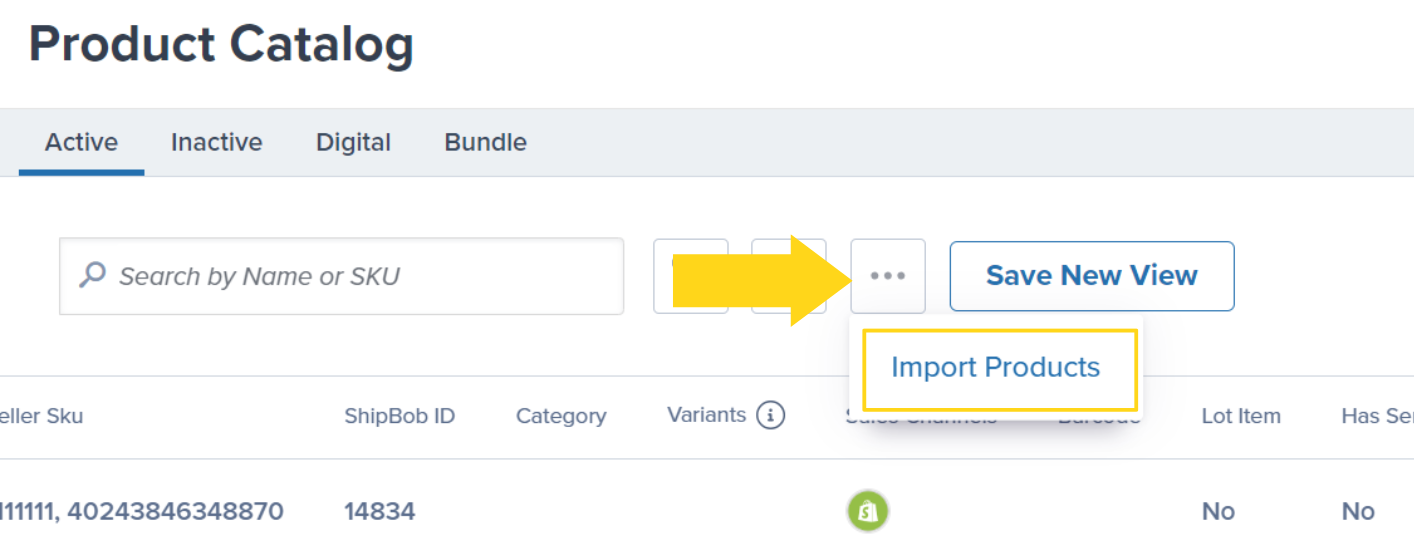
The **More** button (three horizontal dots) provides access to additional Product Catalog tools, including bulk updating capabilities.

<Steps>
  <Step title="Access the More menu">
    Click the **hyperlinked name** of your current view at the top of the page, then click the **three horizontal dots** (More) icon.

    <img src="https://mintcdn.com/jetpack/O_KVSI7218dE1Fgp/images/managing-products/more-menu-import-products.png?fit=max&auto=format&n=O_KVSI7218dE1Fgp&q=85&s=37b904db905d38ce19a360687df831b6" alt="More menu showing Import Products and other options" className="screenshot" width="1414" height="559" data-path="images/managing-products/more-menu-import-products.png" />
  </Step>

  <Step title="Use available options">
    From the More menu, you can:

    * **Export Products** - Download your product data to Excel
    * **Bulk Update Products** - Download an Excel template for bulk updating product details to ensure all product information, including pricing and shipping data, is consistent
    * **Import Products** - Upload products using the bulk import template
  </Step>
</Steps>

***

## Exporting Product Data

After customizing your view, you can export your Product Catalog data to work with it in Excel or share with your team.

<Steps>
  <Step title="Access export options">
    Click the **hyperlinked name** of your current view at the top of the page, then click the **three horizontal dots** (More) icon.
  </Step>

  <Step title="Initiate export">
    Select **Export Products**, then click **Yes, export** to confirm.
  </Step>

  <Step title="Download exported file">
    Check your email for a message titled "Your Product Catalog Export" and download the attached file.
  </Step>
</Steps>

***

## Adding Products to Your Catalog

You can add products to your Product Catalog in multiple ways:

* **Manually add individual products** - Create products one at a time in the dashboard
* **Bulk import via Excel template** - Upload multiple products at once
* **Sync from sales channels** - Automatically pull products from connected integrations

Learn more about each method in our guide on [adding products](/fulfillment/managing-products/adding-products).

***

## Bulk Actions with the Actions Menu

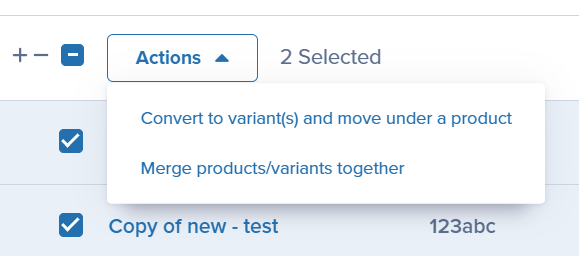
The Actions menu (three vertical dots) next to each product, or the bulk Actions button when multiple products are selected, provides quick access to bulk operations:

* **Convert to variant(s) and move under a product** - Transform standalone products into variants
* **Merge products/variants together** - Combine duplicate products

<img src="https://mintcdn.com/jetpack/O_KVSI7218dE1Fgp/images/managing-products/product-catalog-actions-menu.png?fit=max&auto=format&n=O_KVSI7218dE1Fgp&q=85&s=6af18b258009e558193ac6cd42964de7" alt="Product actions menu for bulk operations" className="screenshot" width="579" height="256" data-path="images/managing-products/product-catalog-actions-menu.png" />

See our complete guide on [moving, merging, and converting products](/fulfillment/managing-products/more-tools/move-merge-convert) for detailed instructions.

***

## Let's Dive Deeper

<CardGroup cols={3}>
  <Card title="Syncing Your Products" icon="arrows-rotate" href="/fulfillment/managing-products/syncing-products">
    Sync products from integrated platforms like Shopify and Amazon
  </Card>

  <Card title="Manually Adding Products" icon="square-plus" href="/fulfillment/managing-products/adding-products">
    Add products without a store integration using Excel or dashboard
  </Card>

  <Card title="Product Details Page" icon="file-lines" href="/fulfillment/managing-products/product-details-page">
    Configure product settings, packaging, customs, and more
  </Card>

  <Card title="Adding Product Variants" icon="layer-group" href="/fulfillment/managing-products/adding-product-variants">
    Group related products under parent SKUs for better organization
  </Card>

  <Card title="Setting Product Preferences" icon="sliders" href="/fulfillment/managing-products/setting-product-preferences">
    Configure returns, reorder points, and shipping settings
  </Card>

  <Card title="Creating Product Bundles" icon="box-open" href="/fulfillment/managing-products/more-tools/creating-product-bundles">
    Combine multiple SKUs into one sellable unit
  </Card>
</CardGroup>

<div className="jetpack-callout">
  <img src="https://mintcdn.com/jetpack/2iejPNBTYKEx6ntF/images/jetpack-logomark-256.png?fit=max&auto=format&n=2iejPNBTYKEx6ntF&q=85&s=340604ced4add3864f2641341826e1c9" alt="Jetpack" className="jetpack-callout-icon" width="256" height="256" data-path="images/jetpack-logomark-256.png" />

  <div className="jetpack-callout-content">
    <h4 className="jetpack-callout-title">Questions? Contact Jetpack Care.</h4>
    <p className="jetpack-callout-text">If you have any questions or run into issues, you can always contact Jetpack Care for help. Our team is always here to assist via Slack, phone, or email!</p>
  </div>
</div>