> ## Documentation Index
> Fetch the complete documentation index at: https://help.jetpack3pl.com/llms.txt
> Use this file to discover all available pages before exploring further.
# Inventory History Page
> Track and audit every inventory adjustment in your Jetpack dashboard with detailed action records, filtering options, and Excel export capabilities.
The Inventory History page provides a complete audit trail of every inventory adjustment made to your SKUs. Whether you're tracking down a discrepancy, monitoring receiving activity, or analyzing how inventory moves through your fulfillment centers, this page gives you the visibility you need to understand exactly how and when your inventory quantities change.
## Understanding the Inventory History Page
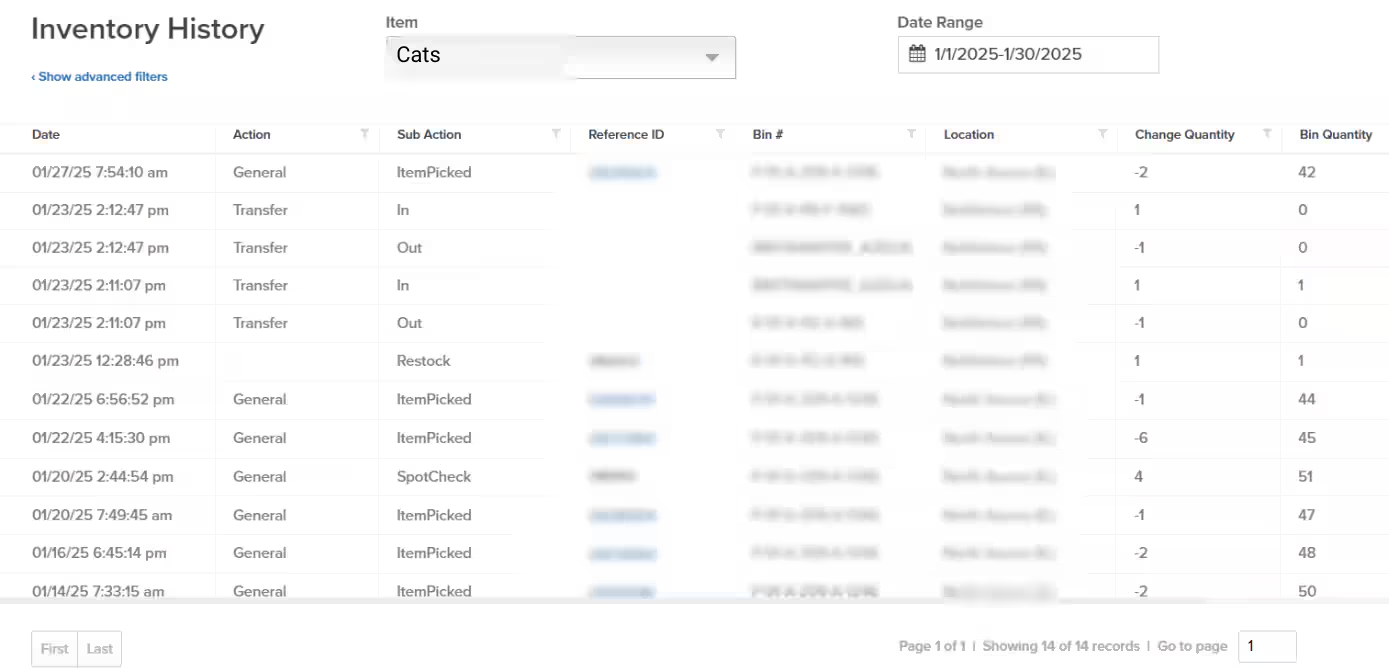
The Inventory History page displays every inventory adjustment for a SKU, providing a detailed record of how each action affects inventory quantities. Each adjustment appears as a row with comprehensive details across multiple columns:
| Column | What It Shows |
| ------------------- | ------------------------------------------------------------------------------------------------------------------- |
| **Date** | The date and time the action was performed (based on your computer's system time) |
| **Action** | The type of inventory adjustment (e.g., General, Bin, Transfer, Bundle, Merge, Receiving, Restock, or FCRelocation) |
| **Sub Action** | Further details on the action (e.g., Added, Removed, ItemPicked, etc.) |
| **Reference ID** | A unique identifier associated with the action (such as a WRO ID or Shipment ID) |
| **Bin Number** | The bin impacted by the adjustment |
| **Location** | The fulfillment center where the action occurred |
| **Change Quantity** | The amount of inventory added or removed |
| **Bin Quantity** | The total inventory in the bin after the action |
This level of detail allows you to trace the complete journey of your inventory, from receiving through storage, fulfillment, and any internal movements.
***
## Accessing the Inventory History Page
Navigate to the Inventory History page from your Jetpack dashboard to begin tracking inventory adjustments:
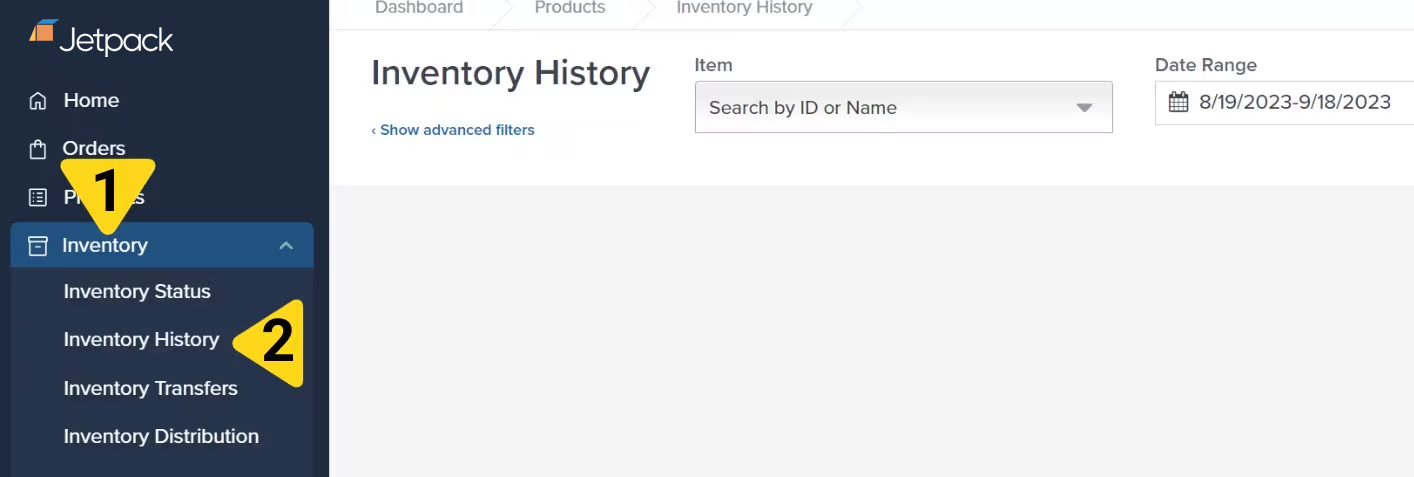
From your dashboard's left-hand navigation bar, click **Inventory**, then select **Inventory History** from the additional menu options.
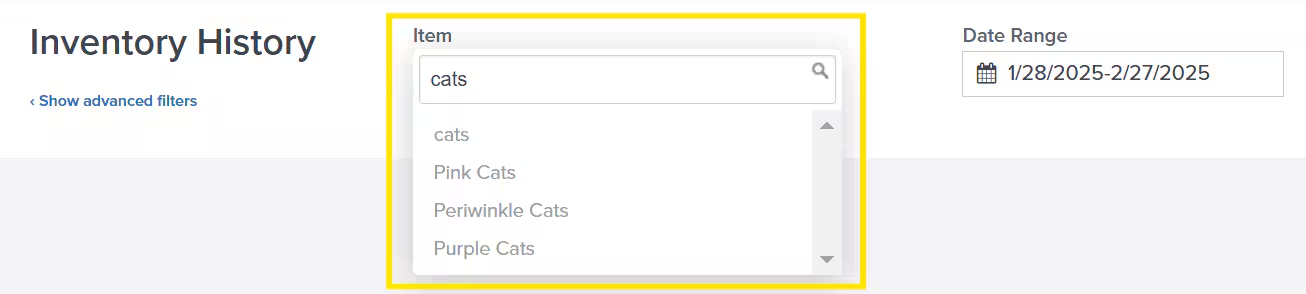
 Use the drop-down menu under **Item** to select a product, or search for the product by **Name** or **Inventory ID** (as seen in your [Product Catalog](/fulfillment/managing-products)).
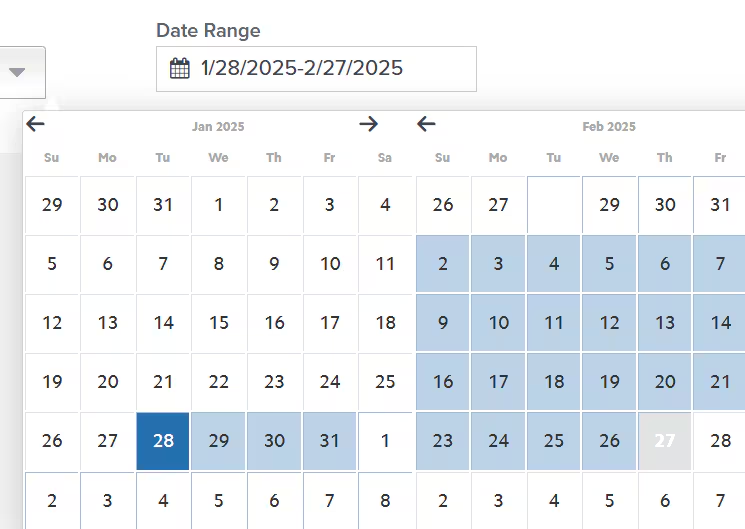
 Click the textbox under **Date Range** to open the calendar. The dashboard defaults to displaying data for the last 30 days. Choose your desired date range to update the view with all inventory adjustments during that period.
 If no inventory adjustments occurred during the selected period, you'll see the message "No records found!" This indicates the selected product had no inventory activity during the specified timeframe.
The inventory history table displays all adjustments for the selected product and date range, showing Date, Action, Sub Action, Reference ID, Bin Number, Location, Change Quantity, and Bin Quantity for each adjustment.
If no inventory adjustments occurred during the selected period, you'll see the message "No records found!" This indicates the selected product had no inventory activity during the specified timeframe.
The inventory history table displays all adjustments for the selected product and date range, showing Date, Action, Sub Action, Reference ID, Bin Number, Location, Change Quantity, and Bin Quantity for each adjustment.
 ***
## Filtering Your Results
Narrow down your inventory history view by applying filters to any column. Click the **funnel icon** on any column header to refine your results based on specific criteria.
***
## Filtering Your Results
Narrow down your inventory history view by applying filters to any column. Click the **funnel icon** on any column header to refine your results based on specific criteria.
 This filtering capability is particularly useful when you're searching for specific types of adjustments, particular fulfillment centers, or specific bin movements.
***
## Exporting Inventory History Data
Export your inventory history to Excel for further analysis, record-keeping, or sharing with your team:
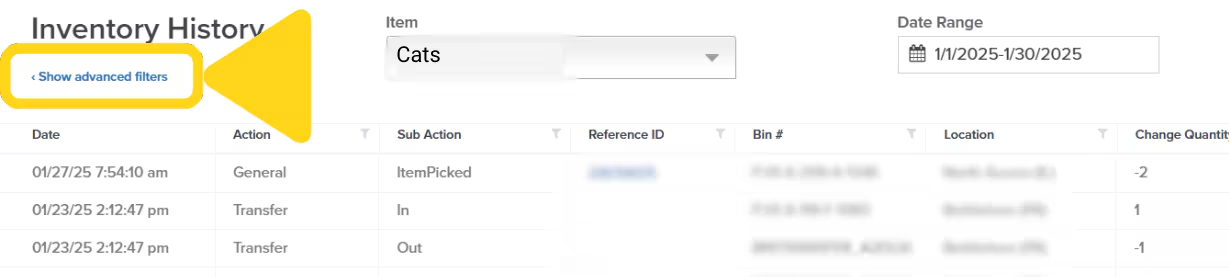
Click **Show Advanced Filters** (hyperlinked text) on the Inventory History page.
This filtering capability is particularly useful when you're searching for specific types of adjustments, particular fulfillment centers, or specific bin movements.
***
## Exporting Inventory History Data
Export your inventory history to Excel for further analysis, record-keeping, or sharing with your team:
Click **Show Advanced Filters** (hyperlinked text) on the Inventory History page.
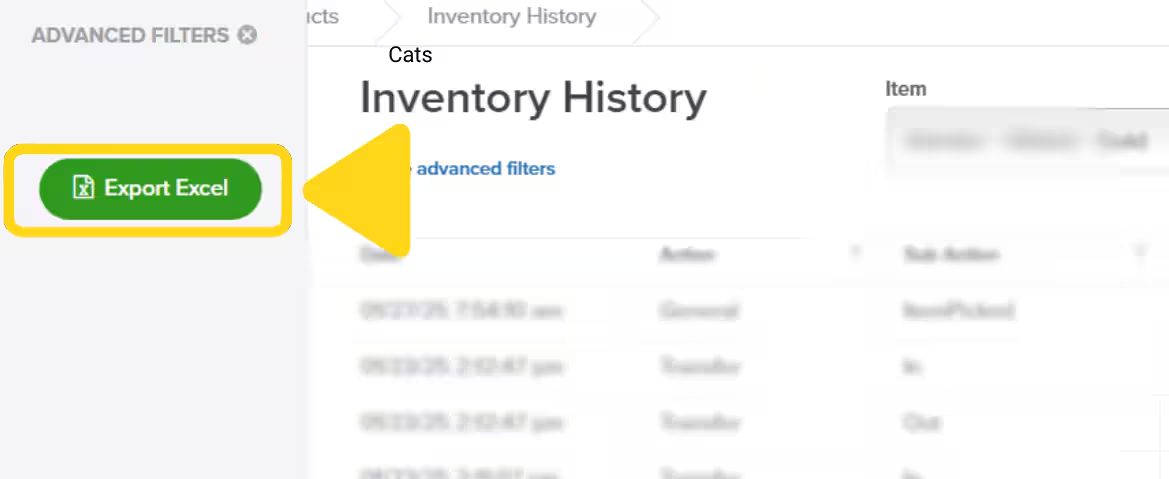
 In the pop-up panel that appears on the left side, click **Export Excel**. A success message will appear, and the Excel file will be downloaded to your computer automatically.
 Regularly exporting inventory history allows you to maintain offline records and perform deeper analysis using spreadsheet tools. This is especially valuable during audits or when investigating inventory discrepancies across multiple time periods.
***
## Let's Dive Deeper
Back to the main inventory management guide with all tools
View real-time inventory levels across fulfillment centers
Move inventory between fulfillment centers
Optimize inventory placement across the network
Set up replenishment schedules and reorder points
Daily inventory tracking with comprehensive column data
Regularly exporting inventory history allows you to maintain offline records and perform deeper analysis using spreadsheet tools. This is especially valuable during audits or when investigating inventory discrepancies across multiple time periods.
***
## Let's Dive Deeper
Back to the main inventory management guide with all tools
View real-time inventory levels across fulfillment centers
Move inventory between fulfillment centers
Optimize inventory placement across the network
Set up replenishment schedules and reorder points
Daily inventory tracking with comprehensive column data

Questions? Contact Jetpack Care.
If you have any questions or run into issues, you can always contact Jetpack Care for help. Our team is always here to assist via Slack, phone, or email!