> ## Documentation Index
> Fetch the complete documentation index at: https://help.jetpack3pl.com/llms.txt
> Use this file to discover all available pages before exploring further.
# Marketing Inserts
> Add printed marketing materials to your shipments with on-demand marketing inserts at Jetpack fulfillment centers.
This feature is exclusively available to merchants who meet certain eligibility criteria. To learn more about pricing and enablement, please reach out to your Jetpack Care Manager.
Marketing inserts let you include branded promotional materials in your shipments without the hassle of pre-printing and storing them as separate SKUs. Jetpack's US fulfillment centers print these materials on-demand, ensuring every eligible order includes your latest marketing message.
## What Are Marketing Inserts?
Marketing inserts are promotional materials printed and included with your outbound shipments. Once enabled, a 4.1 x 6-inch (10 x 15-cm) marketing insert will be printed in full color on a 65# Cover Rolland Opaque postcard style paper for all applicable orders.
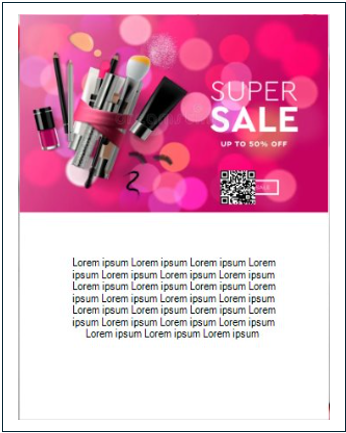 You upload your design as a digital image, and Jetpack prints it on-demand at the fulfillment center—no need to ship pre-printed materials or allocate inventory space.
Marketing inserts are not supported for products configured to Ship in Own Container (SIOC), and you will not receive fees if a marketing insert is included on the order details page.
***
## Marketing Insert Specifications
Your marketing insert image must meet the following specifications:
| Specification | Requirement |
| -------------------- | --------------------------------------------------------------- |
| **Dimensions** | 4.1 x 6 inches (10 x 15 centimeters) |
| **Image Resolution** | 1230 x 1800 pixels at 300 dots per inch |
| **Paper** | 65# Cover Rolland Opaque postcard style paper |
| **Color** | Full color printing |
| **Border** | 0.25-inch (0.635-centimeter) white border on all sides required |
| **Orientation** | Portrait or landscape (depends on uploaded image orientation) |
| **File Format** | .jpg or .png (recommended for best results) |
| **File Size** | 100 MB or less |
You can download a template to ensure your design meets these requirements: [Marketing Insert Template](https://www.shipbob.com/wpcontent/uploads/2025/02/9ee6f1f0899ac710702fc4a4634cca59.png)
***
## Pricing
You are subject to a 3% credit card processing fee if you meet all of the criteria outlined by your Jetpack Care Manager.
Please use Slack or email to learn more about marketing insert pricing.
***
## Enable Marketing Inserts
Follow these steps to enable marketing inserts for your orders:
From the Customize Order Documents page, click **Manage Marketing Inserts** (hyperlinked). You will be redirected to the marketing inserts configuration page.
You upload your design as a digital image, and Jetpack prints it on-demand at the fulfillment center—no need to ship pre-printed materials or allocate inventory space.
Marketing inserts are not supported for products configured to Ship in Own Container (SIOC), and you will not receive fees if a marketing insert is included on the order details page.
***
## Marketing Insert Specifications
Your marketing insert image must meet the following specifications:
| Specification | Requirement |
| -------------------- | --------------------------------------------------------------- |
| **Dimensions** | 4.1 x 6 inches (10 x 15 centimeters) |
| **Image Resolution** | 1230 x 1800 pixels at 300 dots per inch |
| **Paper** | 65# Cover Rolland Opaque postcard style paper |
| **Color** | Full color printing |
| **Border** | 0.25-inch (0.635-centimeter) white border on all sides required |
| **Orientation** | Portrait or landscape (depends on uploaded image orientation) |
| **File Format** | .jpg or .png (recommended for best results) |
| **File Size** | 100 MB or less |
You can download a template to ensure your design meets these requirements: [Marketing Insert Template](https://www.shipbob.com/wpcontent/uploads/2025/02/9ee6f1f0899ac710702fc4a4634cca59.png)
***
## Pricing
You are subject to a 3% credit card processing fee if you meet all of the criteria outlined by your Jetpack Care Manager.
Please use Slack or email to learn more about marketing insert pricing.
***
## Enable Marketing Inserts
Follow these steps to enable marketing inserts for your orders:
From the Customize Order Documents page, click **Manage Marketing Inserts** (hyperlinked). You will be redirected to the marketing inserts configuration page.
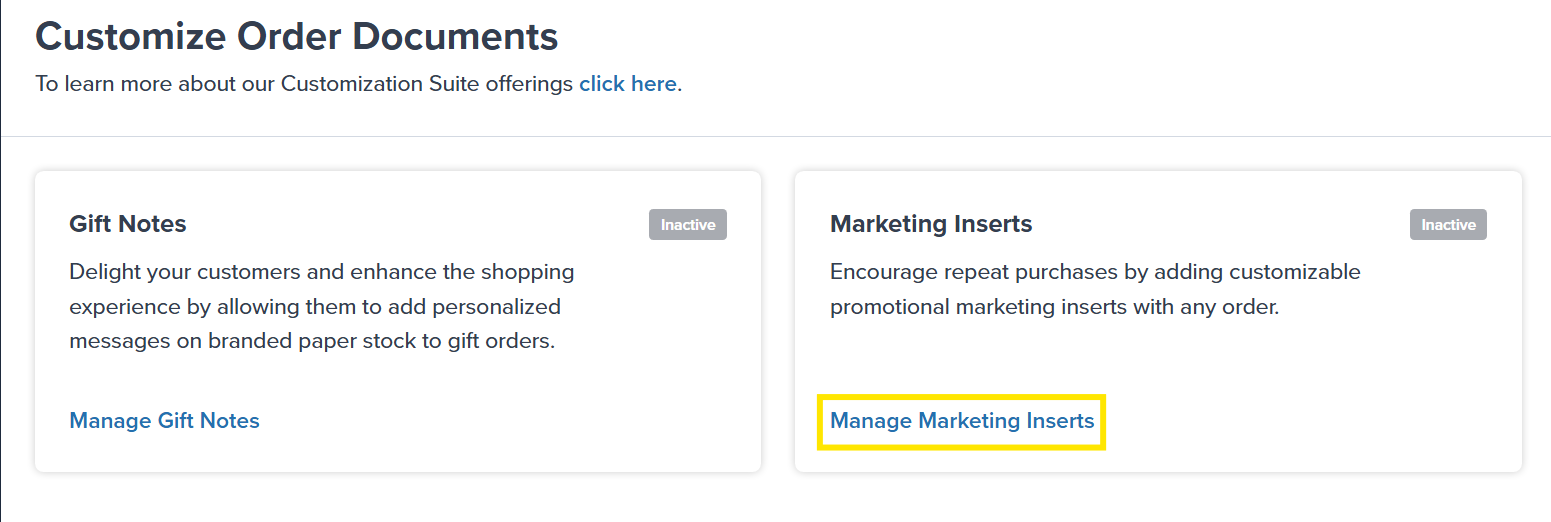 Click the **Standard Marketing Insert** panel. The panel will expand to show additional options.
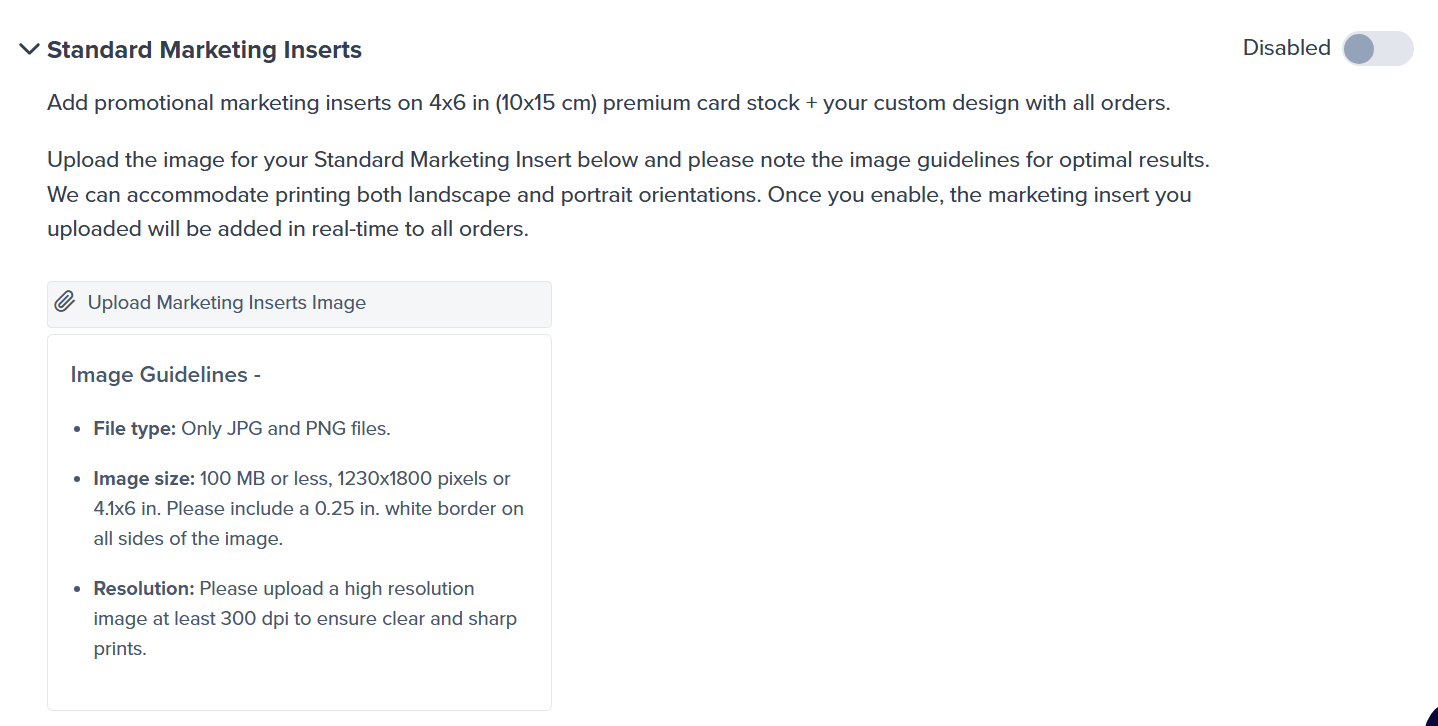 Click **Upload Marketing Inserts Image**.
This will allow you to add a single 1230 x 1800-pixel (300 dots per image) color image to your marketing inserts (4.1 x 6 inches or 10 x 15 centimeters).
* There must be a 0.25-inch (0.635-centimeter) white border on all sides of the image
* The orientation will depend on the orientation of the image uploaded (portrait or landscape)
* Download template here: [Marketing Insert Template](https://www.shipbob.com/wpcontent/uploads/2025/02/9ee6f1f0899ac710702fc4a4634cca59.png)
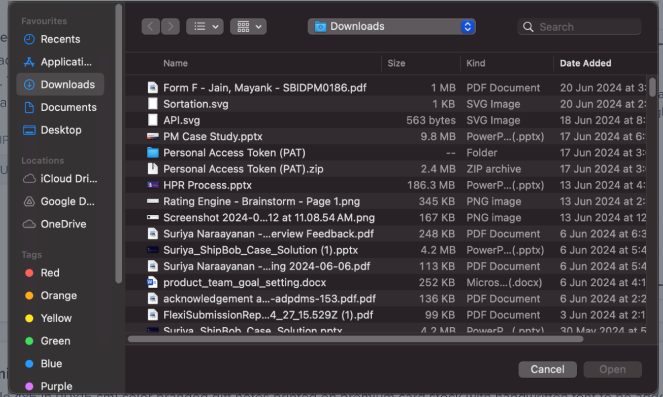
Select the file to upload. For the best results, select a file in .jpg or .png format that is 100 MB or less.
Click **Upload Marketing Inserts Image**.
This will allow you to add a single 1230 x 1800-pixel (300 dots per image) color image to your marketing inserts (4.1 x 6 inches or 10 x 15 centimeters).
* There must be a 0.25-inch (0.635-centimeter) white border on all sides of the image
* The orientation will depend on the orientation of the image uploaded (portrait or landscape)
* Download template here: [Marketing Insert Template](https://www.shipbob.com/wpcontent/uploads/2025/02/9ee6f1f0899ac710702fc4a4634cca59.png)
Select the file to upload. For the best results, select a file in .jpg or .png format that is 100 MB or less.
 If your image does not meet requirements, you'll see an on-screen alert:
* **Image too large:** You will not be allowed to proceed until you upload a supported size
* **Image too small:** You will be alerted, but you can proceed if desired
If your image does not meet requirements, you'll see an on-screen alert:
* **Image too large:** You will not be allowed to proceed until you upload a supported size
* **Image too small:** You will be alerted, but you can proceed if desired

 Click **Save Changes** in the Unsaved Changes bar.
 You will receive a success message, and the image will be printed on all Standard marketing inserts (as it appears under Image Preview).
Click the toggle icon next to **Disabled** (located at the top right of the Standard Marketing Insert panel). A pop-up window will appear.
Review the on-screen message, check the box to confirm acknowledgment, and click **Yes, Enable**.
You will receive a success message, and the image will be printed on all Standard marketing inserts (as it appears under Image Preview).
Click the toggle icon next to **Disabled** (located at the top right of the Standard Marketing Insert panel). A pop-up window will appear.
Review the on-screen message, check the box to confirm acknowledgment, and click **Yes, Enable**.
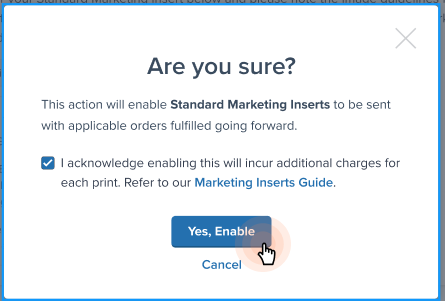 You will receive a success message, and the toggle icon will update to **Enabled** and change to blue.
Once enabled, your marketing insert will be printed for all orders that are in the Processing status (i.e., the fulfillment process has yet to begin).
***
## Disable Marketing Inserts
You can disable marketing inserts at any time in your Jetpack dashboard. Once disabled, all orders for which we have not yet started the fulfillment process (i.e., are not yet picked) will not receive the marketing insert.
From the Customize Order Documents page, click **Manage Marketing Inserts** (hyperlinked). You will be redirected to the marketing inserts configuration page.
Click the **Standard Marketing Insert** panel. The panel will expand to show additional options.
Click the toggle icon next to **Enabled**.
You will receive a success message, and the toggle icon will turn gray and update to **Disabled**. Your previous marketing insert settings will remain configured if you choose to enable the feature later.
***
## Delete Marketing Insert Image
You can update the image utilized for marketing inserts at any time by deleting the previous image and uploading a new one.
Once updated, orders for which we have not yet started the fulfillment process will receive the new image, while orders that we have already started fulfilling will receive the previously uploaded image.
From the Customize Order Documents page, click **Manage Marketing Inserts** (hyperlinked). You will be redirected to the marketing inserts configuration page.
Click the **Standard Marketing Insert** panel. The panel will expand to show additional options.
Click the trash can/bin icon next to **Replace Current Marketing Insert Image**. A pop-up screen will appear.
Keep in mind:
* You are required to have an image for marketing inserts
* Removing the image will disable the marketing insert feature
* If you want to continue utilizing marketing inserts, you must provide a new background image and re-enable the feature
Review the on-screen message and click **Yes, Delete**.
You will receive a success message, and the toggle icon will update to **Enabled** and change to blue.
Once enabled, your marketing insert will be printed for all orders that are in the Processing status (i.e., the fulfillment process has yet to begin).
***
## Disable Marketing Inserts
You can disable marketing inserts at any time in your Jetpack dashboard. Once disabled, all orders for which we have not yet started the fulfillment process (i.e., are not yet picked) will not receive the marketing insert.
From the Customize Order Documents page, click **Manage Marketing Inserts** (hyperlinked). You will be redirected to the marketing inserts configuration page.
Click the **Standard Marketing Insert** panel. The panel will expand to show additional options.
Click the toggle icon next to **Enabled**.
You will receive a success message, and the toggle icon will turn gray and update to **Disabled**. Your previous marketing insert settings will remain configured if you choose to enable the feature later.
***
## Delete Marketing Insert Image
You can update the image utilized for marketing inserts at any time by deleting the previous image and uploading a new one.
Once updated, orders for which we have not yet started the fulfillment process will receive the new image, while orders that we have already started fulfilling will receive the previously uploaded image.
From the Customize Order Documents page, click **Manage Marketing Inserts** (hyperlinked). You will be redirected to the marketing inserts configuration page.
Click the **Standard Marketing Insert** panel. The panel will expand to show additional options.
Click the trash can/bin icon next to **Replace Current Marketing Insert Image**. A pop-up screen will appear.
Keep in mind:
* You are required to have an image for marketing inserts
* Removing the image will disable the marketing insert feature
* If you want to continue utilizing marketing inserts, you must provide a new background image and re-enable the feature
Review the on-screen message and click **Yes, Delete**.
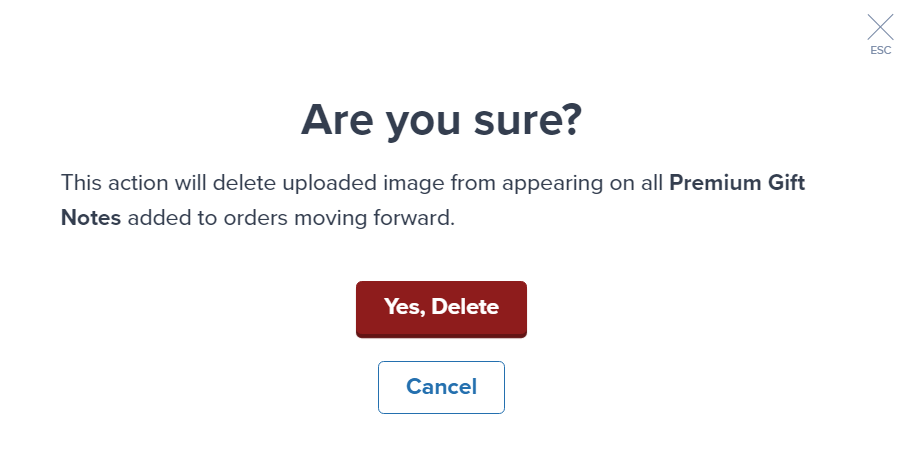 You will receive a confirmation message that your marketing insert image has been deleted.
***
## Let's Dive Deeper
Back to the main customization guide
Configure settings for gift notes and marketing inserts
Add personalized Standard or Premium gift notes
Personalize sender information on shipping labels
Configure packaging types
Use branded boxes and materials
You will receive a confirmation message that your marketing insert image has been deleted.
***
## Let's Dive Deeper
Back to the main customization guide
Configure settings for gift notes and marketing inserts
Add personalized Standard or Premium gift notes
Personalize sender information on shipping labels
Configure packaging types
Use branded boxes and materials
Questions? Contact Jetpack Care.
If you have any questions or run into issues, you can always contact Jetpack Care for help. Our team is always here to assist via Slack, phone, or email!