> ## Documentation Index
> Fetch the complete documentation index at: https://help.jetpack3pl.com/llms.txt
> Use this file to discover all available pages before exploring further.
# Pick By Lot (B2B Orders)
> Learn how to create B2B orders with lot selection for perishable and traceable goods, and how to edit lot information after order creation.
For perishable goods like consumables, health products, or beauty items, traceability is critical. When fulfilling B2B orders to retailers or wholesalers, you can select specific lot numbers and expiration dates for each product in your shipment. This ensures that your customers receive inventory with the batch tracking information they need for compliance and quality control.
## Understanding B2B Orders with Lot Selection
B2B orders are shipped to retailers or wholesalers and often require special handling due to order size or product type. For perishable goods, such as consumables, health, or beauty products, a single lot ID per order is required for traceability. Jetpack allows you to select a lot ID for each product within a B2B order.
For pricing details, contact Jetpack Care.
***
## Creating a B2B Order with Lot Selection
By following these structured steps, you can efficiently manage B2B orders with lot selection in the Jetpack dashboard and ensure that lot information is accurate and up to date for traceability purposes.
From the Jetpack dashboard, click **Orders** on the left-hand navigation bar. Additional menu options will appear.
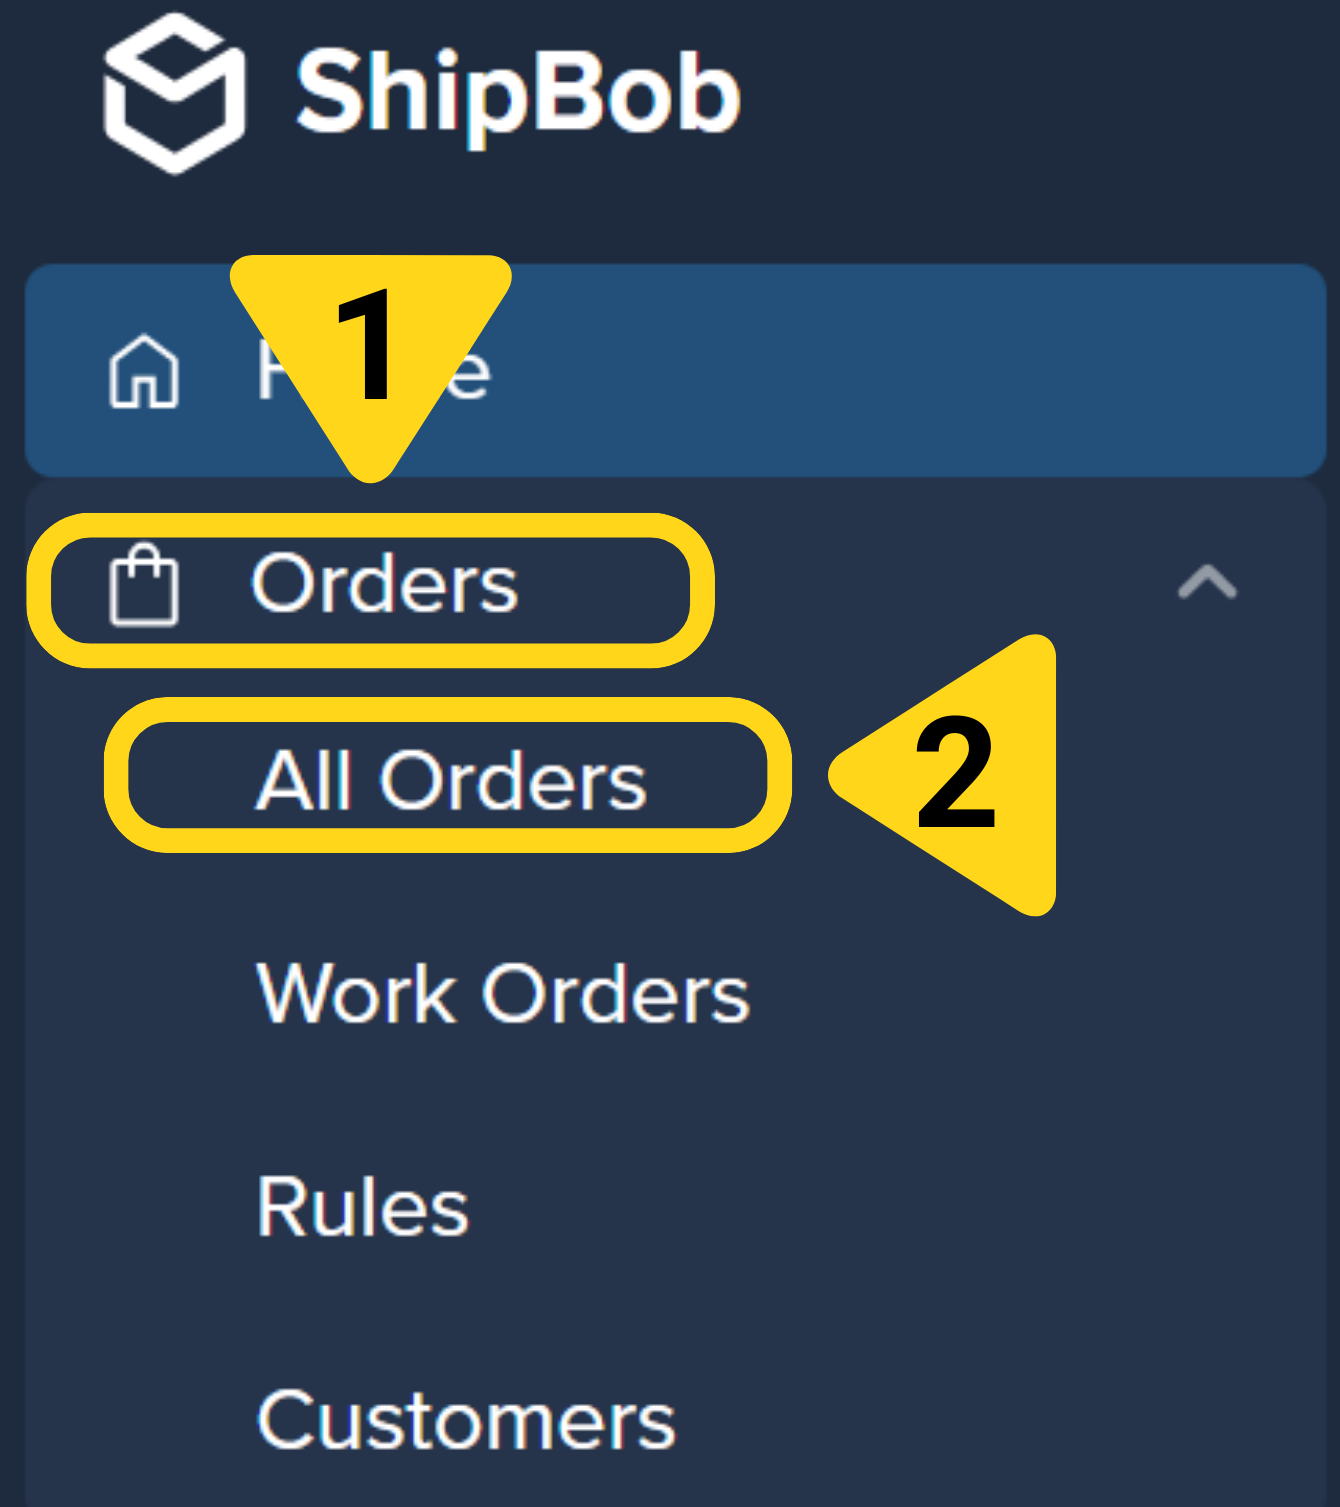 In the expanded Orders menu, select **All Orders**.
At the top right-hand corner of the page, click **New Order**.
In the expanded Orders menu, select **All Orders**.
At the top right-hand corner of the page, click **New Order**.
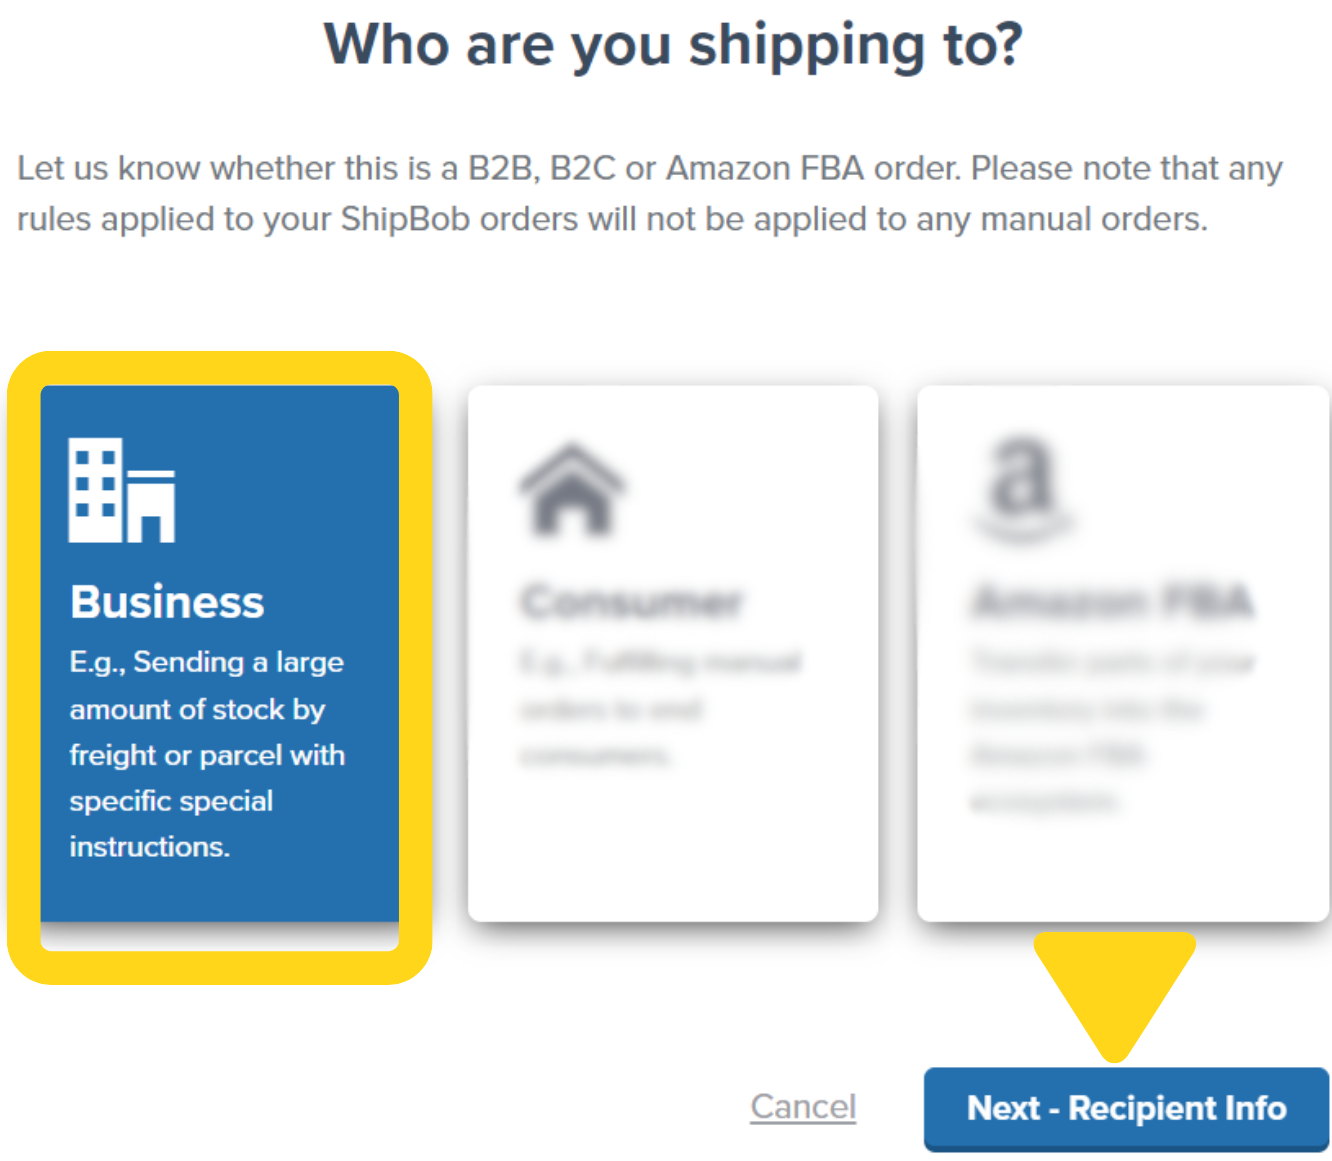
 Under "Who are you shipping to?", select **Business**.
Click **Next - Recipient Info**.
Under "Who are you shipping to?", select **Business**.
Click **Next - Recipient Info**.
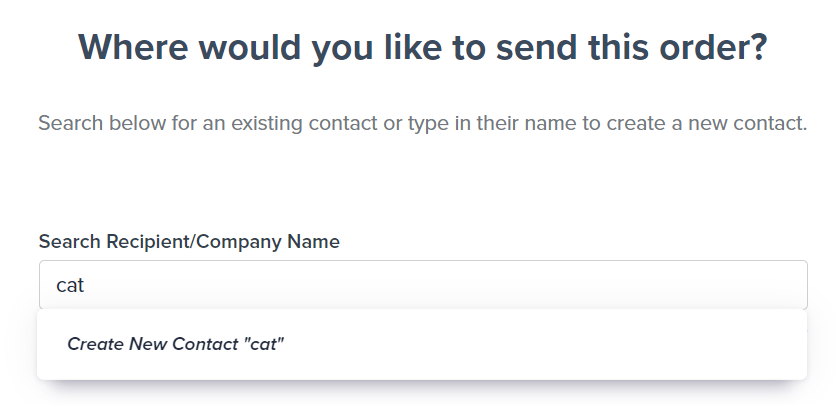
 Use the textbox under **Search Recipient/Company Name** to find a saved contact, or click **Create New Contact** to enter new details for your wholesale or retail customer.
Once you've selected or created the recipient, click **Next - Shipping Info**.
Use the textbox under **Search Recipient/Company Name** to find a saved contact, or click **Create New Contact** to enter new details for your wholesale or retail customer.
Once you've selected or created the recipient, click **Next - Shipping Info**.
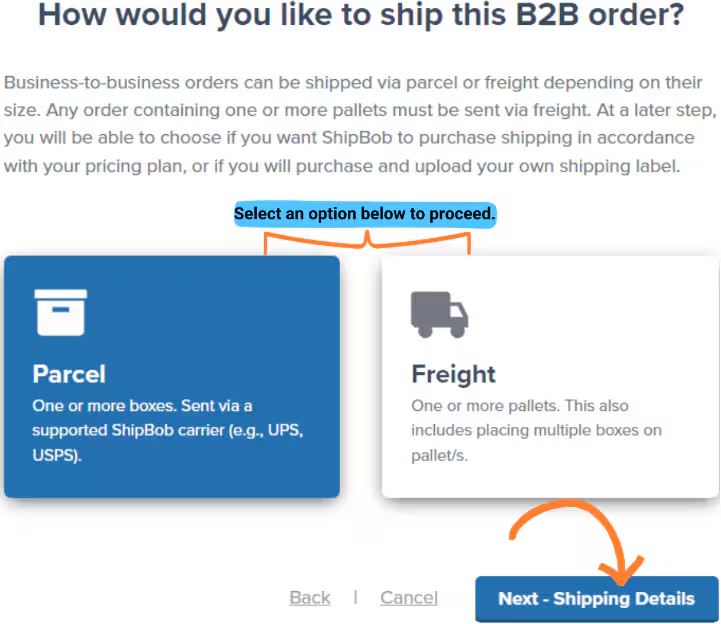
 Select either **Parcel** (for individual boxes) or **Freight** (for palletized shipments) based on your needs.
Click **Next - Shipping Details**.
Select either **Parcel** (for individual boxes) or **Freight** (for palletized shipments) based on your needs.
Click **Next - Shipping Details**.
 Choose your shipping method:
* **ShipBob Buys** - Jetpack automatically purchases shipment labels using ShipBob's shipping network. The order will automatically be billed to your Jetpack dashboard.
* **Upload Your Own** - You prefer to handle shipping labels and freight pickup independently.
- **ShipBob Buys quotes must be requested ahead of time** by emailing Jetpack Care
- **Freight orders require a Bill of Lading (BOL)** - The BOL must be attached to the order, and the driver must arrive on time to their scheduled appointment with a copy of the attached BOL
Click **Next - Packing Instructions**.
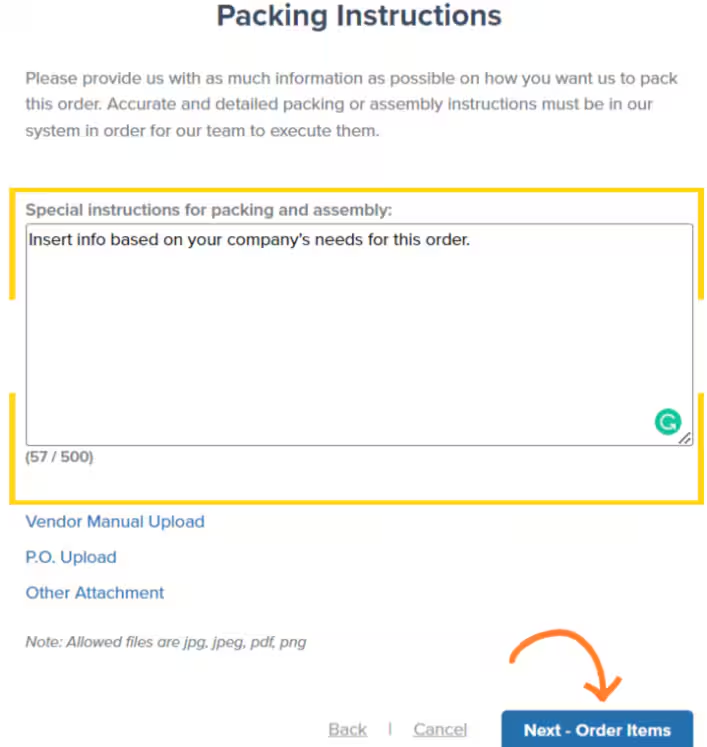
Input any special instructions for packing and assembly in the provided textbox.
You may also upload a purchase order or other attachments:
* Supported file types: `.jpg`, `.jpeg`, `.pdf`, `.png`
* Maximum file size: 5 MB
The "Vendor Manual Upload" hyperlink does not have functionality - Jetpack cannot follow or read vendor manuals uploaded through this field.
Click **Next - Order Items**.
Choose your shipping method:
* **ShipBob Buys** - Jetpack automatically purchases shipment labels using ShipBob's shipping network. The order will automatically be billed to your Jetpack dashboard.
* **Upload Your Own** - You prefer to handle shipping labels and freight pickup independently.
- **ShipBob Buys quotes must be requested ahead of time** by emailing Jetpack Care
- **Freight orders require a Bill of Lading (BOL)** - The BOL must be attached to the order, and the driver must arrive on time to their scheduled appointment with a copy of the attached BOL
Click **Next - Packing Instructions**.
Input any special instructions for packing and assembly in the provided textbox.
You may also upload a purchase order or other attachments:
* Supported file types: `.jpg`, `.jpeg`, `.pdf`, `.png`
* Maximum file size: 5 MB
The "Vendor Manual Upload" hyperlink does not have functionality - Jetpack cannot follow or read vendor manuals uploaded through this field.
Click **Next - Order Items**.
 Select the fulfillment center from the drop-down list, or choose **Let Jetpack optimize for me** to have the most optimal center selected automatically.
Enter the products for the order by searching and selecting from your Product Catalog.
Select the fulfillment center from the drop-down list, or choose **Let Jetpack optimize for me** to have the most optimal center selected automatically.
Enter the products for the order by searching and selecting from your Product Catalog.
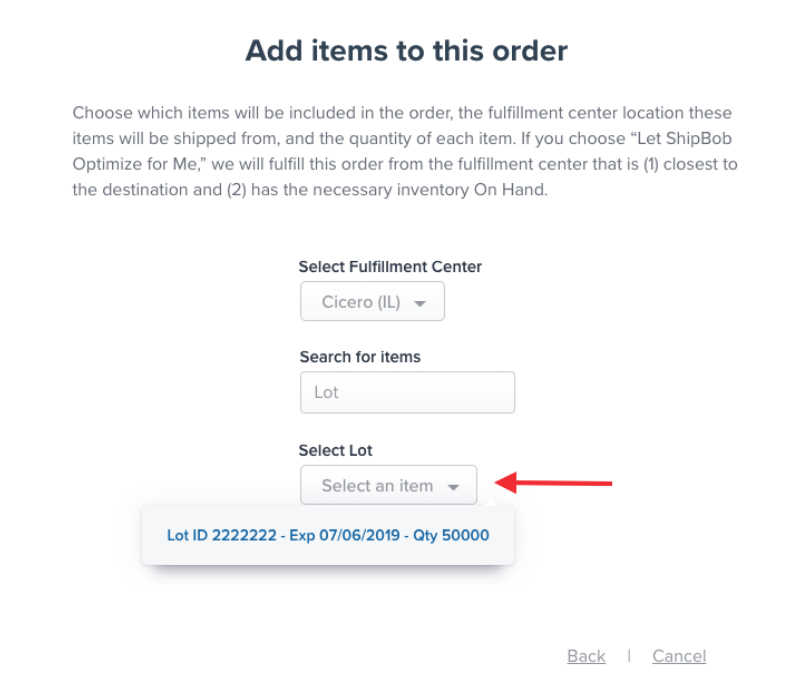 For each product, a **Select Lot** dropdown will appear if you've configured that product with lot tracking.
Choose the appropriate lot number and lot date for each product from the dropdown.
For each product, a **Select Lot** dropdown will appear if you've configured that product with lot tracking.
Choose the appropriate lot number and lot date for each product from the dropdown.
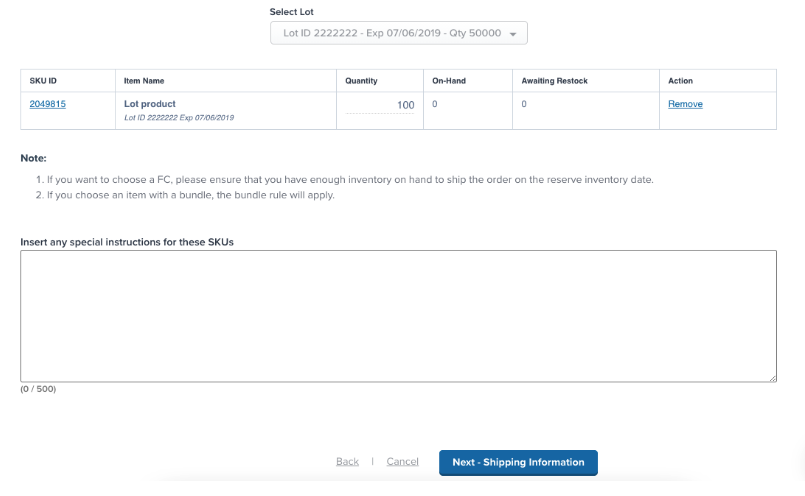 Optionally, add special instructions for the selected SKUs.
The Select Lot dropdown only appears for products that have been configured with lot tracking. If you don't see this option, your product may not be set up for lot management. Learn more about configuring lot products in your inventory settings.
Click **Next - Shipping Information**.
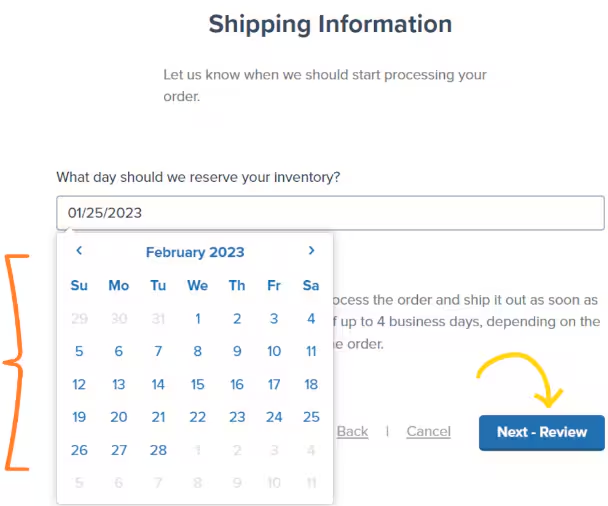
Specify the date on which you want the inventory reserved.
* If immediate processing is required, use today's date
* Note that the SLA (Service Level Agreement) will start once the reserve date is met
For details on B2B fulfillment timelines, see [B2B Turnaround Times](/fulfillment/b2b/b2b-turnaround-times).
Optionally, add special instructions for the selected SKUs.
The Select Lot dropdown only appears for products that have been configured with lot tracking. If you don't see this option, your product may not be set up for lot management. Learn more about configuring lot products in your inventory settings.
Click **Next - Shipping Information**.
Specify the date on which you want the inventory reserved.
* If immediate processing is required, use today's date
* Note that the SLA (Service Level Agreement) will start once the reserve date is met
For details on B2B fulfillment timelines, see [B2B Turnaround Times](/fulfillment/b2b/b2b-turnaround-times).
 Click **Next - Review** to confirm the order details.
Review all order details including recipient information, shipping method, products, lot selections, and reserve date.
Click **Next - Review** to confirm the order details.
Review all order details including recipient information, shipping method, products, lot selections, and reserve date.
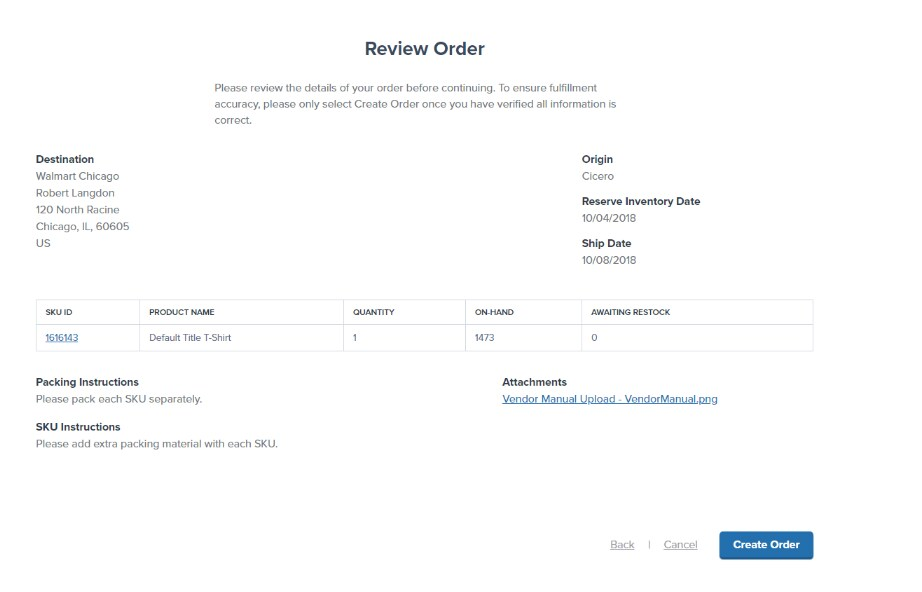 Click **Create Order** to finalize.
After creation, you will be redirected to the newly created order details page where you can track its progress through fulfillment.
***
## Editing Lot Information on a B2B Order
You can modify the lot information for B2B shipments that are either imported from your e-commerce platform or manually created in the Jetpack dashboard.
Changes to lot information cannot be made once the order status changes to **Picked**. Make any necessary lot adjustments before the warehouse begins picking your order.
From the Orders page, click on the **Shipment ID** (hyperlinked) for the B2B shipment you want to update.
On the order details page, click **Edit Items**.
Click **Create Order** to finalize.
After creation, you will be redirected to the newly created order details page where you can track its progress through fulfillment.
***
## Editing Lot Information on a B2B Order
You can modify the lot information for B2B shipments that are either imported from your e-commerce platform or manually created in the Jetpack dashboard.
Changes to lot information cannot be made once the order status changes to **Picked**. Make any necessary lot adjustments before the warehouse begins picking your order.
From the Orders page, click on the **Shipment ID** (hyperlinked) for the B2B shipment you want to update.
On the order details page, click **Edit Items**.
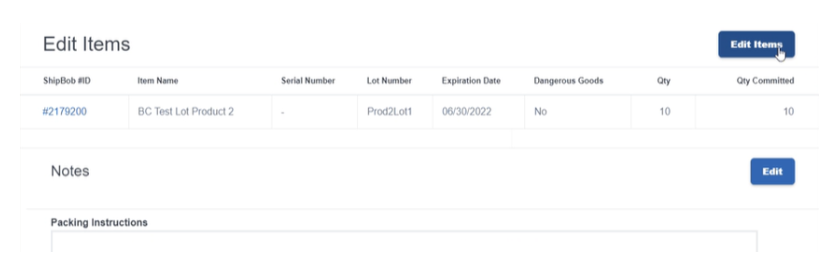 Click the current lot information for the product to display a dropdown of available lot numbers and expiration dates.
Select the correct lot information for the chosen fulfillment center.
Click the current lot information for the product to display a dropdown of available lot numbers and expiration dates.
Select the correct lot information for the chosen fulfillment center.
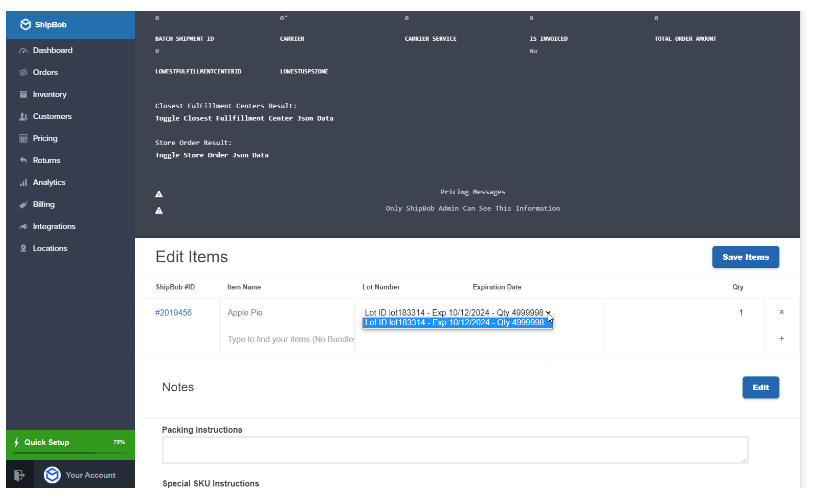 Click **Save Items** to update the lot information.
The order will now be fulfilled using the updated lot selection.
***
## Let's Dive Deeper
Back to the B2B fulfillment overview
Complete guide to manual B2B order creation
Automatically import B2B orders from Shopify
Transfer inventory between fulfillment centers
Track and manage inventory across your fulfillment network
Set up and manage lot-tracked inventory
Click **Save Items** to update the lot information.
The order will now be fulfilled using the updated lot selection.
***
## Let's Dive Deeper
Back to the B2B fulfillment overview
Complete guide to manual B2B order creation
Automatically import B2B orders from Shopify
Transfer inventory between fulfillment centers
Track and manage inventory across your fulfillment network
Set up and manage lot-tracked inventory

Questions? Contact Jetpack Care.
If you have any questions or run into issues with lot selection or B2B order creation, you can always contact Jetpack Care for help. Our team is always here to assist via Slack, phone, or email!