> ## Documentation Index
> Fetch the complete documentation index at: https://help.jetpack3pl.com/llms.txt
> Use this file to discover all available pages before exploring further.
# Integrations + Apps Overview
> Learn how to connect, manage, and configure integrations with your ecommerce platforms, marketplaces, and third-party tools.
Integrations are the backbone of automated fulfillment with Jetpack. By connecting your ecommerce store, marketplace accounts, and third-party tools, you enable seamless product syncing, automatic order importing, real-time inventory updates, and tracking synchronization—all without manual data entry.
## What Are Jetpack Integrations?
Integrations connect Jetpack with external platforms to automate data flow between systems. Once connected, integrations handle:
* **Product Syncing** - Automatically import products from your store into the Jetpack Product Catalog
* **Order Importing** - New orders flow from your platform to Jetpack for fulfillment
* **Inventory Updates** - Real-time inventory counts sync back to your store as orders ship
* **Tracking Notifications** - Tracking numbers automatically push to your store and notify customers
* **Returns Management** - Return orders sync from platforms that support return workflows
This automation eliminates manual data entry, reduces errors, and ensures your store always reflects accurate inventory and order status.
***
## Types of Integrations
Jetpack offers two main categories of integrations:
| Integration Type | Description | Examples | How to Access |
| ------------------------------ | ---------------------------------------------------------------------------------------------------------------------------------------------------------------------------------------------------------- | ------------------------------------------------------------------------ | ----------------------------------- |
| **Jetpack-Built Integrations** | - Built and maintained by Jetpack
- Deep integration with platform APIs
- Optimized for reliability and speed
- Directly supported by Jetpack Care
| Shopify, Amazon, BigCommerce, WooCommerce, eBay, Walmart | **Quick Actions** menu in dashboard |
| **Third-Party Integrations** | - Built by external software vendors
- Connect Jetpack with specialized tools
- Extend functionality beyond ecommerce platforms
- Support provided by third-party vendor
| Gorgias (support), Klaviyo (email), AfterShip (tracking), NetSuite (ERP) | **App Store** in dashboard settings |
Most merchants use **Jetpack-Built Integrations** to connect their primary ecommerce platform. **Third-Party Integrations** add functionality for customer support, email marketing, accounting, or advanced inventory management.
***
## Accessing and Installing Integrations
Jetpack provides two ways to access and install integrations, depending on the integration type:
### Quick Actions (Jetpack-Built Integrations)
**Quick Actions** is your fast-access menu for core Jetpack-built integrations like Shopify, Amazon, BigCommerce, WooCommerce, eBay, Walmart, and more.
**Common integrations available:**
* Shopify, Amazon Seller Central, BigCommerce, WooCommerce
* Adobe Commerce (Magento), Squarespace, Wix
* eBay, Walmart, TikTok Shop, Temu
### How to Install Jetpack-Built Integrations
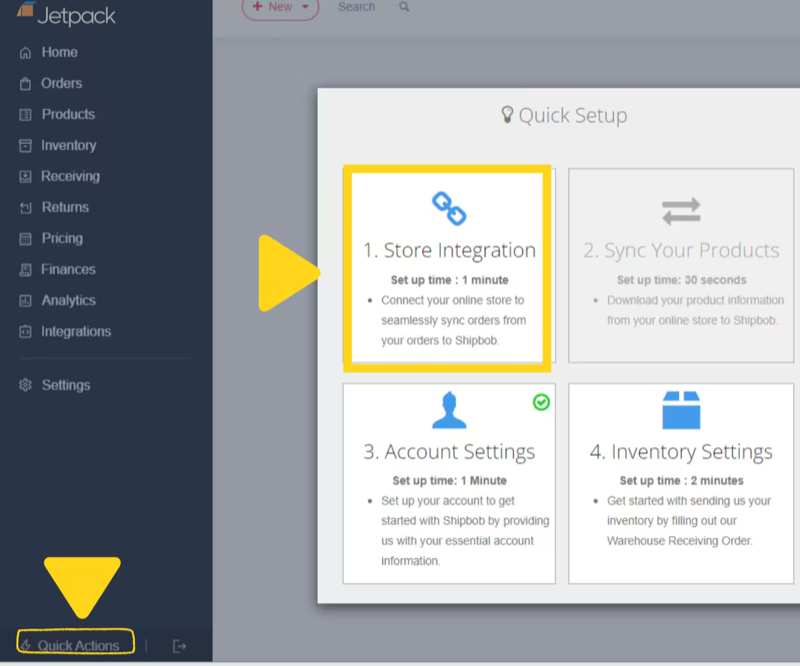
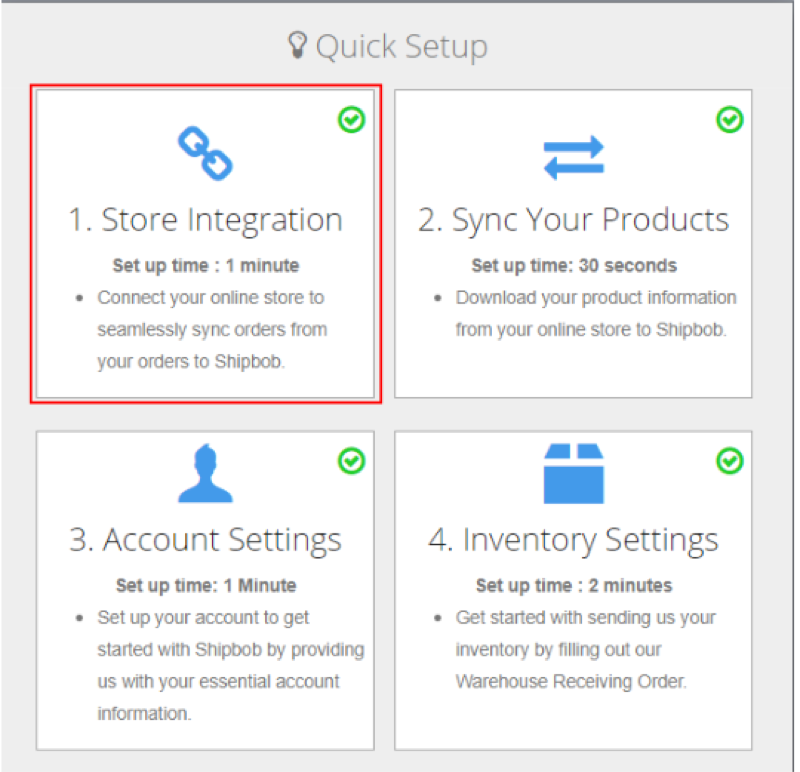 You'll see a list of available integrations to connect.
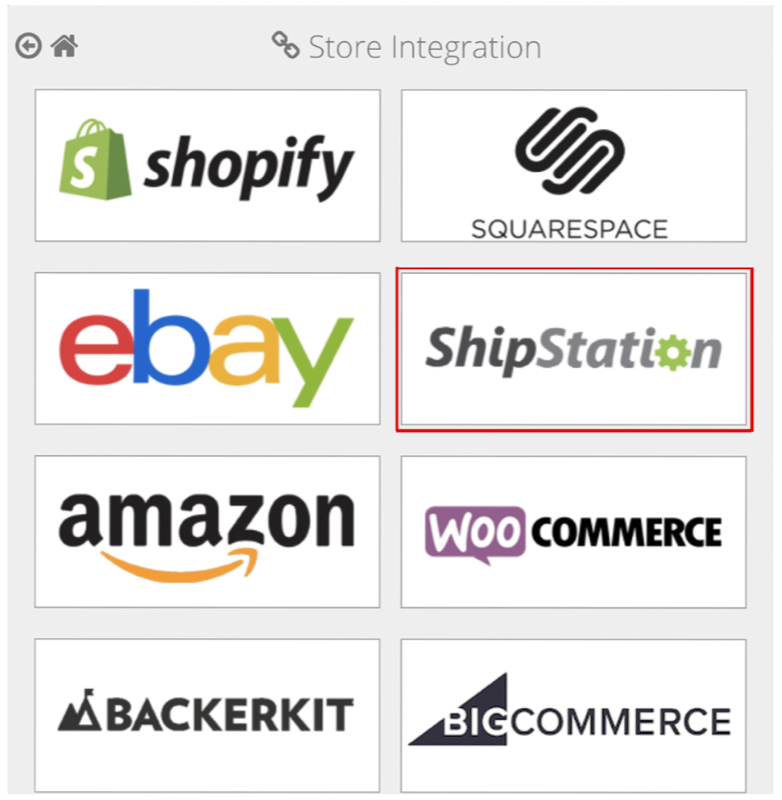
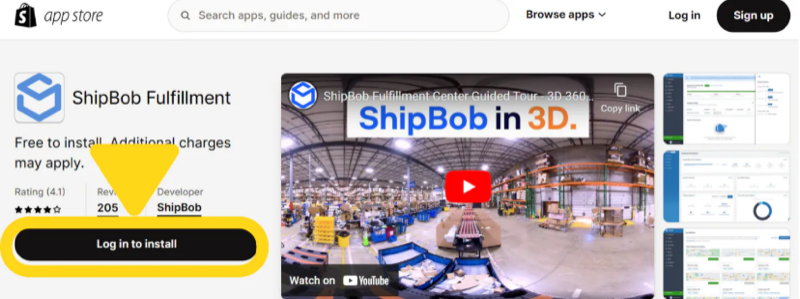 You'll be redirected to your store platform to authorize the connection:
* For Shopify: Click "Install App" to grant Jetpack access
* For Amazon: Log in with Seller Central credentials
* For other platforms: Follow platform-specific authorization steps
You'll be redirected to your store platform to authorize the connection:
* For Shopify: Click "Install App" to grant Jetpack access
* For Amazon: Log in with Seller Central credentials
* For other platforms: Follow platform-specific authorization steps
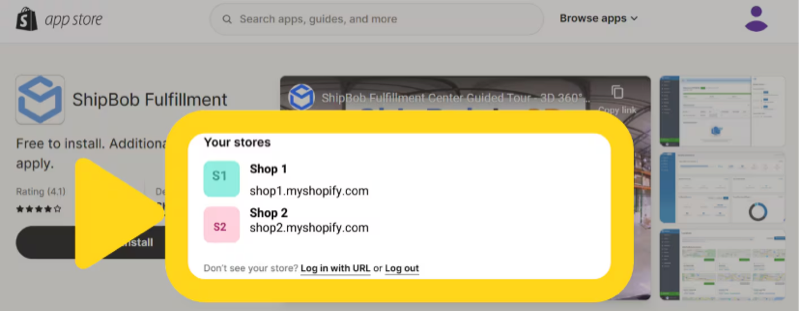 If you have multiple stores, select which store to connect.
* Choose which data to sync (products, orders, inventory)
* Set sync frequency (real-time, hourly, daily)
* Select fulfillment locations (if you have multiple stores/accounts)
Your integration is now active. Products and orders will begin syncing according to your configured settings.
For platform-specific instructions, see the [Store Integration Overview](/fulfillment/account-setup/integrating-store).
### App Store (Third-Party Integrations)
The **App Store** houses third-party integrations that extend Jetpack's functionality beyond ecommerce platforms.
**Available app categories:**
* Customer Support (Gorgias, Loop Returns, Happy Returns)
* Email & Marketing (Klaviyo, Triple Whale)
* Inventory Management (Inventory Planner, Cin7, Skubana)
* Order Management (Order Desk, ShipStation)
* Accounting & ERP (NetSuite, QuickBooks)
* Returns & Exchanges (Loop, Happy Returns, AfterShip)
### How to Install Third-Party Apps
**From the Jetpack dashboard:**
If you have multiple stores, select which store to connect.
* Choose which data to sync (products, orders, inventory)
* Set sync frequency (real-time, hourly, daily)
* Select fulfillment locations (if you have multiple stores/accounts)
Your integration is now active. Products and orders will begin syncing according to your configured settings.
For platform-specific instructions, see the [Store Integration Overview](/fulfillment/account-setup/integrating-store).
### App Store (Third-Party Integrations)
The **App Store** houses third-party integrations that extend Jetpack's functionality beyond ecommerce platforms.
**Available app categories:**
* Customer Support (Gorgias, Loop Returns, Happy Returns)
* Email & Marketing (Klaviyo, Triple Whale)
* Inventory Management (Inventory Planner, Cin7, Skubana)
* Order Management (Order Desk, ShipStation)
* Accounting & ERP (NetSuite, QuickBooks)
* Returns & Exchanges (Loop, Happy Returns, AfterShip)
### How to Install Third-Party Apps
**From the Jetpack dashboard:**
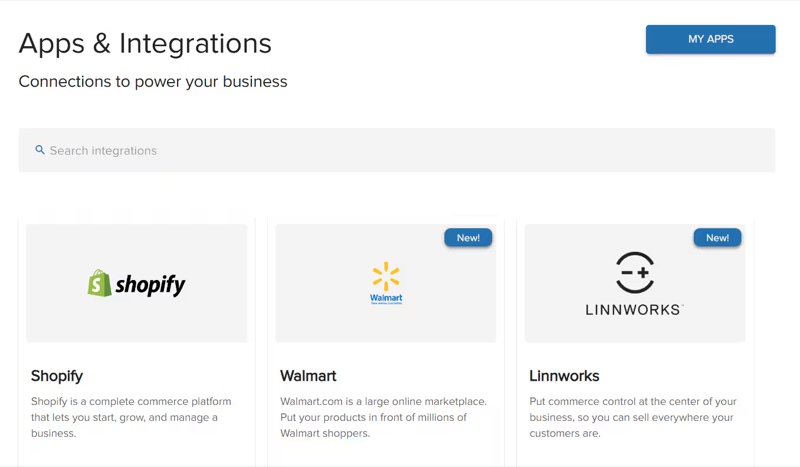 Use the search bar or scroll through available integrations to find the app you need.
You'll be redirected to the third-party app to authorize the connection:
* Log in with your account credentials for that app
* Grant Jetpack the requested permissions
Each app has unique configuration options:
* API keys or tokens may need to be entered
* Select which data to share between systems
* Configure automation rules specific to the app
The third-party app is now connected to Jetpack and will begin exchanging data.
While Jetpack provides the connection infrastructure for third-party integrations, support for setup and troubleshooting is typically provided by the third-party vendor. Check the vendor's documentation or support channels for detailed assistance.
Some integrations require you to generate API keys or credentials from your store platform or third-party app before connecting. Check the integration's setup guide for specific requirements.
***
## Managing Your Integrations
Once integrations are installed, you'll need to monitor their status, update settings, and troubleshoot issues when they arise.
### Viewing All Integrations
**From the Jetpack dashboard:**
Use the search bar or scroll through available integrations to find the app you need.
You'll be redirected to the third-party app to authorize the connection:
* Log in with your account credentials for that app
* Grant Jetpack the requested permissions
Each app has unique configuration options:
* API keys or tokens may need to be entered
* Select which data to share between systems
* Configure automation rules specific to the app
The third-party app is now connected to Jetpack and will begin exchanging data.
While Jetpack provides the connection infrastructure for third-party integrations, support for setup and troubleshooting is typically provided by the third-party vendor. Check the vendor's documentation or support channels for detailed assistance.
Some integrations require you to generate API keys or credentials from your store platform or third-party app before connecting. Check the integration's setup guide for specific requirements.
***
## Managing Your Integrations
Once integrations are installed, you'll need to monitor their status, update settings, and troubleshoot issues when they arise.
### Viewing All Integrations
**From the Jetpack dashboard:**
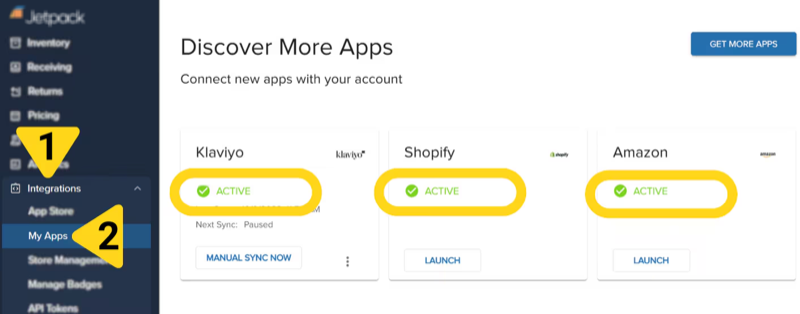 You'll see a list of active integrations with:
* Integration name and logo
* Connection status (Connected, Disconnected, Error)
* Last sync timestamp
* Quick access to settings
### Viewing Integration Settings
To access settings for a specific integration:
You'll see a list of active integrations with:
* Integration name and logo
* Connection status (Connected, Disconnected, Error)
* Last sync timestamp
* Quick access to settings
### Viewing Integration Settings
To access settings for a specific integration:
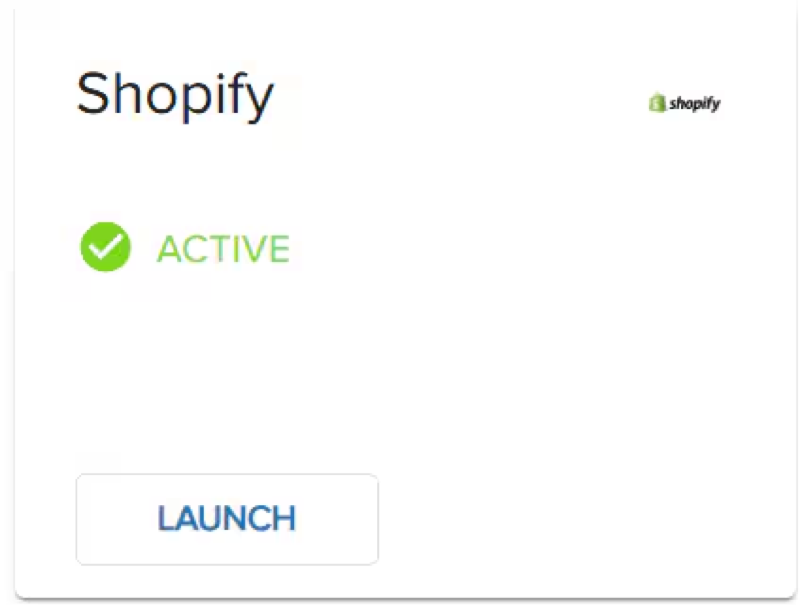 **Available settings** (varies by integration):
* **Sync Schedule**: How often data syncs (real-time, every 15 min, hourly, daily)
* **Sync Logs**: History of sync events, errors, and warnings
* **Connection Settings**: API credentials, authentication status, connected accounts
* **Sync Preferences**: Which data types sync (products, orders, inventory, tracking)
* **Filters**: Rules for which products or orders sync (e.g., only specific tags or collections)
### Monitoring Sync Logs
Sync logs help you troubleshoot integration issues and monitor data flow:
**From integration settings:**
* **Timestamp**: When the sync occurred
* **Status**: Success, Warning, Error
* **Details**: What data synced (e.g., "50 products synced", "3 orders imported")
* **Error Messages**: If sync failed, detailed error explanation
**Common sync log statuses:**
| Status | What It Means | Action Needed |
| ----------- | ------------------------------------------------------------------ | --------------------------------------------------------------------------------------------------------------------------- |
| **Success** | Data synced without issues | No action required |
| **Warning** | Sync completed but with minor issues (e.g., some products skipped) | Review warnings, may need product updates |
| **Error** | Sync failed completely or partially |
**Available settings** (varies by integration):
* **Sync Schedule**: How often data syncs (real-time, every 15 min, hourly, daily)
* **Sync Logs**: History of sync events, errors, and warnings
* **Connection Settings**: API credentials, authentication status, connected accounts
* **Sync Preferences**: Which data types sync (products, orders, inventory, tracking)
* **Filters**: Rules for which products or orders sync (e.g., only specific tags or collections)
### Monitoring Sync Logs
Sync logs help you troubleshoot integration issues and monitor data flow:
**From integration settings:**
* **Timestamp**: When the sync occurred
* **Status**: Success, Warning, Error
* **Details**: What data synced (e.g., "50 products synced", "3 orders imported")
* **Error Messages**: If sync failed, detailed error explanation
**Common sync log statuses:**
| Status | What It Means | Action Needed |
| ----------- | ------------------------------------------------------------------ | --------------------------------------------------------------------------------------------------------------------------- |
| **Success** | Data synced without issues | No action required |
| **Warning** | Sync completed but with minor issues (e.g., some products skipped) | Review warnings, may need product updates |
| **Error** | Sync failed completely or partially | - Check connection status
- Re-authenticate if needed
- Review error message for specific issue
|
During initial setup, check sync logs daily to catch issues early. Once stable, check weekly or when you notice missing products or orders.
### Updating Integration Settings
To modify integration settings after installation:
* Change sync frequency
* Add or remove synced data types
* Update API credentials
* Adjust filters or rules
Changes typically take effect immediately or on the next scheduled sync.
***
## Uninstalling an Integration
If you no longer need an integration or want to disconnect a platform:
**From the Jetpack dashboard:**
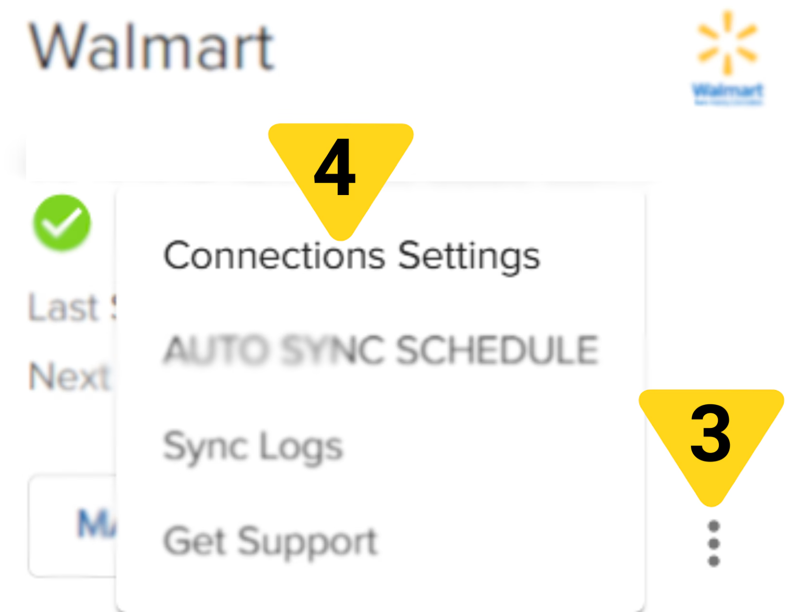 You'll be asked to confirm:
* Note: Disconnecting stops data syncing but doesn't delete historical data
* Products and orders already in Jetpack remain unchanged
**What happens when you uninstall:**
| Data Type | What Happens After Disconnection |
| ------------- | ------------------------------------------------------------------------------------------------------------------------------------------------------------------ |
| **Products** |
You'll be asked to confirm:
* Note: Disconnecting stops data syncing but doesn't delete historical data
* Products and orders already in Jetpack remain unchanged
**What happens when you uninstall:**
| Data Type | What Happens After Disconnection |
| ------------- | ------------------------------------------------------------------------------------------------------------------------------------------------------------------ |
| **Products** | - Existing products remain in Product Catalog
- No new products sync
- Product updates from store no longer sync
|
| **Orders** | - Existing orders continue fulfilling normally
- New orders stop syncing
- You must manually import or create new orders
|
| **Inventory** | - Inventory counts no longer sync to store
- Store inventory becomes independent of Jetpack
- You must manually update store inventory
|
| **Tracking** | - Tracking numbers stop pushing to store
- Customers won't receive automatic tracking updates
|
You can reinstall a previously disconnected integration at any time. Historical data won't duplicate—Jetpack matches products and orders by SKU and order number.
***
## Troubleshooting Common Integration Issues
Even well-configured integrations occasionally encounter issues. Here's how to diagnose and fix common problems:
### Issue 1: Products Not Syncing
**Possible Causes:**
* Integration disconnected or authentication expired
* Sync filters excluding products
* Products not marked as active in store
* API rate limits exceeded
**How to Fix:**
### Issue 2: Orders Not Importing
**Possible Causes:**
* Automatic order sync disabled
* Order status not configured to sync (e.g., only "paid" orders sync)
* Duplicate order numbers
* Order contains products not in Jetpack catalog
**How to Fix:**
### Issue 3: Inventory Not Updating in Store
**Possible Causes:**
* Inventory sync disabled or one-way sync only
* Store platform API delays
* Mismatched SKUs between Jetpack and store
* Inventory sync filters applied
**How to Fix:**
### Issue 4: Integration Status Shows "Error"
**Possible Causes:**
* Store API credentials changed
* App uninstalled from store platform
* Permissions revoked
* Platform API outage
**How to Fix:**
If you've tried troubleshooting steps and the integration still isn't working, contact Jetpack Care with:
* Integration name
* Error messages from sync logs
* Screenshots of settings
* Description of expected vs. actual behavior
***
## Exploring Store Integrations
For detailed setup instructions for specific ecommerce platforms and marketplaces, see our comprehensive integration guides:
Complete list of supported platforms with setup guides
Connect your Shopify store to Jetpack
Integrate Amazon Seller Central with Jetpack
Connect BigCommerce to Jetpack fulfillment
Link your WooCommerce store to Jetpack
Third-party tools and specialized integrations
***
## Let's Dive Deeper
Back to the Account Setup overview
Platform-specific integration guides
Import products from integrated stores
All methods for importing orders
Configure automation rules after integration
Third-party tools and specialized integrations

Questions? Contact Jetpack Care.
If you have any questions or run into issues, you can always contact Jetpack Care for help. Our team is always here to assist via Slack, phone, or email!