> ## Documentation Index
> Fetch the complete documentation index at: https://help.jetpack3pl.com/llms.txt
> Use this file to discover all available pages before exploring further.
# Adobe Commerce (Magento 2) Integration
> Connect your Adobe Commerce store to Jetpack for automatic product syncing, order fulfillment, and real-time inventory management.
Connecting your Adobe Commerce (formerly Magento 2) store to Jetpack automates your fulfillment operations by syncing products, importing orders, and managing inventory levels in near real-time. This guide covers the complete setup process, including installation methods, configuration, and all available features and capabilities.

About ShipBob Integration References
During setup, you'll authorize the "ShipBob" integration in your Adobe Commerce store. This is expected—Jetpack has licensed ShipBob's integration infrastructure to provide reliable connections. Your data flows seamlessly to your Jetpack dashboard.
***
## Prerequisites
Before connecting your Adobe Commerce store, ensure you have:
* **Adobe Commerce (Magento 2) store** (Magento 1 is not supported)
* **Admin access** to your Adobe Commerce backend
* **Jetpack merchant account** with login credentials
***
## Creating Integration in Adobe Commerce
Before connecting Adobe Commerce to Jetpack, you need to create an integration in your Adobe Commerce admin panel. This integration generates OAuth credentials that allow Jetpack to securely access your store's data.
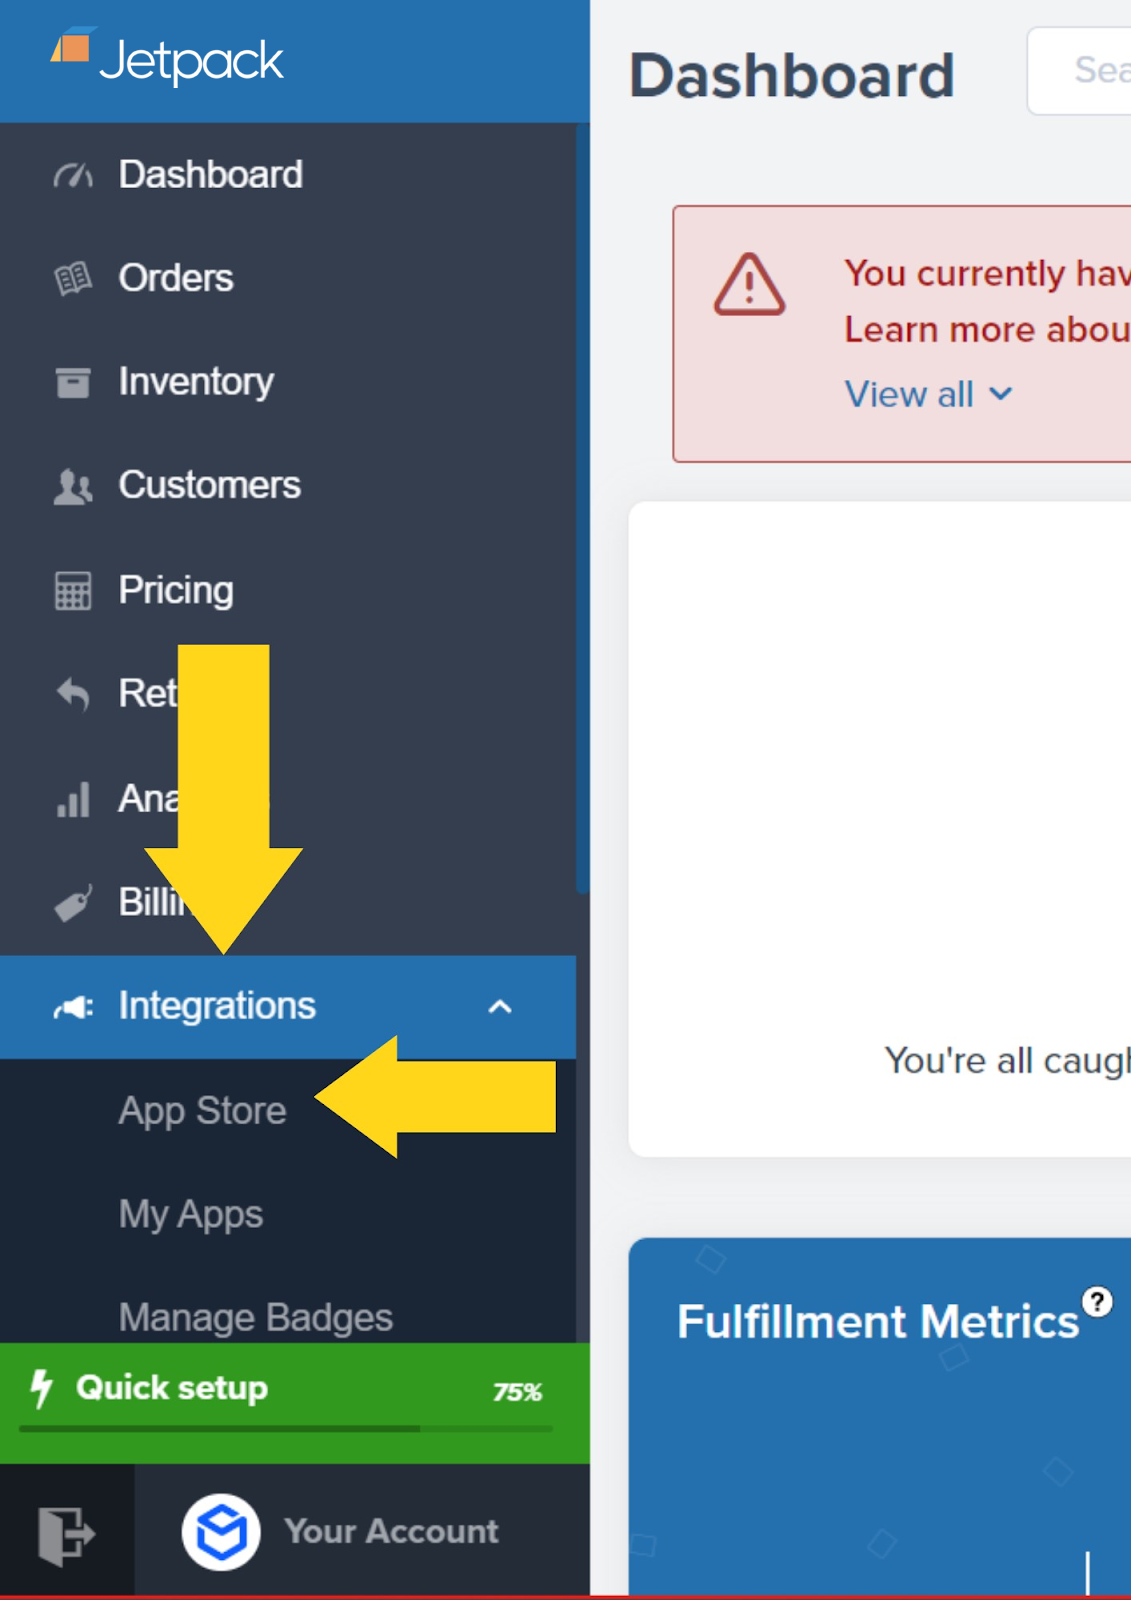
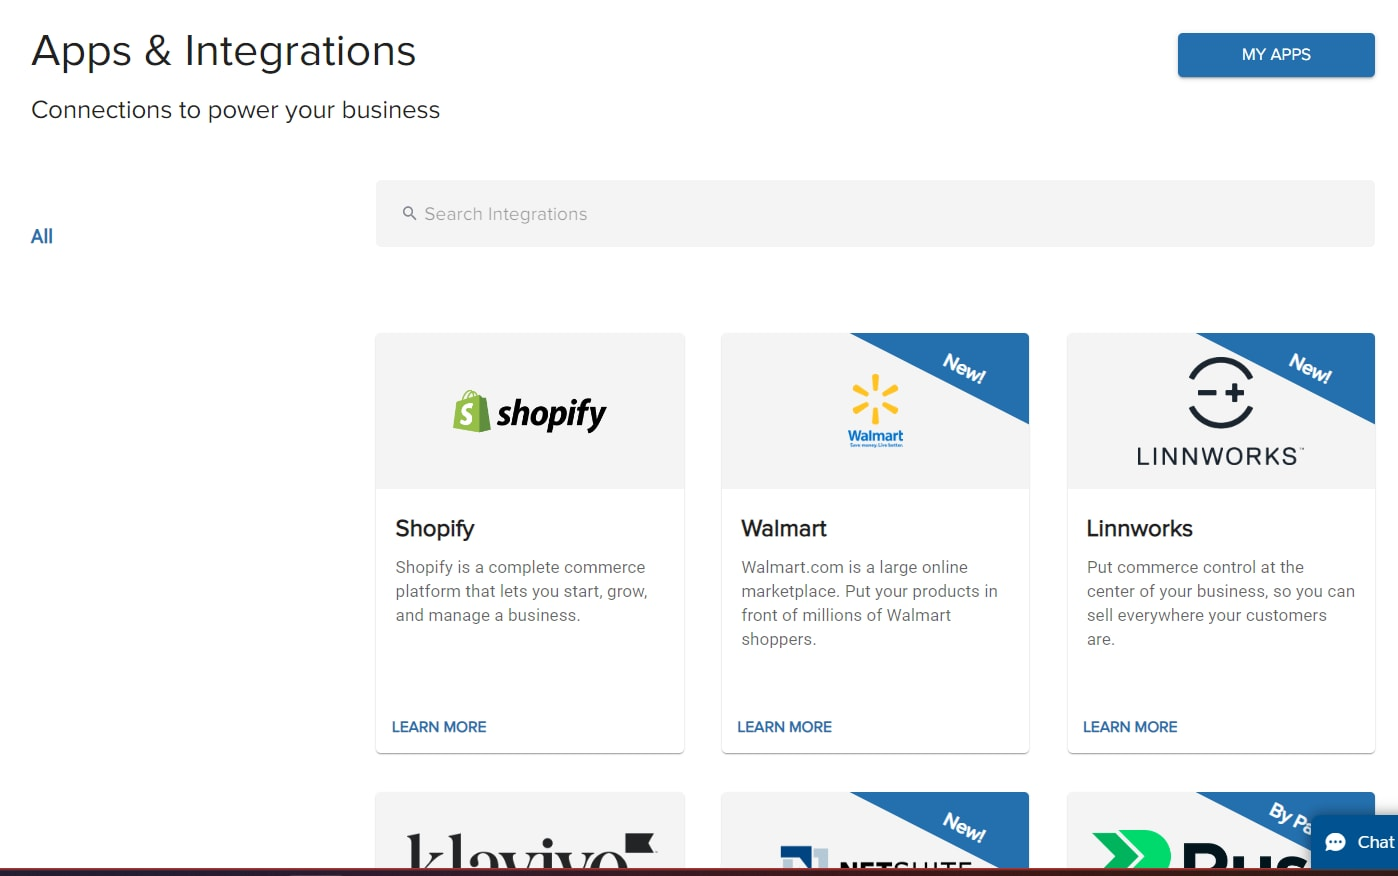
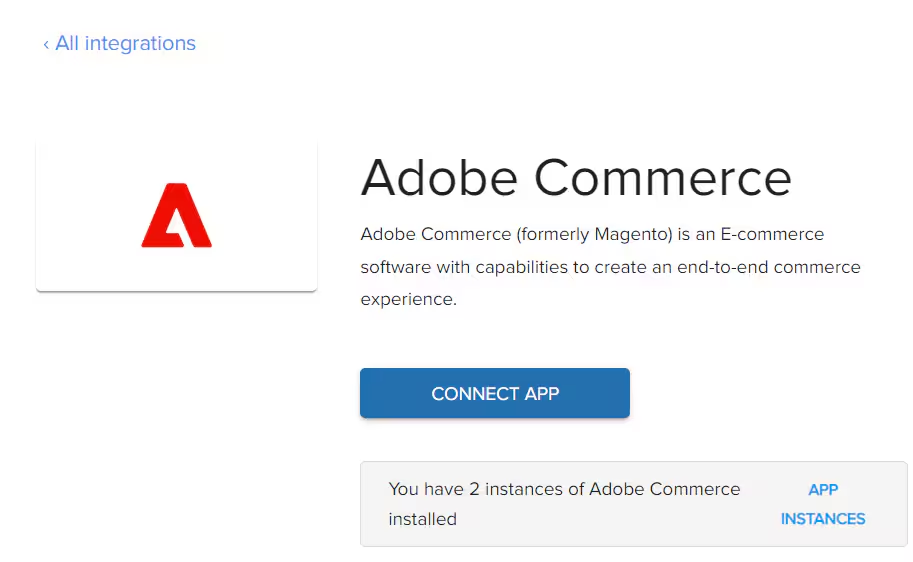 Keep this window open—you'll return to it after creating the integration in Adobe Commerce.
 Enter the following information:
* **Name**: Enter a descriptive name (e.g., "Jetpack Integration" or "ShipBob Integration")
* **Email**: Enter your admin email address
* **Your Password**: Enter your Adobe Commerce admin password
* **Callback URL**: Copy from the Jetpack integration window
* **Identity Link URL**: Copy from the Jetpack integration window
The Callback URL and Identity Link URL are displayed in the Jetpack integration window you opened in Step 4. Copy them exactly as shown.
Enter the following information:
* **Name**: Enter a descriptive name (e.g., "Jetpack Integration" or "ShipBob Integration")
* **Email**: Enter your admin email address
* **Your Password**: Enter your Adobe Commerce admin password
* **Callback URL**: Copy from the Jetpack integration window
* **Identity Link URL**: Copy from the Jetpack integration window
The Callback URL and Identity Link URL are displayed in the Jetpack integration window you opened in Step 4. Copy them exactly as shown.
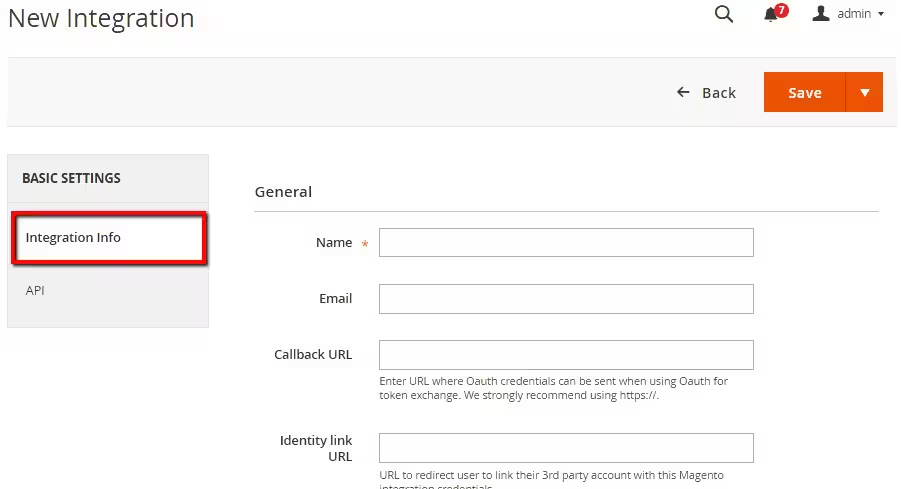 Click the **API** tab in the left sidebar, then select **All** under Resource Access to grant full API permissions.
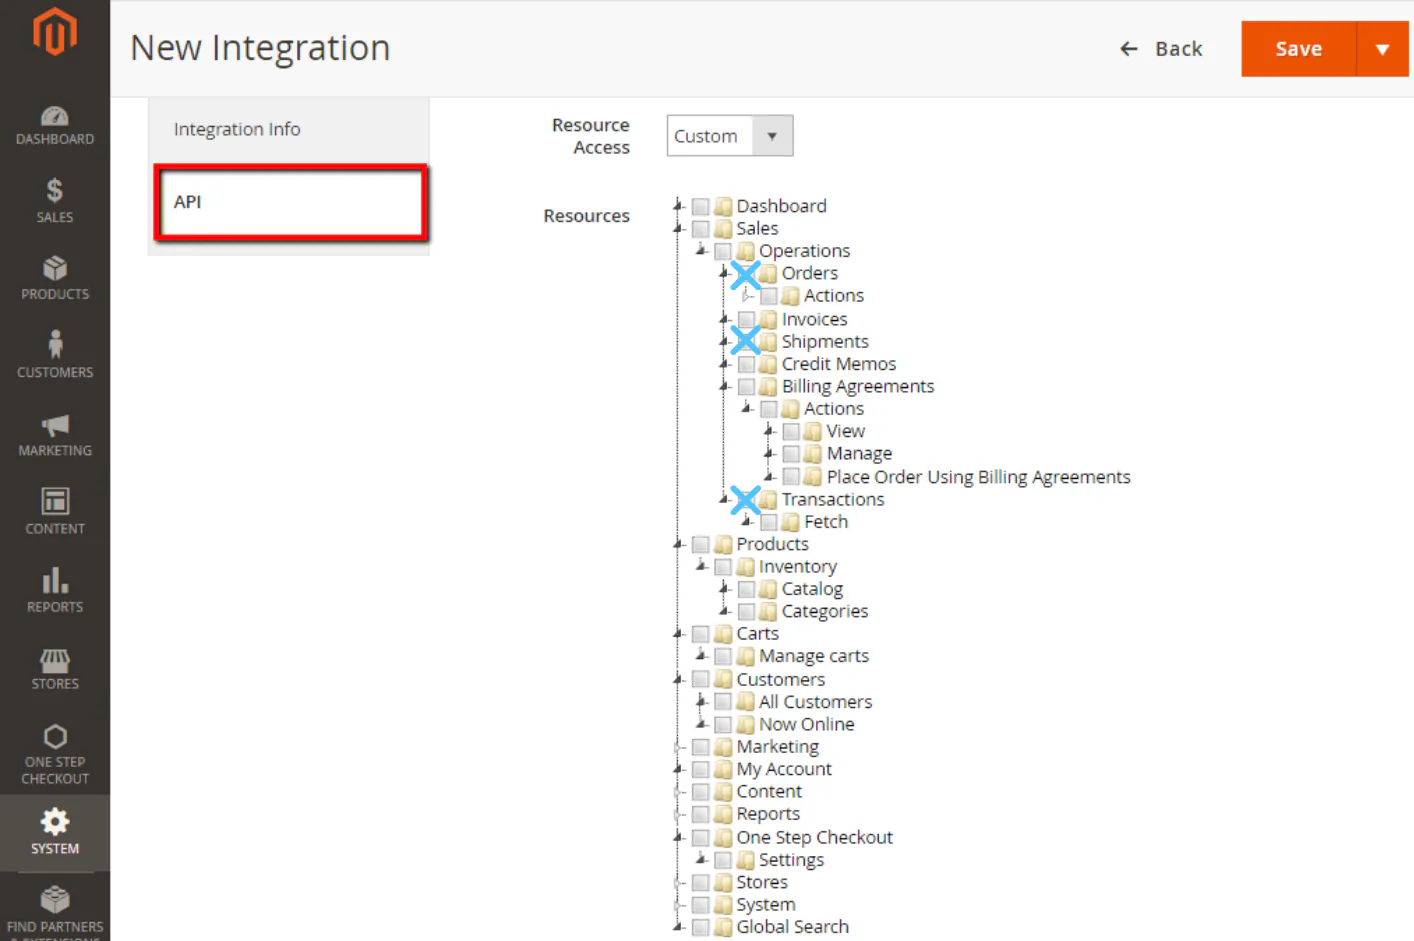 Click **Save** to create the integration.
After saving, your new integration appears in the integrations list. Click **Activate** to generate OAuth credentials.
Back on the Integrations list, click the pencil icon for your new integration to view its Integration Details. You’ll need these for the next steps in Jetpack.
Click **Save** to create the integration.
After saving, your new integration appears in the integrations list. Click **Activate** to generate OAuth credentials.
Back on the Integrations list, click the pencil icon for your new integration to view its Integration Details. You’ll need these for the next steps in Jetpack.
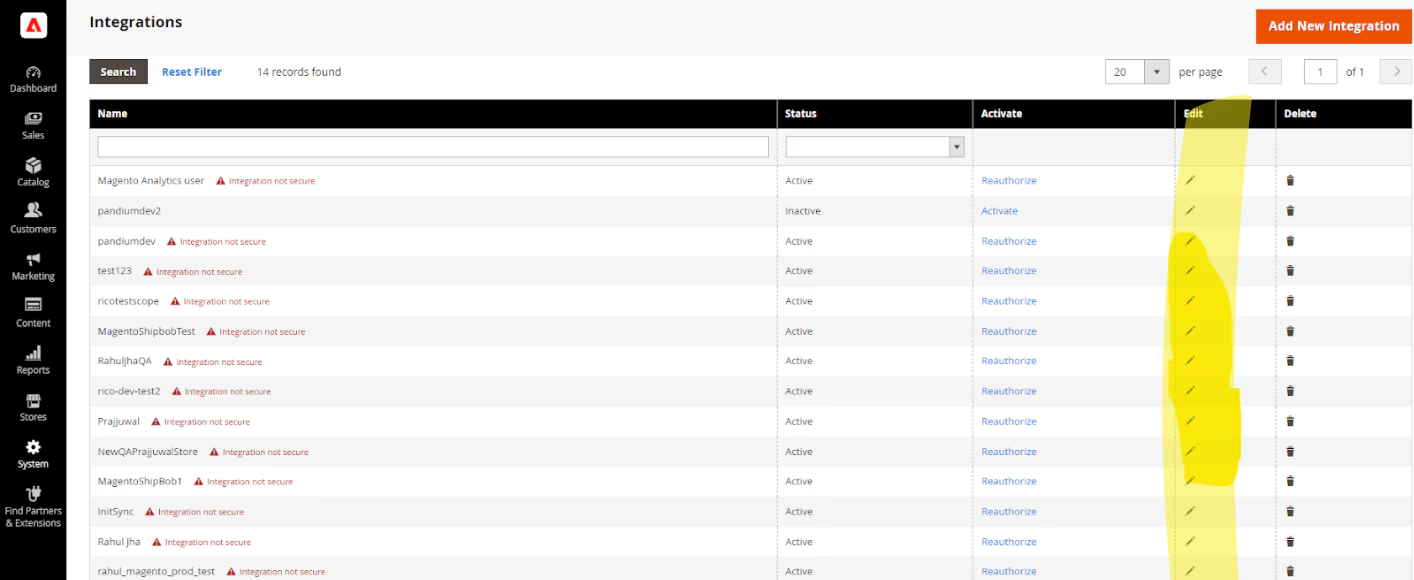 Click **Allow** to confirm activation.
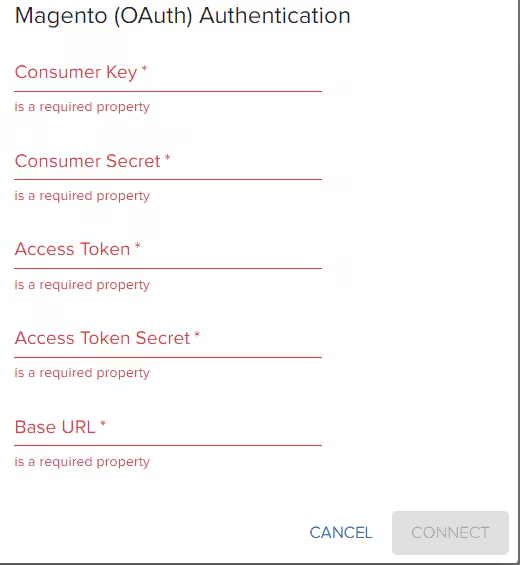 A modal will display your OAuth credentials:
* **Consumer Key**
* **Consumer Secret**
* **Access Token**
* **Access Token Secret**
Copy all four credentials immediately. You'll need them in the next step to complete the connection in Jetpack.
***
## Linking Adobe Commerce to Jetpack
Now that you have your OAuth credentials from Adobe Commerce, complete the connection in your Jetpack dashboard.
Return to the Jetpack browser window you kept open from the "Creating Integration in Adobe Commerce" section.
A modal will display your OAuth credentials:
* **Consumer Key**
* **Consumer Secret**
* **Access Token**
* **Access Token Secret**
Copy all four credentials immediately. You'll need them in the next step to complete the connection in Jetpack.
***
## Linking Adobe Commerce to Jetpack
Now that you have your OAuth credentials from Adobe Commerce, complete the connection in your Jetpack dashboard.
Return to the Jetpack browser window you kept open from the "Creating Integration in Adobe Commerce" section.
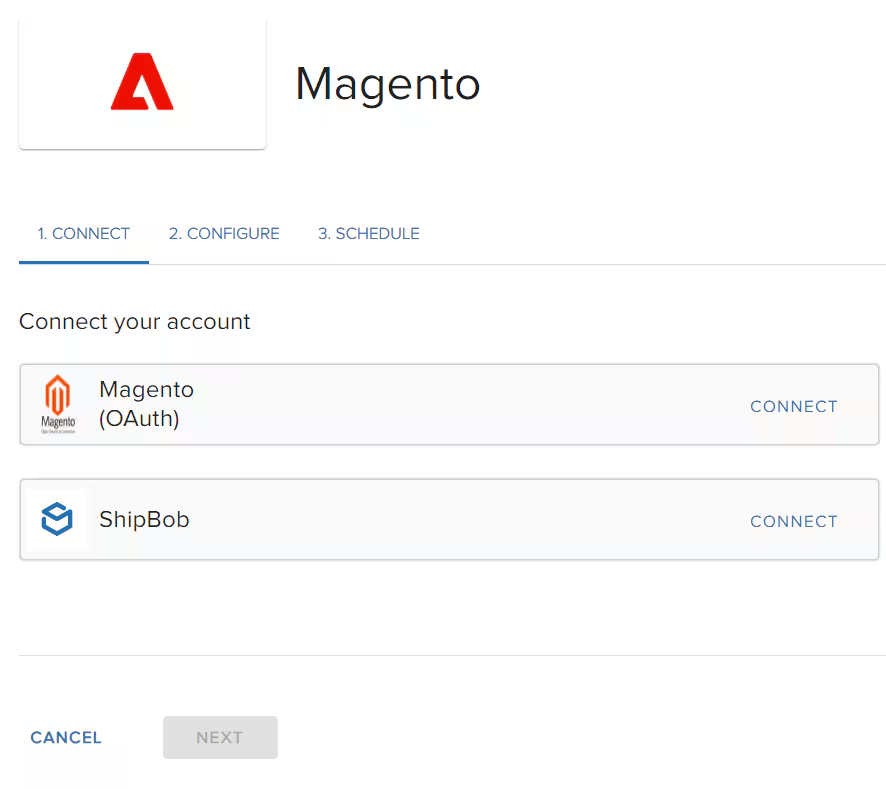 Enter the four OAuth credentials you copied from Adobe Commerce:
* **Consumer Key**
* **Consumer Secret**
* **Access Token**
* **Access Token Secret**
Click **Connect** to proceed.
Enter the four OAuth credentials you copied from Adobe Commerce:
* **Consumer Key**
* **Consumer Secret**
* **Access Token**
* **Access Token Secret**
Click **Connect** to proceed.
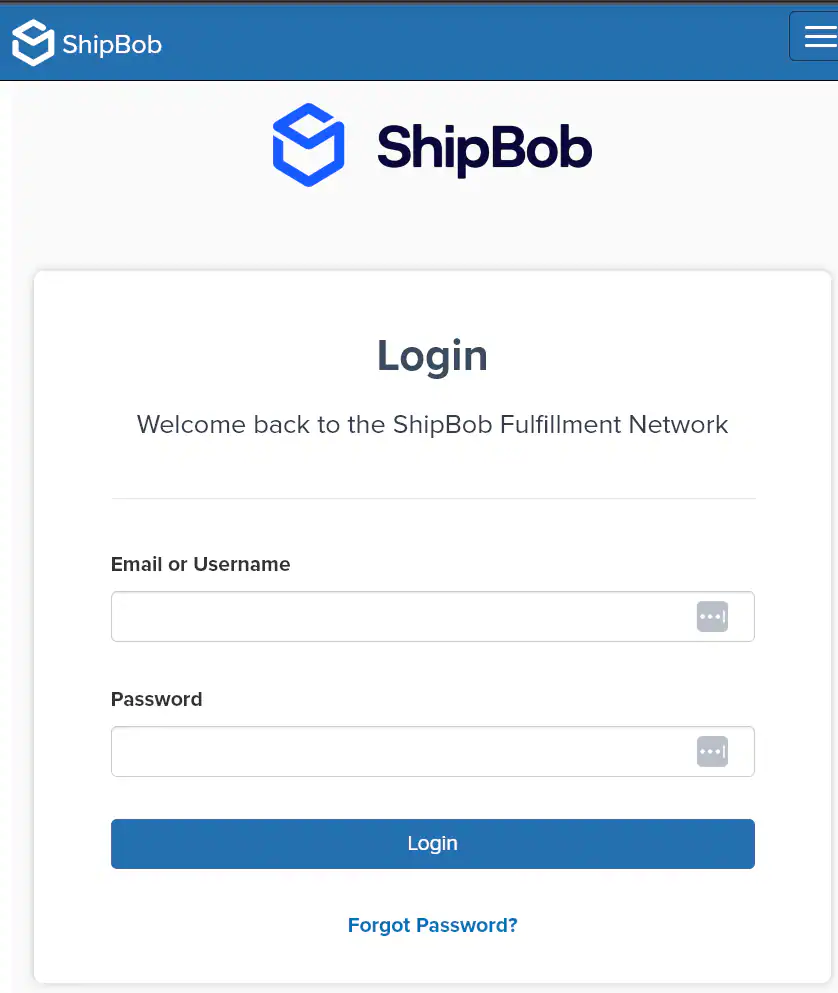 You'll be redirected to your Adobe Commerce store to authorize the connection.
Click **Allow** to grant Jetpack permission to access your store's data.
You'll be redirected to your Adobe Commerce store to authorize the connection.
Click **Allow** to grant Jetpack permission to access your store's data.
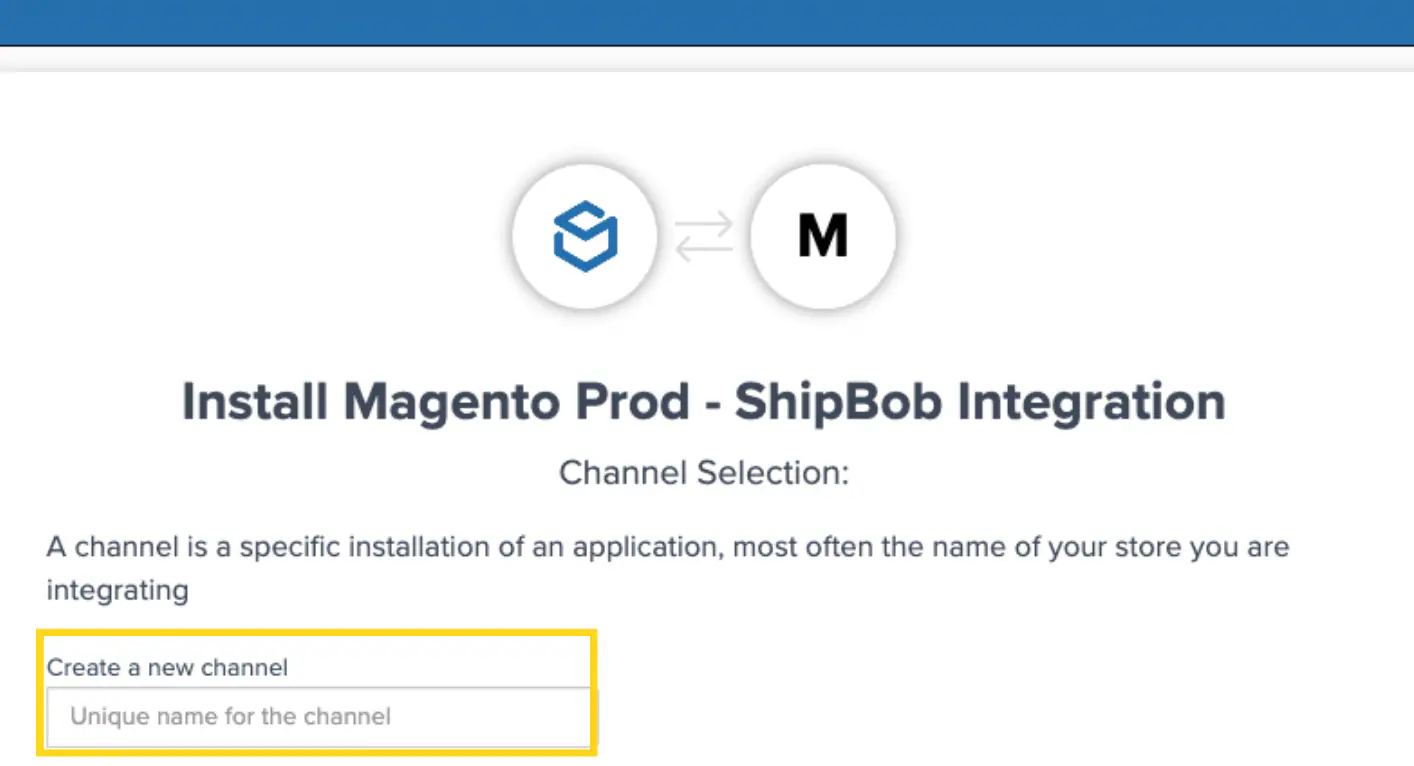 After authorizing, you'll be redirected back to Jetpack's Integrations page.
Your Adobe Commerce integration will now show as **Connected**.
During the initial setup, you can choose to sync existing products automatically from your Adobe Commerce store to Jetpack. Products will continue to sync automatically as they're created or updated.
***
## Ship Option Mapping
Before Jetpack can fulfill orders, you must map your Adobe Commerce shipping methods to Jetpack ship options. This ensures orders ship using the correct carrier service based on the customer's selection at checkout.
[Learn how to configure Ship Option Mapping here](/fulfillment/account-setup/shipping-preferences/choosing-default-carriers).
***
## Verifying Your Integration
After installation and configuration, create a test order to verify the integration is working correctly:
After confirming your integration works, cancel the test order in your Jetpack dashboard to avoid fulfillment charges.
***
## Adjusting Sync Settings
After setting up your integration, you can adjust sync settings (such as real-time vs. manual order import) by navigating to **Integrations → Adobe Commerce → Connection Settings** in your Jetpack dashboard. These settings allow you to customize how orders and product data sync between Adobe Commerce and Jetpack.
***
## What Syncs Automatically
After connecting your Adobe Commerce store, Jetpack automatically handles product syncing, order importing, inventory updates, and fulfillment notifications.
### Product Syncing
**What syncs:**
* All enabled products in Adobe Commerce sync to Jetpack's Product Catalog
* Product details including name, SKU, barcode, weight, and dimensions
* Product images for easy identification in the dashboard
* Configurable products (products with options like size, color)
* Simple products
**Sync frequency:** Products sync when created or updated in Adobe Commerce (near real-time).
**Configurable Products:**
Adobe Commerce configurable products (products with size, color, or other options) sync to Jetpack with each configuration option treated as a separate SKU. Attributes like size and color are appended to the product name in Jetpack, and inventory is tracked separately for each configuration.
**Example:**
* **Adobe Commerce:** T-Shirt (configurations: Small-Blue, Medium-Red, Large-Green)
* **Jetpack:** T-Shirt-Small-Blue, T-Shirt-Medium-Red, T-Shirt-Large-Green
### Order Importing
Orders placed in your Adobe Commerce store are imported to Jetpack for fulfillment within 15 minutes of being placed.
**What syncs:**
* Customer name and shipping address
* Products and quantities
* Shipping method selected at checkout
* Order comments
* Order number (mapped to Jetpack Reference ID)
**What doesn't sync:**
* Pending payment orders (only "Processing" status orders sync)
* Canceled orders
* On-hold orders
**Import frequency:** Orders are imported within 15 minutes of being placed.
### Inventory Syncing
Jetpack syncs available inventory quantities from fulfillment centers back to Adobe Commerce, ensuring your store always reflects accurate stock levels.
**Sync triggers:**
* Receiving new inventory at Jetpack fulfillment centers
* Fulfilling orders
* Processing inventory adjustments
* Restocking returned items
**Sync frequency:** Near real-time, typically within 15-30 minutes of any inventory change.
**Stock Management:** Jetpack updates the "Quantity" field in Adobe Commerce for each product to reflect available inventory.
### Tracking Numbers and Fulfillment
When Jetpack ships an order from a fulfillment center, the following occurs automatically:
* Tracking number syncs to Adobe Commerce
* Order status updates to "Complete"
* Adobe Commerce sends a shipment notification email to the customer with the tracking link
* Tracking details include carrier name, tracking number, and tracking URL
**Split Shipments:**
If an order ships from multiple Jetpack fulfillment centers or in multiple packages:
* Each shipment is created as a separate shipment in Adobe Commerce
* Each tracking number is added to the order
* Customers receive separate email notifications for each shipment
***
## Gift Messages and Order Comments
Jetpack imports order comments from Adobe Commerce, ensuring special customer requests are visible during order processing.
**Order Comments:**
* Sync from Adobe Commerce to Jetpack automatically
* Visible in order details in the Jetpack dashboard
* Available to fulfillment center staff during order processing
**Gift Messages:**
If your Adobe Commerce store supports gift messages, you can configure Jetpack to include them on packing slips. Contact Jetpack Care to map the gift message field from Adobe Commerce to Jetpack's packing slip system.
***
## Advanced Features and Capabilities
### Bundled Products
If you sell bundled products in Adobe Commerce (kits or sets that include multiple items), you can configure bundles in Jetpack to fulfill them correctly.
**Requirements:**
* Bundles must be configured in Jetpack with the bundle parent SKU
* Component products must be available in Jetpack inventory
* Map the Adobe Commerce bundle SKU to the Jetpack bundle parent SKU
For detailed instructions on creating and managing bundled products, see [Creating Product Bundles](/fulfillment/managing-products/more-tools/creating-product-bundles).
### Multi-Store Support
If you operate multiple Adobe Commerce stores, each can connect to Jetpack separately. Each store requires its own API credentials and extension configuration. Orders and products from each store are tracked independently in your Jetpack dashboard.
### Multi-Source Inventory (MSI)
If you use Adobe Commerce's Multi-Source Inventory (MSI) feature, contact Jetpack Care to configure advanced inventory syncing to ensure compatibility with MSI.
***
## Supported Adobe Commerce Features
| Feature | Supported |
| ------------------------------ | ---------------------------------------------- |
| Configurable products | Yes |
| Simple products | Yes |
| Bundled products | Yes (requires setup in Jetpack) |
| Gift messages | Yes (requires configuration with Jetpack Care) |
| Order comments | Yes |
| Multiple Adobe Commerce stores | Yes (each store connects separately) |
| Multi-Source Inventory (MSI) | Contact Jetpack Care to configure |
***
## Returns Processing
Jetpack does not automatically create return orders in Adobe Commerce. Returns must be managed manually.
**Returns Process:**
1. Create the return order in Jetpack manually or via the Jetpack API
2. Once processed and restocked, manually create a credit memo or refund in Adobe Commerce
***
## Important Notes
### Magento Version Compatibility
This integration is designed for **Adobe Commerce (Magento 2) only**. Magento 1 is not supported. If you are using Magento 1, you will need to upgrade to Magento 2 to use this integration.
### Order Status Requirements
By default, only orders with **"Processing"** status are imported to Jetpack. Orders with "Pending," "On Hold," or "Canceled" statuses are not imported. Ensure orders are confirmed and payment is processed before they will sync to Jetpack.
***
## Adobe Commerce Integration FAQs
No, this integration is for Adobe Commerce (Magento 2) only. Magento 1 is not supported. If you are using Magento 1, you will need to upgrade to Magento 2 to use this integration.
By default, orders with **"Processing"** status are imported to Jetpack. Orders with "Pending," "On Hold," or "Canceled" statuses are not imported.
Adobe Commerce configurable products (products with size, color, or other options) sync to Jetpack with each configuration option treated as a separate SKU. Attributes like size and color are appended to the product name in Jetpack, and inventory is tracked separately for each configuration.
**Example:**
* **Adobe Commerce:** T-Shirt (configurations: Small-Blue, Medium-Red, Large-Green)
* **Jetpack:** T-Shirt-Small-Blue, T-Shirt-Medium-Red, T-Shirt-Large-Green
Yes, if you operate multiple Adobe Commerce stores, each can connect to Jetpack separately. Each store requires its own API credentials and extension configuration.
Inventory levels sync from Jetpack to Adobe Commerce in near real-time, typically within 15-30 minutes of any inventory change, including receiving, fulfillment, adjustments, and returns processing.
Yes, if your Adobe Commerce store supports gift messages, contact Jetpack Care to map the gift message field from Adobe Commerce to Jetpack's packing slip system.
Bundles must be configured in Jetpack with their component products. Map the Adobe Commerce bundle SKU to a Jetpack bundle parent SKU, and ensure component products are available in Jetpack inventory. See [Creating Product Bundles](/fulfillment/managing-products/more-tools/creating-product-bundles) for detailed instructions.
Yes, but advanced configuration is required. Contact Jetpack Care to configure inventory syncing to ensure compatibility with MSI.
***
## Let's Dive Deeper
Back to the main integrations guide
Configure your Product Catalog after syncing
Learn more about mapping shipping methods
Set up bundled products for Adobe Commerce
Learn how product syncing works
Understand order import methods
After authorizing, you'll be redirected back to Jetpack's Integrations page.
Your Adobe Commerce integration will now show as **Connected**.
During the initial setup, you can choose to sync existing products automatically from your Adobe Commerce store to Jetpack. Products will continue to sync automatically as they're created or updated.
***
## Ship Option Mapping
Before Jetpack can fulfill orders, you must map your Adobe Commerce shipping methods to Jetpack ship options. This ensures orders ship using the correct carrier service based on the customer's selection at checkout.
[Learn how to configure Ship Option Mapping here](/fulfillment/account-setup/shipping-preferences/choosing-default-carriers).
***
## Verifying Your Integration
After installation and configuration, create a test order to verify the integration is working correctly:
After confirming your integration works, cancel the test order in your Jetpack dashboard to avoid fulfillment charges.
***
## Adjusting Sync Settings
After setting up your integration, you can adjust sync settings (such as real-time vs. manual order import) by navigating to **Integrations → Adobe Commerce → Connection Settings** in your Jetpack dashboard. These settings allow you to customize how orders and product data sync between Adobe Commerce and Jetpack.
***
## What Syncs Automatically
After connecting your Adobe Commerce store, Jetpack automatically handles product syncing, order importing, inventory updates, and fulfillment notifications.
### Product Syncing
**What syncs:**
* All enabled products in Adobe Commerce sync to Jetpack's Product Catalog
* Product details including name, SKU, barcode, weight, and dimensions
* Product images for easy identification in the dashboard
* Configurable products (products with options like size, color)
* Simple products
**Sync frequency:** Products sync when created or updated in Adobe Commerce (near real-time).
**Configurable Products:**
Adobe Commerce configurable products (products with size, color, or other options) sync to Jetpack with each configuration option treated as a separate SKU. Attributes like size and color are appended to the product name in Jetpack, and inventory is tracked separately for each configuration.
**Example:**
* **Adobe Commerce:** T-Shirt (configurations: Small-Blue, Medium-Red, Large-Green)
* **Jetpack:** T-Shirt-Small-Blue, T-Shirt-Medium-Red, T-Shirt-Large-Green
### Order Importing
Orders placed in your Adobe Commerce store are imported to Jetpack for fulfillment within 15 minutes of being placed.
**What syncs:**
* Customer name and shipping address
* Products and quantities
* Shipping method selected at checkout
* Order comments
* Order number (mapped to Jetpack Reference ID)
**What doesn't sync:**
* Pending payment orders (only "Processing" status orders sync)
* Canceled orders
* On-hold orders
**Import frequency:** Orders are imported within 15 minutes of being placed.
### Inventory Syncing
Jetpack syncs available inventory quantities from fulfillment centers back to Adobe Commerce, ensuring your store always reflects accurate stock levels.
**Sync triggers:**
* Receiving new inventory at Jetpack fulfillment centers
* Fulfilling orders
* Processing inventory adjustments
* Restocking returned items
**Sync frequency:** Near real-time, typically within 15-30 minutes of any inventory change.
**Stock Management:** Jetpack updates the "Quantity" field in Adobe Commerce for each product to reflect available inventory.
### Tracking Numbers and Fulfillment
When Jetpack ships an order from a fulfillment center, the following occurs automatically:
* Tracking number syncs to Adobe Commerce
* Order status updates to "Complete"
* Adobe Commerce sends a shipment notification email to the customer with the tracking link
* Tracking details include carrier name, tracking number, and tracking URL
**Split Shipments:**
If an order ships from multiple Jetpack fulfillment centers or in multiple packages:
* Each shipment is created as a separate shipment in Adobe Commerce
* Each tracking number is added to the order
* Customers receive separate email notifications for each shipment
***
## Gift Messages and Order Comments
Jetpack imports order comments from Adobe Commerce, ensuring special customer requests are visible during order processing.
**Order Comments:**
* Sync from Adobe Commerce to Jetpack automatically
* Visible in order details in the Jetpack dashboard
* Available to fulfillment center staff during order processing
**Gift Messages:**
If your Adobe Commerce store supports gift messages, you can configure Jetpack to include them on packing slips. Contact Jetpack Care to map the gift message field from Adobe Commerce to Jetpack's packing slip system.
***
## Advanced Features and Capabilities
### Bundled Products
If you sell bundled products in Adobe Commerce (kits or sets that include multiple items), you can configure bundles in Jetpack to fulfill them correctly.
**Requirements:**
* Bundles must be configured in Jetpack with the bundle parent SKU
* Component products must be available in Jetpack inventory
* Map the Adobe Commerce bundle SKU to the Jetpack bundle parent SKU
For detailed instructions on creating and managing bundled products, see [Creating Product Bundles](/fulfillment/managing-products/more-tools/creating-product-bundles).
### Multi-Store Support
If you operate multiple Adobe Commerce stores, each can connect to Jetpack separately. Each store requires its own API credentials and extension configuration. Orders and products from each store are tracked independently in your Jetpack dashboard.
### Multi-Source Inventory (MSI)
If you use Adobe Commerce's Multi-Source Inventory (MSI) feature, contact Jetpack Care to configure advanced inventory syncing to ensure compatibility with MSI.
***
## Supported Adobe Commerce Features
| Feature | Supported |
| ------------------------------ | ---------------------------------------------- |
| Configurable products | Yes |
| Simple products | Yes |
| Bundled products | Yes (requires setup in Jetpack) |
| Gift messages | Yes (requires configuration with Jetpack Care) |
| Order comments | Yes |
| Multiple Adobe Commerce stores | Yes (each store connects separately) |
| Multi-Source Inventory (MSI) | Contact Jetpack Care to configure |
***
## Returns Processing
Jetpack does not automatically create return orders in Adobe Commerce. Returns must be managed manually.
**Returns Process:**
1. Create the return order in Jetpack manually or via the Jetpack API
2. Once processed and restocked, manually create a credit memo or refund in Adobe Commerce
***
## Important Notes
### Magento Version Compatibility
This integration is designed for **Adobe Commerce (Magento 2) only**. Magento 1 is not supported. If you are using Magento 1, you will need to upgrade to Magento 2 to use this integration.
### Order Status Requirements
By default, only orders with **"Processing"** status are imported to Jetpack. Orders with "Pending," "On Hold," or "Canceled" statuses are not imported. Ensure orders are confirmed and payment is processed before they will sync to Jetpack.
***
## Adobe Commerce Integration FAQs
No, this integration is for Adobe Commerce (Magento 2) only. Magento 1 is not supported. If you are using Magento 1, you will need to upgrade to Magento 2 to use this integration.
By default, orders with **"Processing"** status are imported to Jetpack. Orders with "Pending," "On Hold," or "Canceled" statuses are not imported.
Adobe Commerce configurable products (products with size, color, or other options) sync to Jetpack with each configuration option treated as a separate SKU. Attributes like size and color are appended to the product name in Jetpack, and inventory is tracked separately for each configuration.
**Example:**
* **Adobe Commerce:** T-Shirt (configurations: Small-Blue, Medium-Red, Large-Green)
* **Jetpack:** T-Shirt-Small-Blue, T-Shirt-Medium-Red, T-Shirt-Large-Green
Yes, if you operate multiple Adobe Commerce stores, each can connect to Jetpack separately. Each store requires its own API credentials and extension configuration.
Inventory levels sync from Jetpack to Adobe Commerce in near real-time, typically within 15-30 minutes of any inventory change, including receiving, fulfillment, adjustments, and returns processing.
Yes, if your Adobe Commerce store supports gift messages, contact Jetpack Care to map the gift message field from Adobe Commerce to Jetpack's packing slip system.
Bundles must be configured in Jetpack with their component products. Map the Adobe Commerce bundle SKU to a Jetpack bundle parent SKU, and ensure component products are available in Jetpack inventory. See [Creating Product Bundles](/fulfillment/managing-products/more-tools/creating-product-bundles) for detailed instructions.
Yes, but advanced configuration is required. Contact Jetpack Care to configure inventory syncing to ensure compatibility with MSI.
***
## Let's Dive Deeper
Back to the main integrations guide
Configure your Product Catalog after syncing
Learn more about mapping shipping methods
Set up bundled products for Adobe Commerce
Learn how product syncing works
Understand order import methods

Questions? Contact Jetpack Care.
If you have any questions or run into issues during setup, you can always contact Jetpack Care for help. Our team is always here to assist via Slack, phone, or email!