> ## Documentation Index
> Fetch the complete documentation index at: https://help.jetpack3pl.com/llms.txt
> Use this file to discover all available pages before exploring further.
# Onboarding Process
> Your step-by-step guide to getting started with Jetpack fulfillment, from connecting your store to shipping your first orders.
Welcome to Jetpack fulfillment! This guide walks you through the essential onboarding steps to get your account operational. From connecting your online store and configuring products to sending inventory and importing orders, we'll cover everything you need to start fulfilling orders efficiently.
## Your Onboarding Checklist
Getting started with Jetpack involves several key steps that build on each other. Here's your roadmap to a successful launch:
| Onboarding Step | What You'll Accomplish | Time to Complete |
| ---------------------------------------- | -------------------------------------------------------------------------------------------------------------------------------------------------------------------------------- | ---------------- |
| **1. Connect Your Store** |
| Varies by volume |
| **5. Import Your Orders** |
Enable automatic order syncing
Test order flow
Monitor order status
| 15-30 minutes |
Your dedicated Jetpack Care team is available throughout the onboarding process. Reach out via your Slack channel, phone, or email for guidance at any step.
***
## Step 1: Connect Your Store Integration
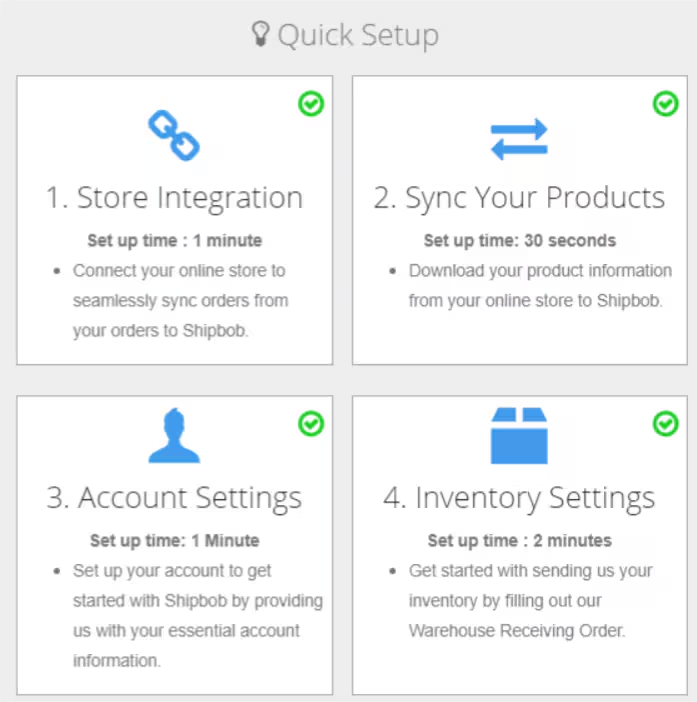
Your store integration is the foundation of your Jetpack fulfillment operations. When you connect your ecommerce platform, you enable automatic product syncing, order importing, and inventory management.
### Supported Store Platforms
Jetpack integrates with all major ecommerce platforms:
* **Shopify** - Most popular integration with full automation support
* **Amazon** - Seller Central integration for FBA and FBM orders
* **BigCommerce** - Complete catalog and order syncing
* **WooCommerce** - WordPress-based store integration
* **Adobe Commerce (Magento)** - Enterprise ecommerce platform support
* **eBay, Walmart, TikTok, Temu** - Marketplace integrations
* **And many more** - See our complete [Store Integration Overview](/fulfillment/account-setup/integrating-store)
### How Integration Works
When you connect your store, Jetpack automatically:
1. **Syncs your product catalog** - All active products import into the Jetpack Product Catalog
2. **Enables order syncing** - New orders flow automatically into Jetpack for fulfillment
3. **Updates inventory levels** - Real-time inventory sync keeps your store updated
4. **Tracks shipments** - Tracking numbers automatically push to your store
To get started, see the [Integrations + Apps Overview](/fulfillment/account-setup/integrations-overview) or jump directly to your platform-specific setup guide in the [Store Integration Overview](/fulfillment/account-setup/integrating-store).
***
## Step 2: Sync and Configure Your Products
Once your store is connected, you'll sync your product catalog into the Jetpack dashboard. This is the most common way merchants add products to the platform.
### Syncing Your Product Catalog
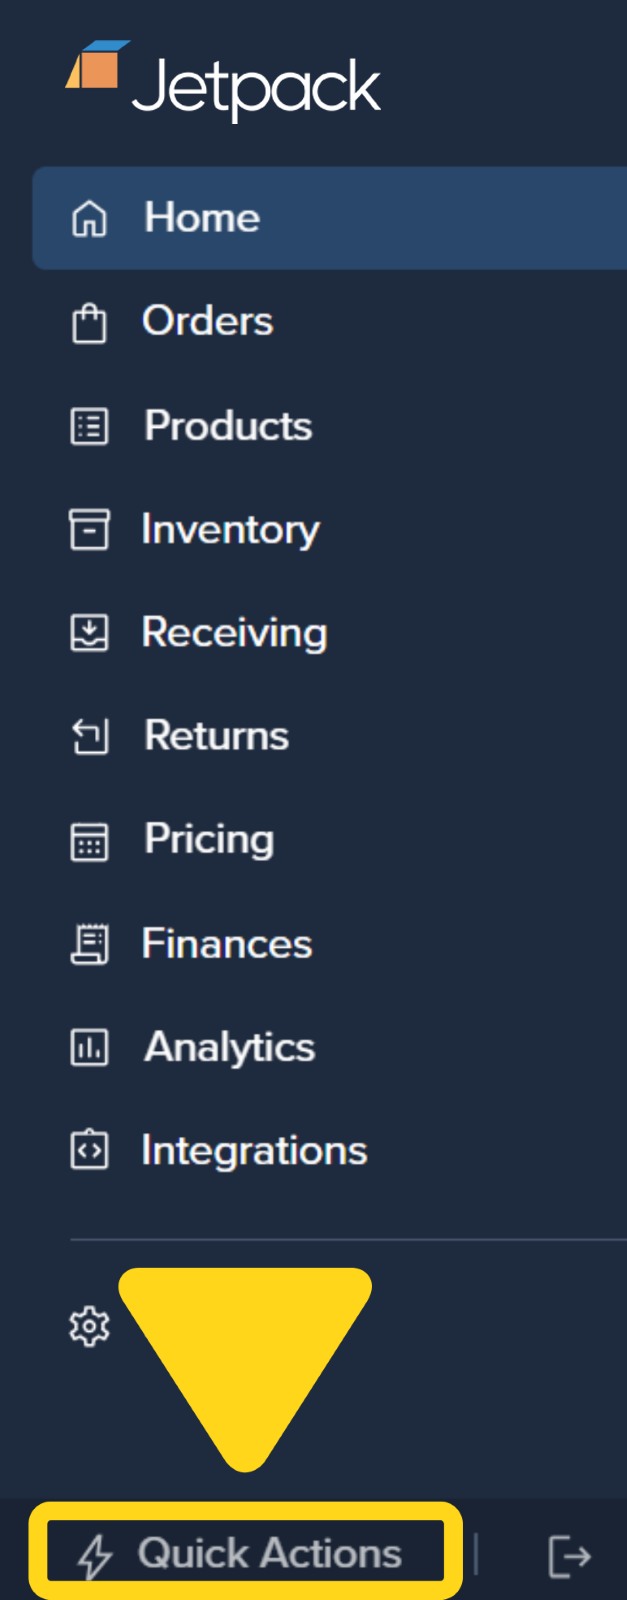
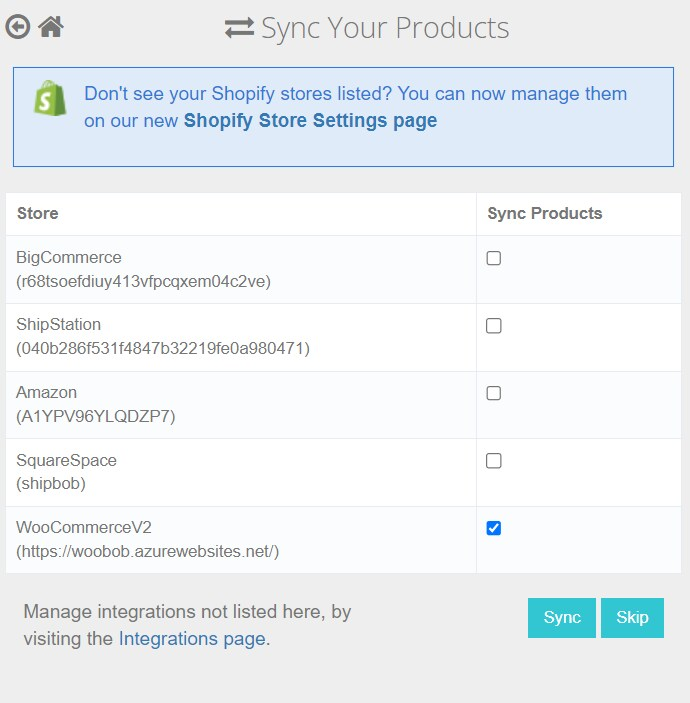
From your Jetpack dashboard:
Check the box next to each store you want to sync from.
Click **Sync** to import your products. Your products will appear in the **Product Catalog** within minutes.
For detailed instructions, see [Syncing Your Products](/fulfillment/account-setup/syncing-products).
### Critical Product Configuration
After syncing, you must configure these product settings before sending inventory:
| Product Setting | Why It's Required | Where to Configure |
| ----------------------- | ------------------------------------------------------------------------------------------------------------------------------------------------------------------------------------- | ------------------------------------------------------------------------------------------------------------ |
| **Barcodes** |
Required for accurate receiving at Fulfillment Centers
| [Setting Reorder Points](/fulfillment/account-setup/shipping-preferences/setting-reorder-points) |
Incomplete product configuration is the most common cause of receiving delays. Ensure all products have barcodes, accurate dimensions, and proper settings before creating your first WRO.
### Packaging Preferences
Choose how Jetpack packages your products:
* **Standard Packaging** - Jetpack selects the most cost-effective box size
* **Custom Packaging** - Use your branded boxes and custom inserts
* **Special Handling** - Configure fragile handling, gift notes, or custom packing slips
Learn more about [Packaging Preferences](/fulfillment/account-setup/shipping-preferences/packaging-preferences).
### Product Bundles and Sales Channels
If you sell bundled products or use multiple sales channels:
* **Product Bundles** - Create virtual bundles that combine multiple SKUs into one sellable unit. See [Creating Product Bundles](/fulfillment/managing-products/more-tools/creating-product-bundles).
* **Sales Channels** - Associate products with specific platforms to manage inventory distribution across channels.
***
## Step 3: Send Your Inventory to Jetpack
Once your products are configured, you're ready to send inventory to a Jetpack Fulfillment Center (FC). This process uses Warehouse Receiving Orders (WROs).
### Understanding the Receiving Process
Jetpack operates two receiving methods:
| Method | How It Works | Best For |
| ----------------- | ------------------------------------------------------------------------------------------------------------------------------------------------------------------------------------------------------------------------------------- | ------------------------------------------------------- |
| **Standard WROs** |
You create a WRO listing expected products
Ship inventory to a single FC
Jetpack receives and verifies against WRO
Inventory available for fulfillment once processed
Jetpack distributes across multiple FCs automatically
Algorithm optimizes placement for faster shipping
Reduces costs through regional distribution
| Multi-location fulfillment, high volume, national reach |
### Creating Your First WRO
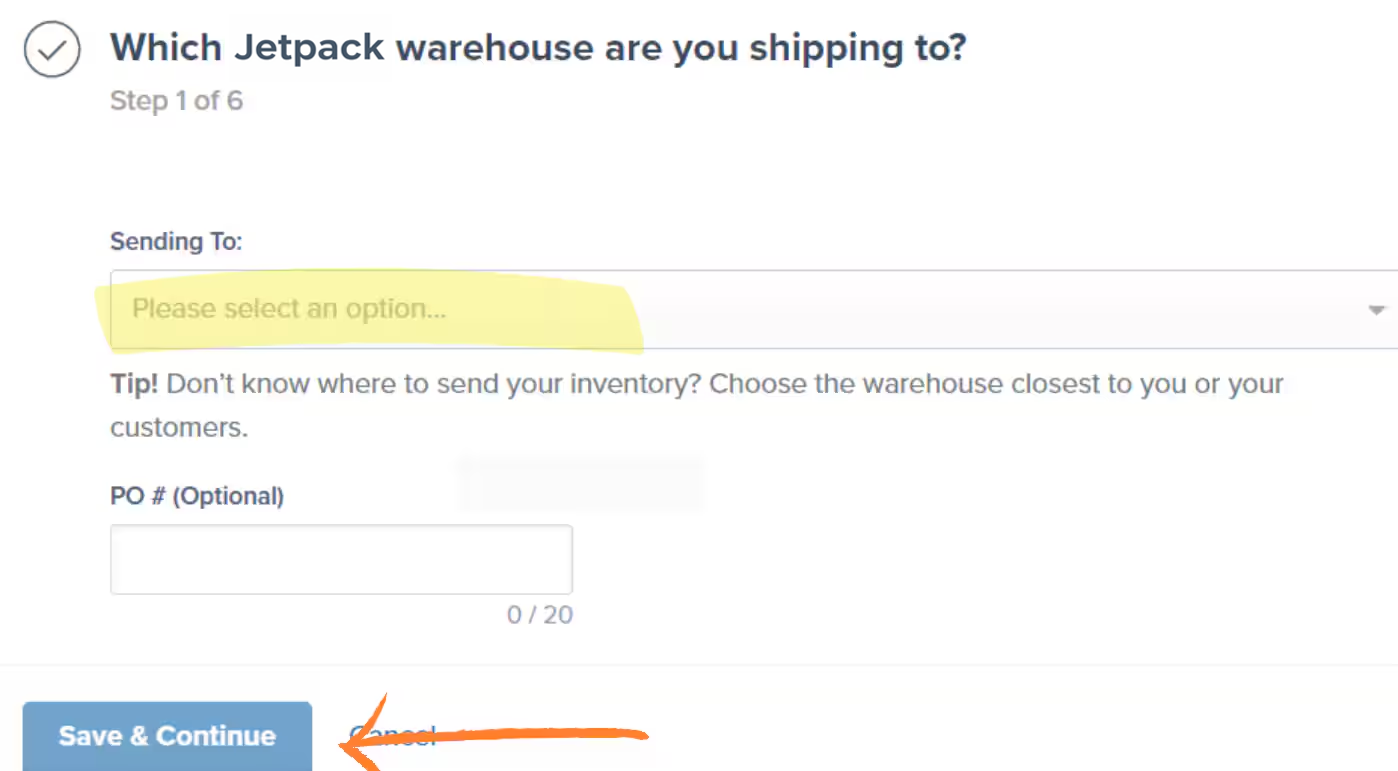
To send inventory:
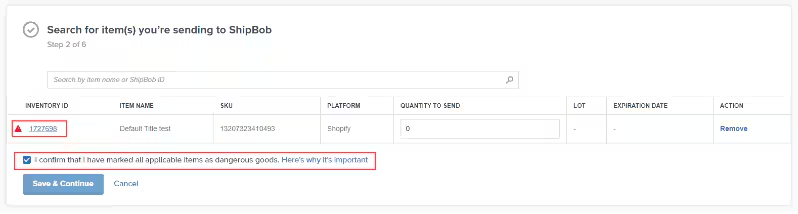
Select your destination Fulfillment Center (or Hero Hub if using MultiHub IQ).
Configure lot numbers and expiration dates if applicable.
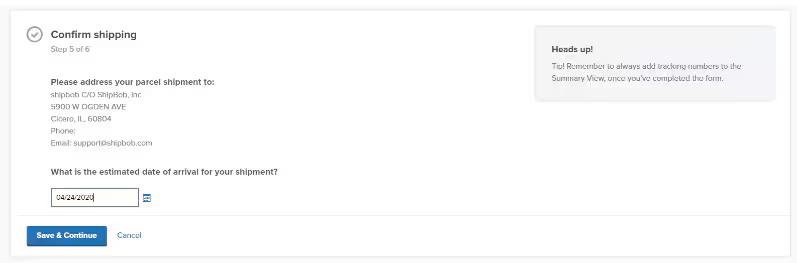
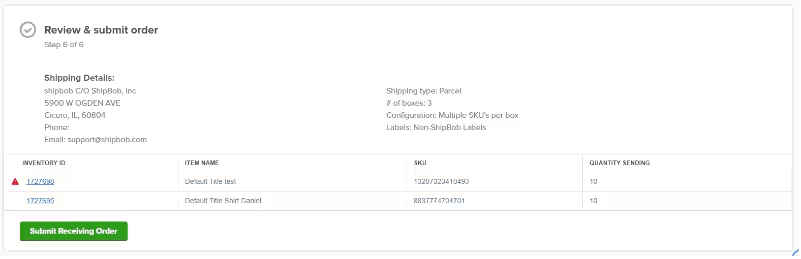
You will receive your WRO number upon submission.
Ship your inventory using your freight partner.
For complete instructions, see [Sending Us Your Inventory](/fulfillment/account-setup/sending-inventory).
### Kitting and Case-Packed Items
If you send products that require assembly or arrive in master cases:
* **Kitting** - Jetpack can assemble bundles, promotional packs, or subscription boxes. See [How Kitting Works](/fulfillment/kitting-and-work-orders).
* **Case Breakdowns** - Send master cases and Jetpack will break them into individual units. See [Case Breakdowns](/fulfillment/kitting-and-work-orders/case-breakdowns).
For merchants sending inventory to US Fulfillment Centers, ensure your products meet all eligibility requirements, including proper labeling, compliant packaging, and no prohibited items. See [Prohibited + Restricted Items](/fulfillment/goods-policies/prohibited-restricted-items) for details.
***
## Step 4: Import Your Orders
With inventory received and available, you're ready to start fulfilling orders. Jetpack offers multiple ways to get orders into the system.
### Automatic Order Syncing
The most common method is automatic syncing from your integrated store:
1. **New orders sync automatically** - When customers place orders, they flow into Jetpack within minutes
2. **Orders process based on rules** - Your automation rules determine carrier selection and shipping speed
3. **Tracking updates automatically** - Jetpack pushes tracking numbers back to your store
4. **Inventory decrements in real-time** - Your store inventory updates as orders ship
### Manual and Bulk Import Options
For B2B orders, wholesale orders, or orders from non-integrated channels:
| Import Method | When to Use | How It Works |
| ----------------------------- | --------------------------------------------------------------------------------------------------------------- | ------------------------------------------------------- |
| **Manual Sync** |
Orders from integrated stores that didn't auto-sync
Selective order importing
| Manually trigger sync for specific orders in dashboard |
| **Bulk Excel Import** |
B2B wholesale orders
Orders from non-integrated platforms
Large order batches
| Upload Excel file with order details (max limits apply) |
| **Individual Order Creation** |
One-off orders
Test orders
Custom B2B orders
| Create orders manually in dashboard (B2C, B2B, or FBA) |
For detailed instructions on all import methods, see [Importing Your Orders](/fulfillment/account-setup/importing-orders).
### Order Status Monitoring
After orders are imported, monitor their progress:
* **Processing** - Order is being picked and packed
* **Shipped** - Order has left the Fulfillment Center
* **Action Required** - Order needs attention (address issue, inventory shortage, etc.)
* **Completed** - Order delivered successfully
Learn more about [Order Status Overview](/fulfillment/d2c/order-status).
***
## Understanding MultiHub IQ (For Multi-Location Fulfillment)
If you use Jetpack's MultiHub IQ (MIQ) service, your inventory distribution works differently than standard single-FC fulfillment.
### How MultiHub IQ Works
MultiHub IQ uses a **Hero Hub** as your primary receiving location:
1. **You send all inventory to your Hero Hub** - One destination for all WROs
2. **MIQ distributes automatically** - Jetpack's algorithm allocates inventory across regional FCs
3. **Distribution based on demand** - Uses historical data and forecasting
4. **Reduces shipping costs** - Regional placement enables faster, cheaper shipping
5. **Rebalancing via Internal Transfer Orders** - MIQ moves inventory between FCs as needed
### MIQ Benefits
* **Faster delivery times** - Inventory positioned closer to customers
* **Lower shipping costs** - Shorter shipping zones reduce expenses
* **Simplified sending** - One destination for all WROs
* **Automatic optimization** - Algorithm handles distribution logic
To learn more about MultiHub IQ, see [What is Multi-Hub IQ?](/fulfillment/multi-hub-iq).
***
## US Fulfillment Checklist
For merchants shipping to US customers, here's a quick checklist to ensure smooth operations:
| Requirement | Status | Details |
| ----------------------------- | ---------- | ------------------------------------------------------------------------------------------------------------------------------------- |
| **Product Eligibility** | ☐ Complete |
No prohibited or restricted items
HAZMAT products properly declared
Battery-powered items disclosed
|
| **Business Requirements** | ☐ Complete |
Business entity registered
Tax documentation provided
Insurance coverage confirmed
|
| **Fulfillment Center Access** | ☐ Complete |
FC locations assigned
Receiving hours confirmed
Dock appointment requirements understood
|
| **Freight Partner** | ☐ Complete |
Freight forwarder selected
LTL carrier account set up
Shipping labels and WRO numbers prepared
|
| **Inventory Ready to Ship** | ☐ Complete |
Products properly labeled with barcodes
WROs created and submitted
Shipments scheduled with carrier
|
***
## Frequently Asked Questions
Most merchants complete onboarding in 1-2 weeks, including time for inventory to ship and be received. The setup steps (integration, product sync, WRO creation) typically take 4-6 hours of active work spread across a few days.
Yes! We recommend sending a small test shipment and creating test orders to verify your setup. This allows you to confirm product configuration, test order flow, and validate shipping settings before enabling automatic order syncing.
Jetpack Care can work with you on custom integration needs, specialized product handling, or unique fulfillment requirements. Contact your Jetpack Care team via Slack to discuss your specific situation.
No - you should connect your store and sync products first. This ensures products are properly configured before you create WROs. However, you don't need inventory received before importing orders; you can have orders in the system waiting for inventory to arrive.
***
## Let's Dive Deeper
Import and configure your product catalog
Create WROs and send inventory to Jetpack
All methods for getting orders into Jetpack
Connect and manage store integrations
Platform-specific setup guides
Configure automation rules and preferences
Questions? Contact Jetpack Care.
If you have any questions or run into issues, you can always contact Jetpack Care for help. Our team is always here to assist via Slack, phone, or email!